
The Team feature in Kata for WordPress enables you to showcase team members or credit individuals associated with a project. Whether you need to display employees, project contributors, or collaborators, the Team feature provides two methods for adding and managing team members. Follow the instructions below to make the most of this powerful feature.
Method 1: Using the Team Menu
Access the Team Feature:
You’ll be taken to the Team Members page, where you can view all existing team members or start adding new ones.
- In the WordPress dashboard, go to the left-side menu and select Team Member.
- You’ll be taken to the Team Members page, where you can view all existing team members or start adding new ones.
Add a New Team Member:
- Click Add Team Member to open the team member editor, which functions similarly to a blog post editor but is customized for team member information.
- Use the following fields to provide details for each team member:
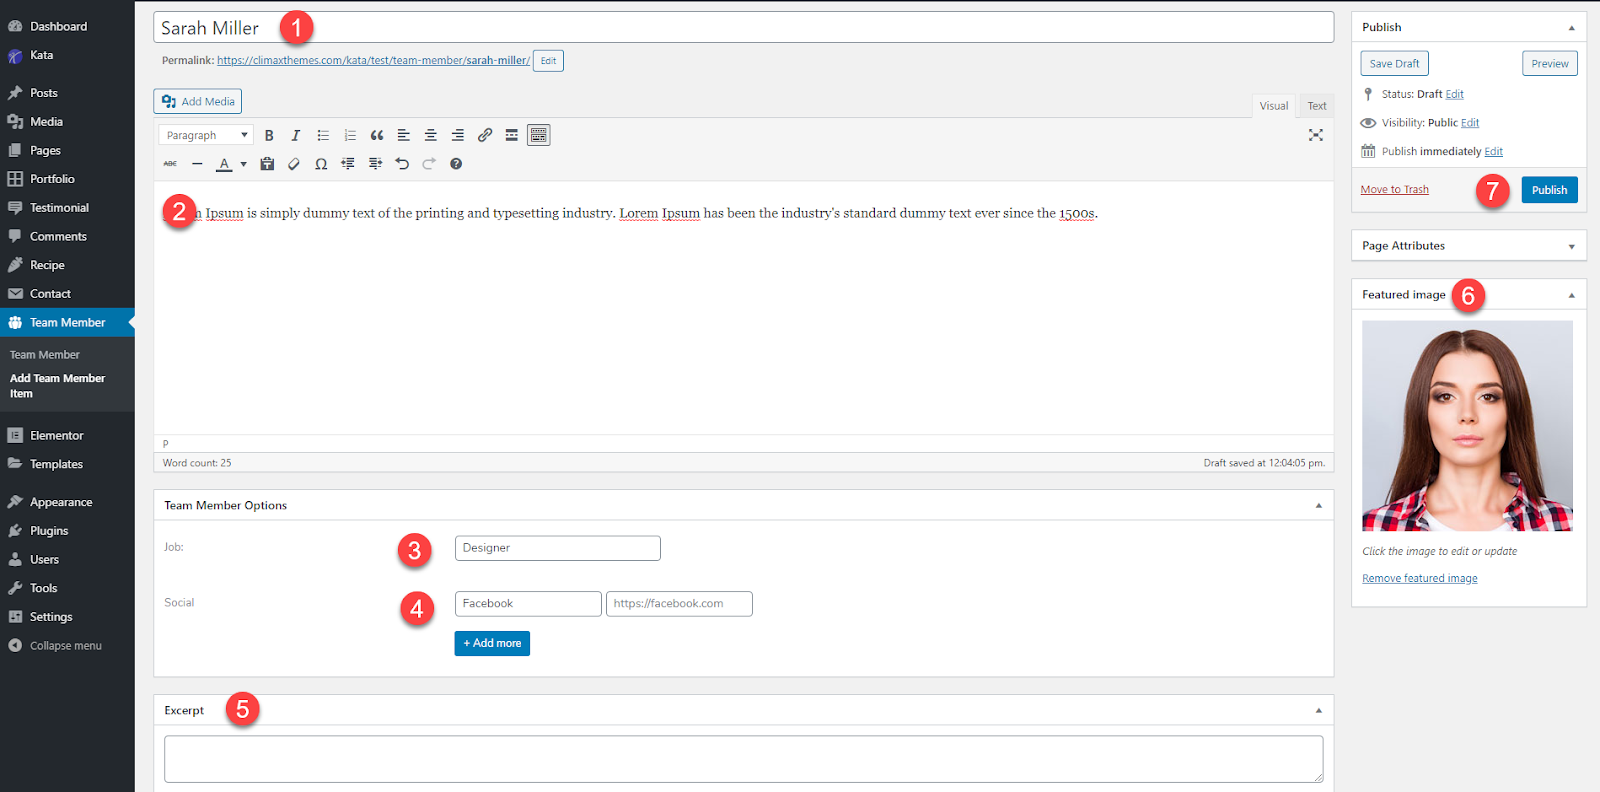
- Name: Enter the full name of the team member.
- Description: Provide a detailed description, such as background, experience, or specific contributions to the project.
- Position: Specify the team member’s position (e.g., Designer, Developer, Project Manager) and list any primary responsibilities.
- Social: Add links to the team member’s social media profiles (e.g., LinkedIn, Twitter, GitHub). You can include multiple profiles to provide a complete online presence.
- Excerpt: Optionally, add a short bio or summary, which can be displayed in certain layouts.
- Profile Picture: Upload a profile picture. Choose a high-quality image to give your team page a polished and professional look.
- Publish: When all details are complete, click Publish to save and publish the team member profile.
Display Team Members on a Page:
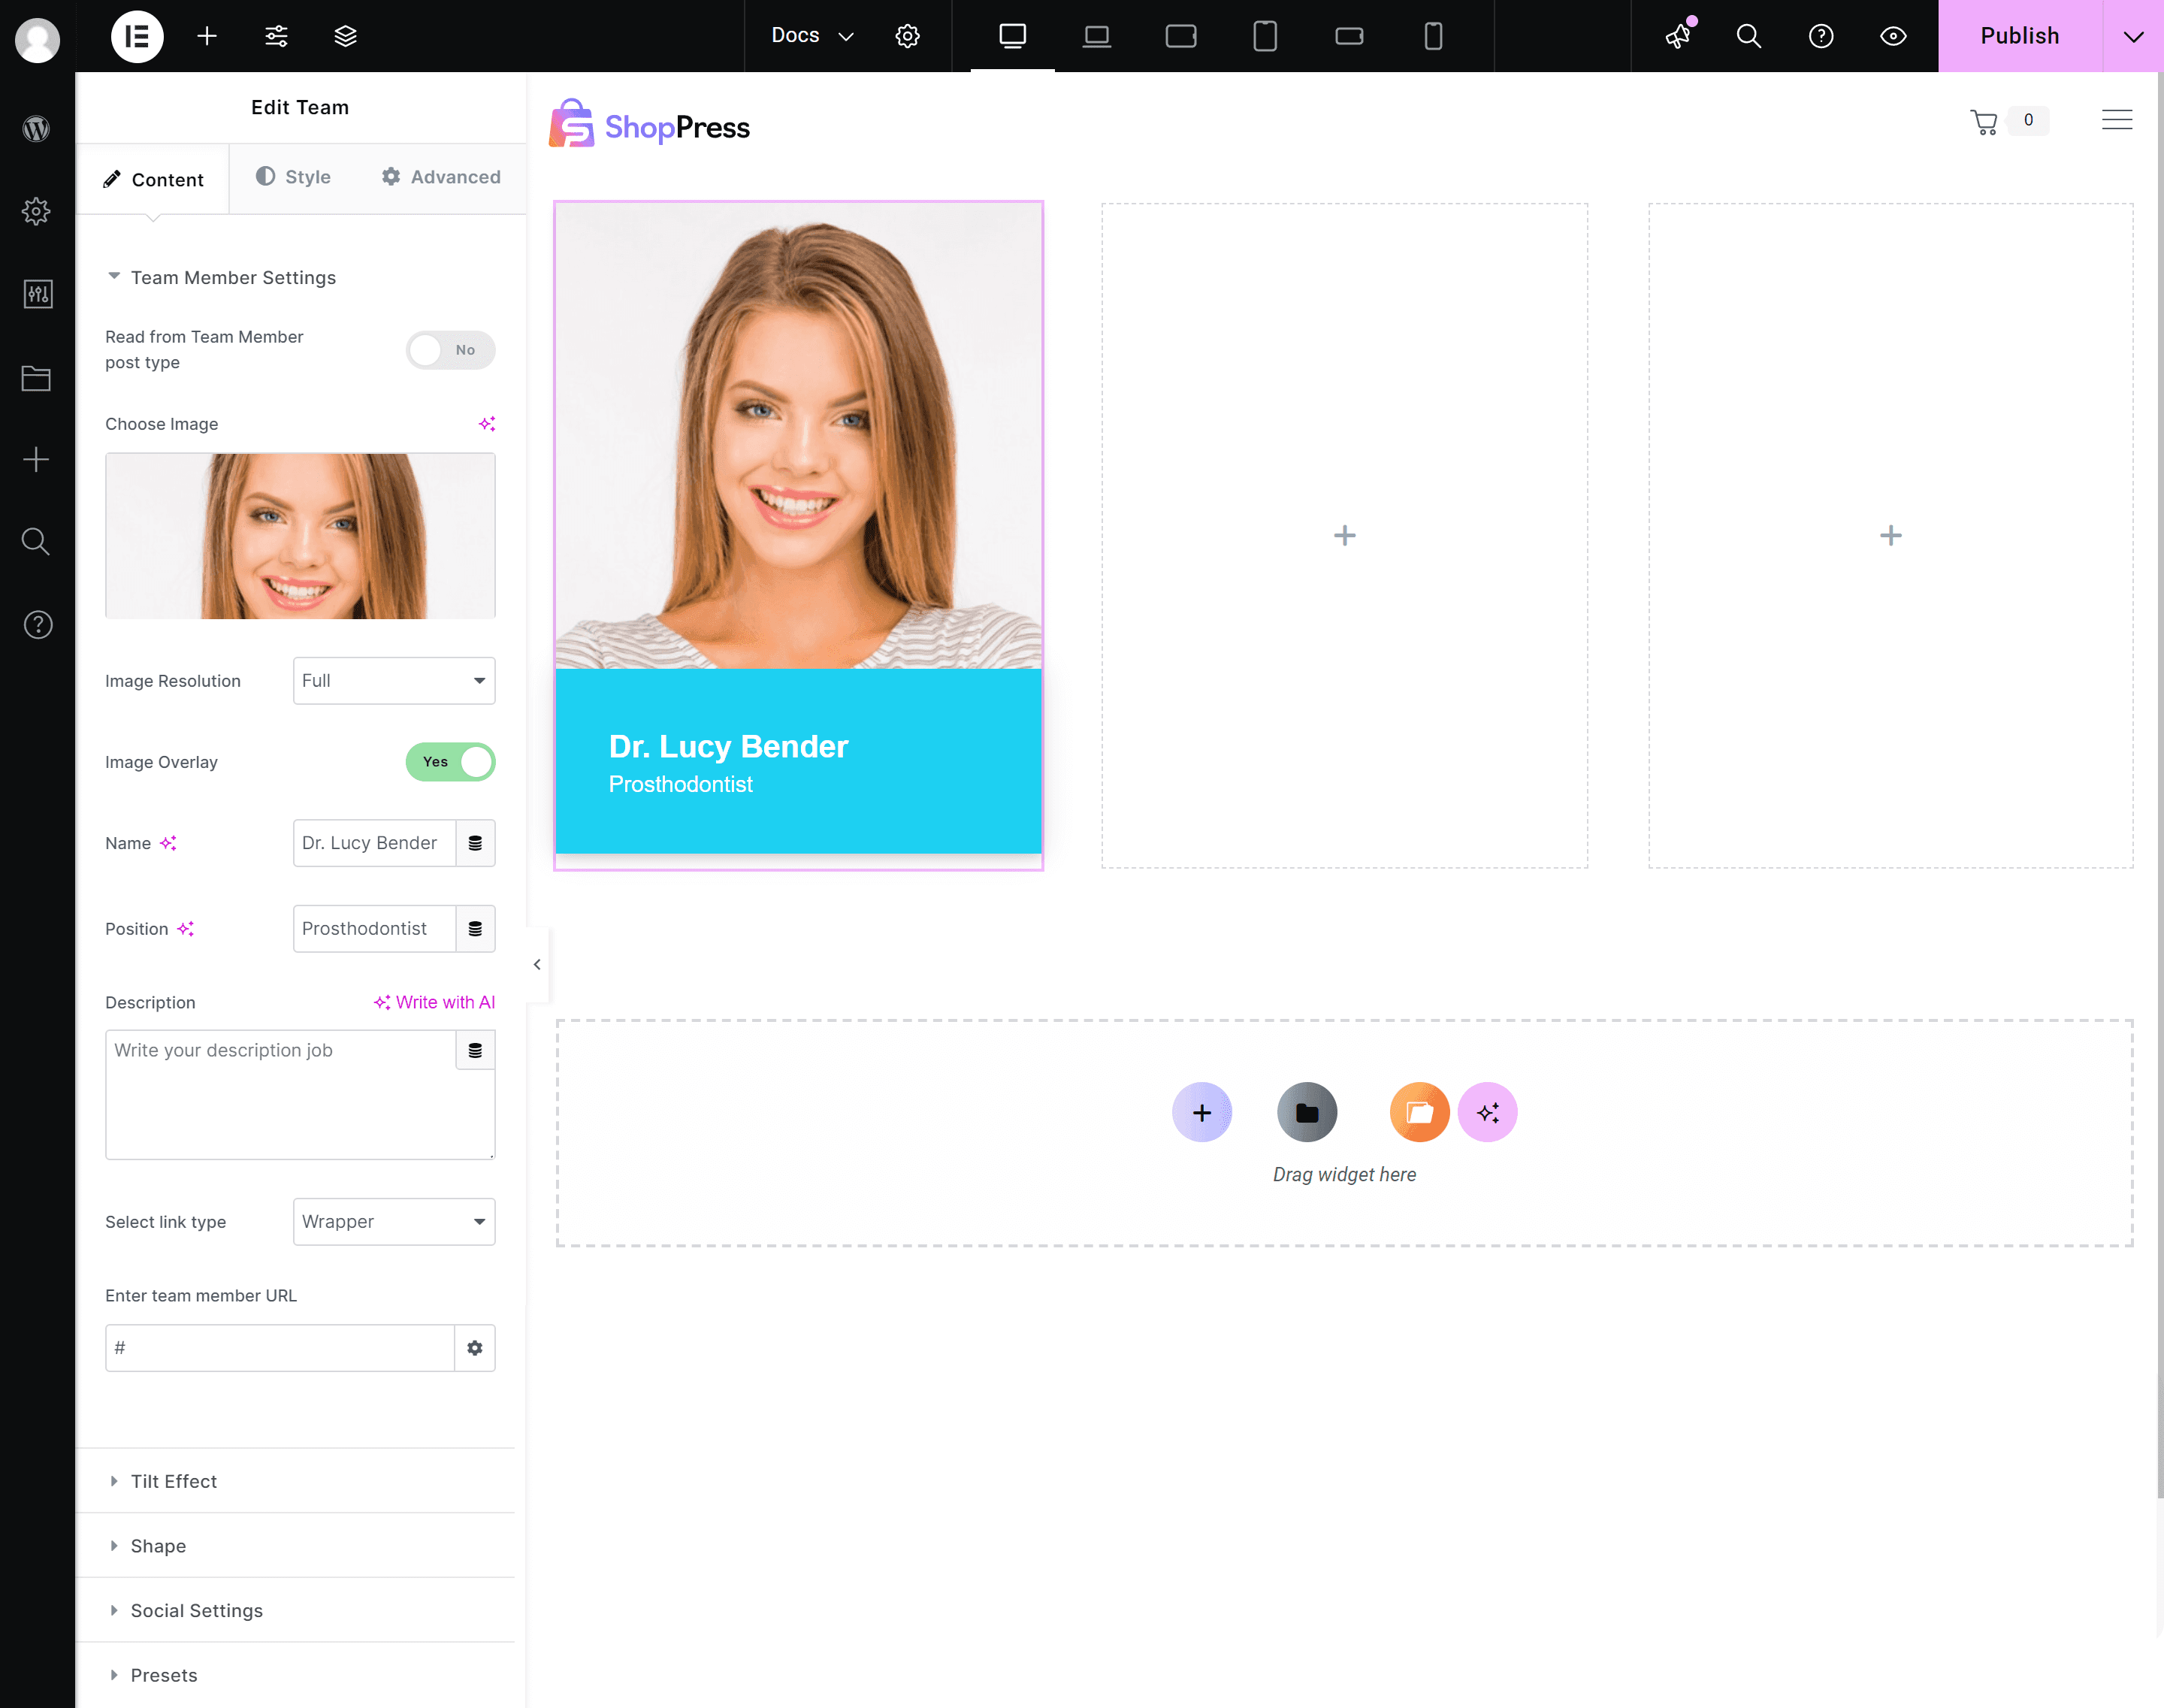
After adding team members, go to the editing page where you want to display them Search for the Team Widget and add it to your page layout.

Note: To ensure the Team widget displays your team members, make sure the Post Type option “Read from Team Member Post Type” is enabled in the widget settings.
In the Team Member Settings tab, you have several options to customize how team members are displayed:

- Image Overlay: Add an overlay effect to profile images to enhance visual appeal or improve readability when hovering.
- Select link Type: Set the type of link for each element.
- Tilt Effect: Enable a tilt effect for a dynamic, 3D-like look when hovering over the team member’s card.
- Shape: Add shapes to the layout for visual interest, such as circles, rounded edges, or other design elements.
- Presets: Choose from predefined design presets to quickly style the team section.
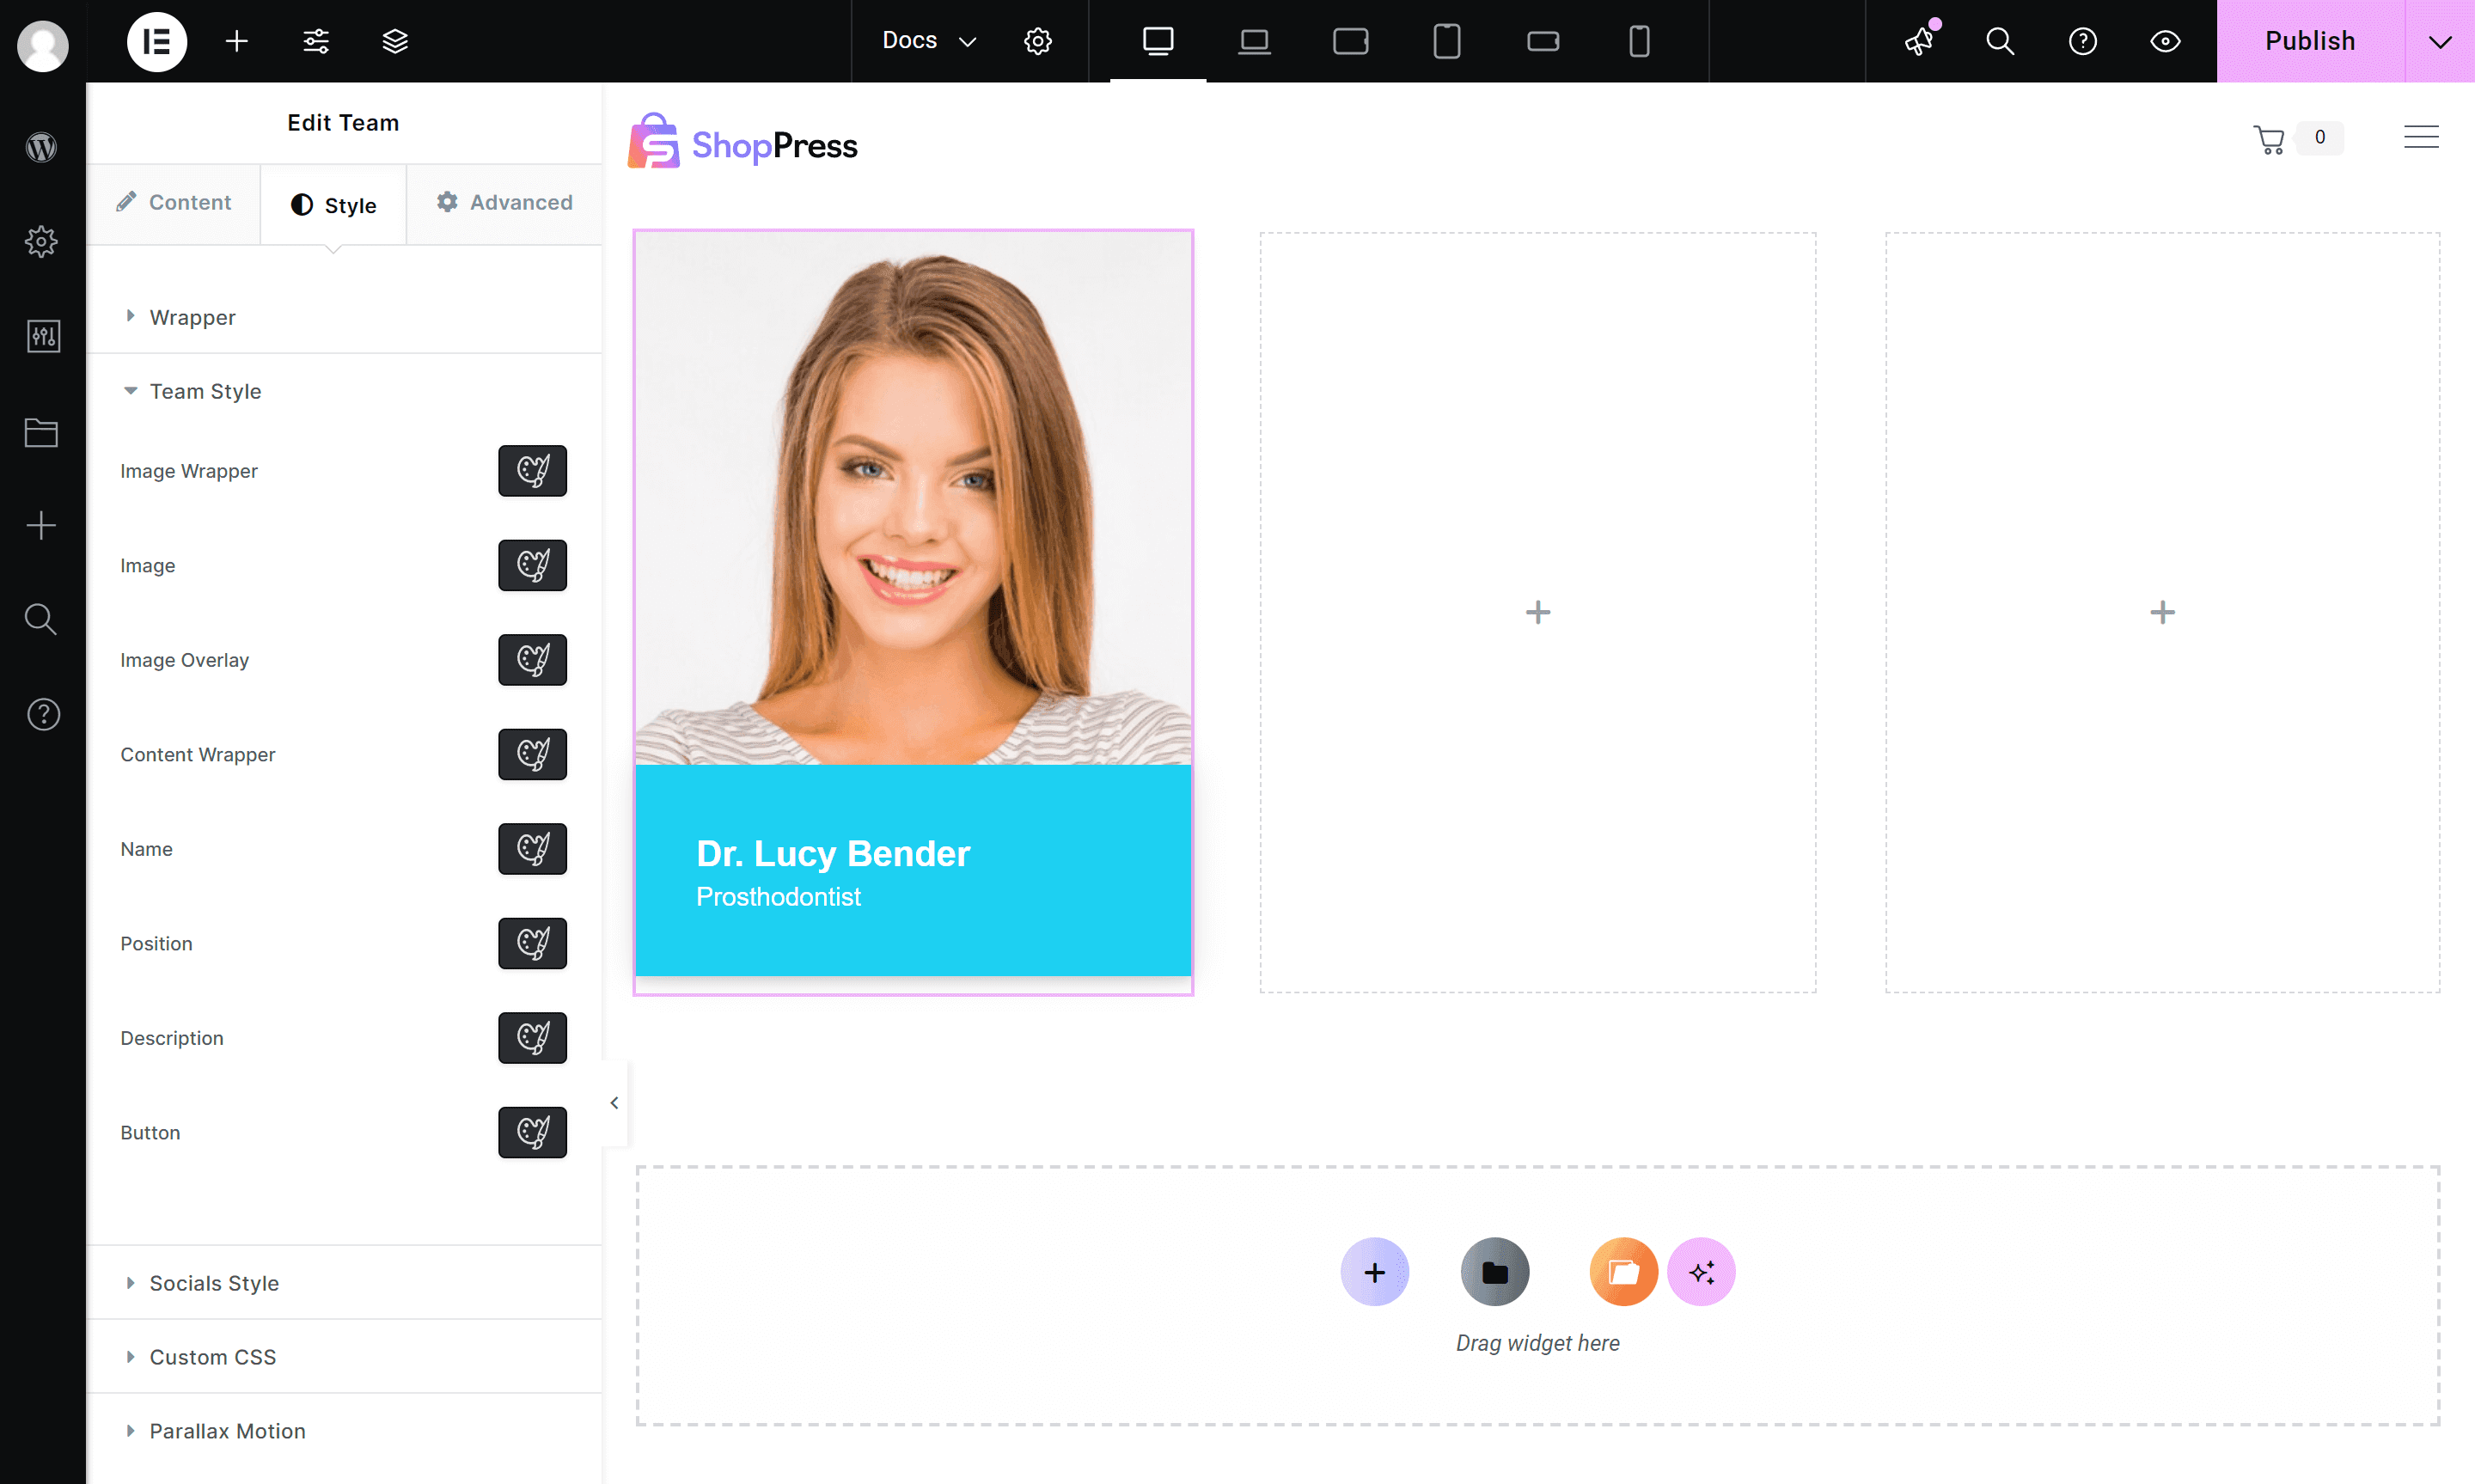
In the Style tab, you can further refine the appearance of the Team section by adjusting the font, color, spacing, and alignment of elements like the name, role, social links, and more.
Method 2: Creating Team Members from the Backend
This method allows you to create and manage team members directly from the backend without using the Team menu.
Access the Backend Settings:
Go to Team in the backend to start creating team members.
Note: For this method, make sure the Post Type option “Read from Team Member Post Type” is turned off when using the Team widget.
Enter Team Member Details in the Backend:
Use the following fields to enter details for each team member:
- Profile Picture: Upload a high-resolution image of the team member. Ensure that the resolution is set appropriately to display well on both desktop and mobile.
- Image Resolution: Set the image resolution to control file size and load speed, balancing quality and performance.
- Image Overlay: Add an overlay effect to the image, such as a color tint or gradient, for a modern look.
- Name: Enter the team member’s full name, which will display prominently.
- Position: Specify the team member’s Position or title, like “Lead Developer” or “Marketing Manager.”
- Description: Write a detailed bio or description to highlight the team member’s expertise and role in the project.
- Select Link Type: Set a link type for elements in the Team section.
- Tilt Effect: Enable or customize the tilt effect for a unique visual experience when hovering.
- Shape: Add shapes to the design to create a distinctive layout.
- Social Settings: You can include multiple links to showcase various platforms.
- Presets: Choose from predefined design presets to quickly style the team section.
Style Customization:
As with Method 1, go to the Style tab to modify the design and layout of the Team feature. Adjust colors, fonts, spacing, and other style options to achieve a cohesive look that matches your site’s design.
By using either of these methods, you can easily add and customize team members on your site, fully tailoring the display and style to suit your preferences. The Team feature in Kata provides a professional, flexible way to showcase the people behind your projects, with options to meet any design requirement.
