The Kata theme gives you powerful options to customize nearly every part of your website. You can easily create a unique blog page from the ground up and design it using Elementor. To help with your design, we’ve also included a wide range of Elementor widgets to make your project even better.
How to Customize a Blog Page
Navigate to Blog Settings
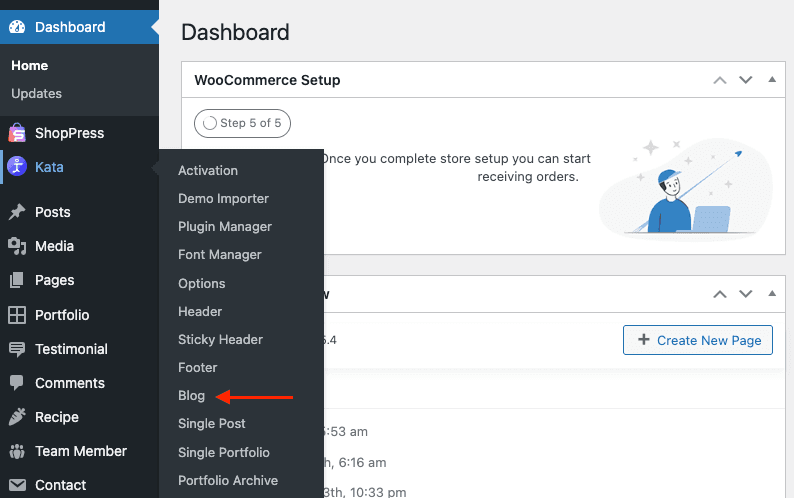
Begin by opening the Kata Panel from your WordPress dashboard. Navigate to the Blog section, where you’ll see a list of available blog templates. These templates serve as starting points, giving you flexibility to customize or build a unique blog page.

Edit with Elementor
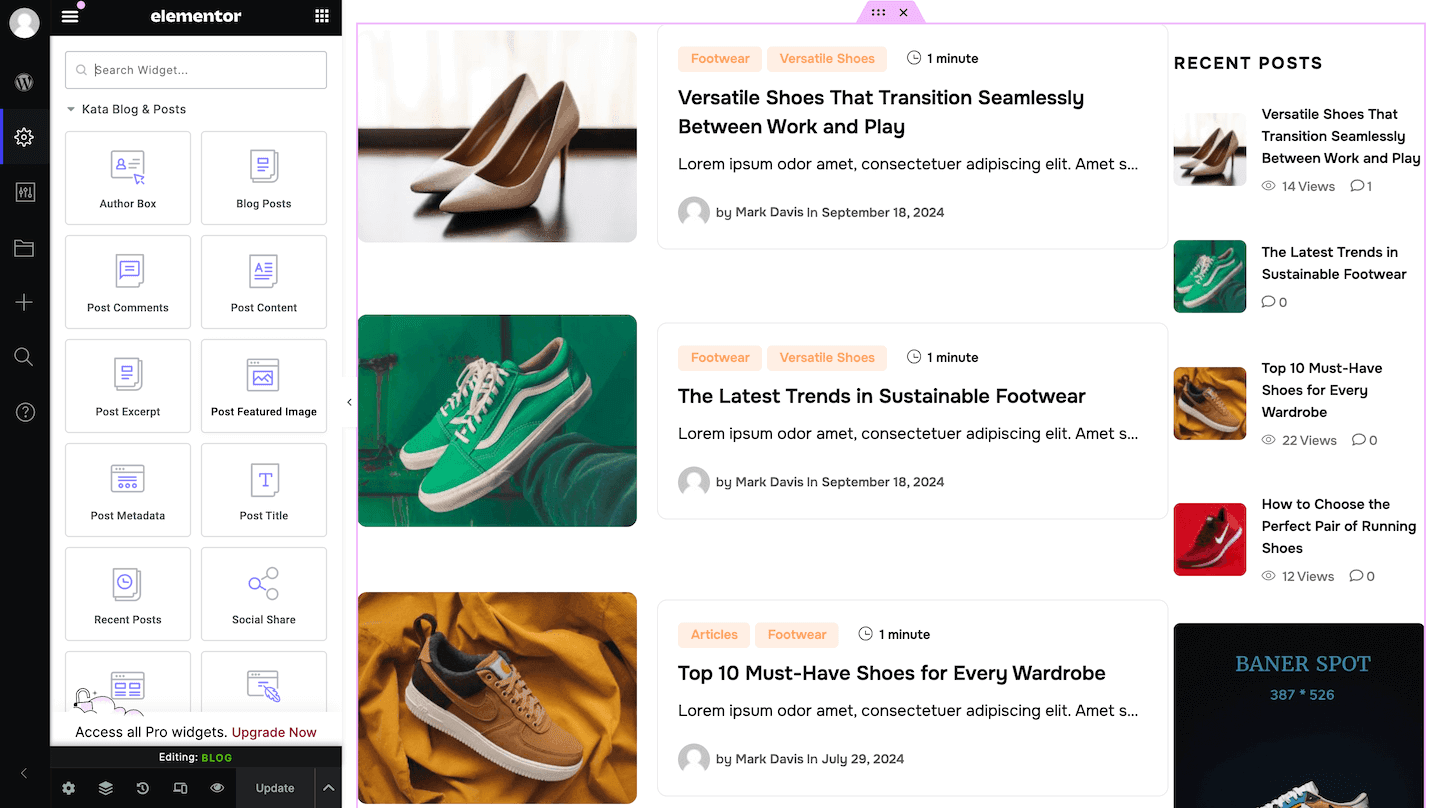
Locate your desired blog template and click Edit with Elementor to open it in the Elementor page builder. This will bring you to the Kata Blog Elementor editing page, where you can fully control the layout and style of your blog page.

Utilize Kata Widgets
On the Elementor editing page, you’ll find a range of widgets specifically designed for creating and customizing a blog page. These widgets allow you to build each element of your page from scratch or enhance an existing template.

These include:
- Kata Archive Posts
- Kata Author Box
- Kata Author Page
- Kata Blog Posts
- Kata Categories List
- Kata Next & Previous Post
- Kata Post Comments
- Kata Post Content
- Kata Post Featured Image
- Kata Post Metadata
- Kata Post Title
- Kata Related Posts
- Kata Search Page
- Kata Social Share
Customizing with Styler
Drag and drop any widget to your preferred location on the blog page. This lets you arrange elements exactly how you want them for a custom look. You can style each widget individually or apply cohesive styling across the page to match your brand.

Use Styler for Advanced Customization
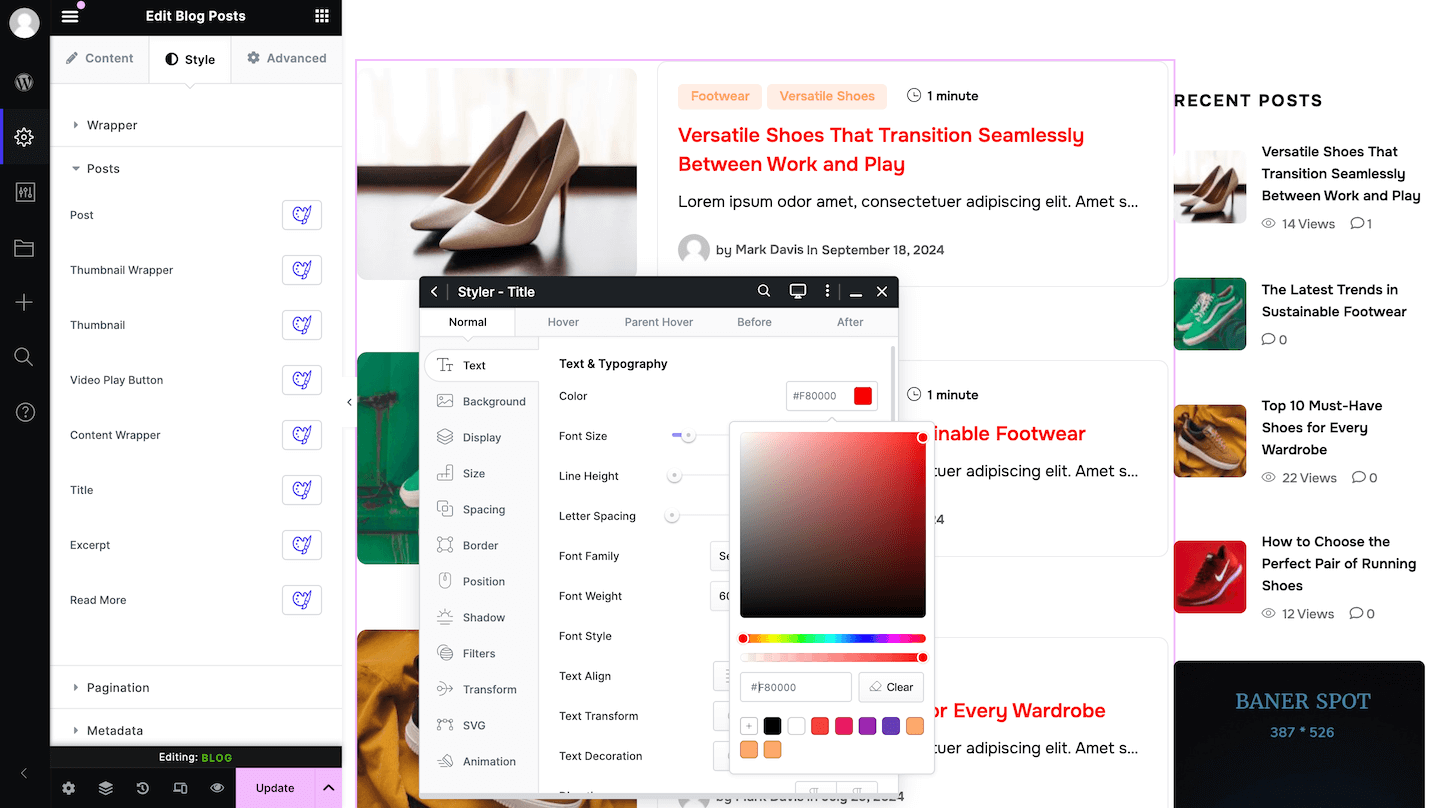
To further personalize the appearance of each element, utilize Styler—Kata’s powerful design tool. With Styler, you can adjust colors, fonts, spacing, and other visual details, giving you complete control over the look of your blog page.

