Many people around the world start their own blog every day for various activities, either to make money from it or not. Not a long time ago, doing so required in-depth knowledge of programming to write so many lines of necessary codes that run a website.
WordPress has simplified this task by allowing everyone to create a WordPress blog in less than half an hour and without much effort.
Starting a WordPress blog is surprisingly simple, but knowing where to start and what steps to take can save you considerable time and effort.
No matter how old you are or how much technical knowledge you have, a simplified step-by-step guide can pave the way towards launching a beautiful blog for you.
That’s why we have prepared this tutorial. In the next paragraphs, you will find useful and beginner-level instructions on how to launch your WordPress blog fast and conveniently.
What You Need to Create a WordPress Blog
The necessary steps you need to take to create a WordPress blog can be generally categorized as below:
- Hosting: Choosing a web hosting service provider
- Planning: Selecting a plan that matches your needs
- Domain: Picking a domain
- WordPress: Installing WordPress
- Blogging: Publishing your posts
While these are not technical and complicated activities, the whole process will be discussed in detail.
Don’t forget that here we talk about using WordPress.org, not WordPress.com.
It is entirely free, customizable, and you can freely monetize your blog in the future without having to show irrelevant ads and facing other limitations.
The WordPress CMS is increasingly becoming popular all over the globe, and it might be interesting to know that more than 30% of all websites now run using this platform.
Therefore, aside from choosing a hosting service and domain, there is no doubt in using the WordPress CMS to create a blog.

1. Web Hosting and Domain
The very first things you need to make your blog posts appear to people are the hosting service and domain name.
Your hosting service is where you store your content, and it powers your site.
Hence, it is a must for every single website, let it be a multi-national online eCommerce platform or a single personal blog.
Your domain, on the other hand, is the address by which people find your content.
Different aspects are taken into consideration prior to choosing a proper name. Some come up with innovative ones; some use a meaningful phrase; others prefer to include a general keyword in their domain, and so on.
Whatever criteria you follow, you should check for its availability and know whether others have already used it or not.
You can buy your web hosting and domain from a single service provider or separate ones.
We don’t want to take a deep dive into the complicated details right now, but due to the global popularity of WordPress, most hosting companies offer special plans for WordPress.
What matters most in choosing a hosting service are two main factors; uptime and loading speed.
So before selecting a hosting company, check for these qualities. Most popular companies around the world can bring high-speed and reliable services you can trust for any kind of website.
Bluehost, DreamHost, and SiteGround are among the top three choices that are officially recommended by WordPress.org as well.
Many companies offer low-cost packages that give you a free domain upon purchasing their products, too.
The WordPress-based plans are generally equipped with easy-to-use interfaces to install and use WordPress in few simple clicks.
Some have even taken one step higher and provided special site builder tools to make website building easier for beginners.
For instance, you can check the details and advantages of Bluehost WordPress packages to see what you receive for the reasonable price you pay.
2. Setting up WordPress
As mentioned above, some hosting companies offer simplified WordPress installations that let you run this CMS instantly with few mouse clicks.
The setup interface for every service provider is different from the other companies.
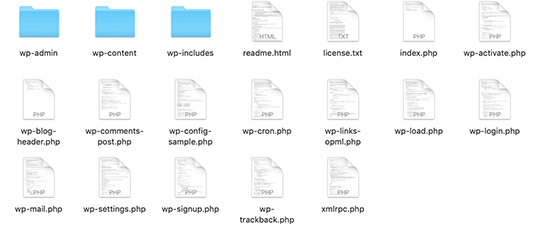
In the manual approach, you have to install WordPress using FTP. When you download the WordPress package, you get a ZIP file that shows a folder named “WordPress” after unzipping.
This folder includes all the necessary files and folders to be uploaded on the webserver:
Upload all of them to your website server. The root directory is often located on this path: /public_html/.
Now it’s time to create a database for your site.
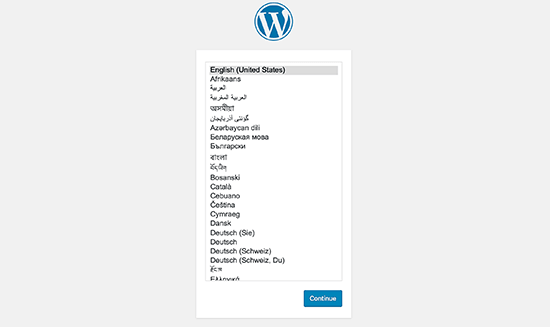
After finishing the process, enter your website address in the browser to see the following window:
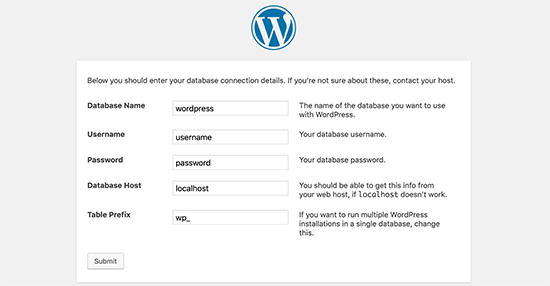
By proceeding to the next level, WordPress asks you for details about the database. Enter the exact information in the required fields and click Submit:
After establishing a successful connection, the following window appears:
Now it asks you about the details of your website.
You should define the title of your site, the admin’s username, password, and email:
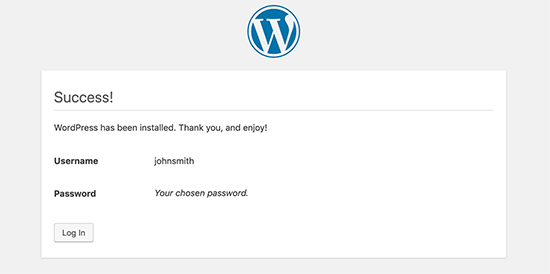
Next, you see a “Success!” window from which you can log in to your account:
Next time you want to make changes from the admin panel, all you need to do is typing “www.yoursite.com/wp-admin/” into the search bar of the browser.
You will then be able to sign in by entering your username and password as created before.
3. Choosing a Theme
The way your web pages, menus, navigations, and colors appear is controlled by the theme you install on the site.
The WordPress package comes equipped with a few default themes which many users don’t find appealing enough.
You can select from thousands of free and premium themes and opt for the one that best matches your activities, brand, and content.
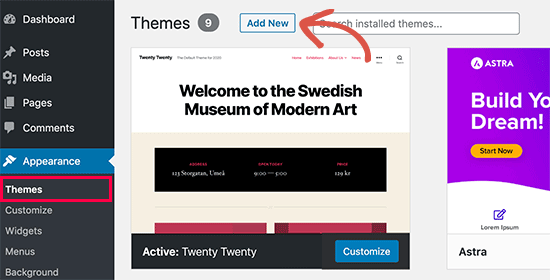
Adding a new theme is possible by heading over to the Themes section under the Appearance menu in your admin panel:
You now see a list of different themes. You can choose from them or search for a specific product.
The list gets filtered by various categories such as the date, layout, industry, and so on.
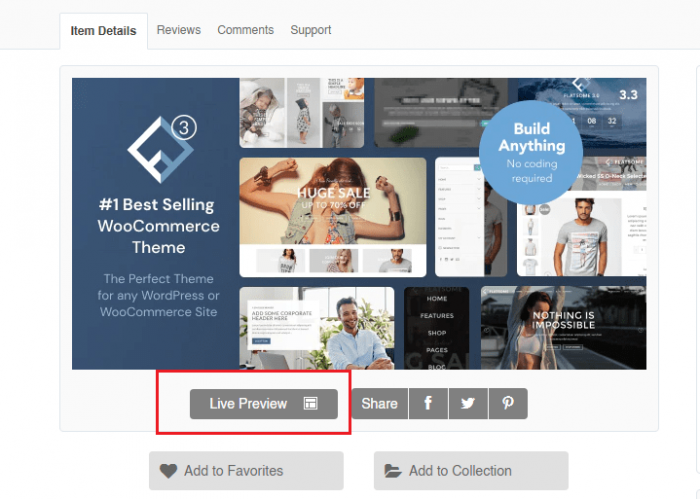
Under each item, there is a Preview button that allows you to put it into the test before installation.
Although the preview should not necessarily look like the shared screenshots, you can quickly check the fonts, general design, and other visual elements.
On the other hand, you can download the product from the official website and manually upload it on your site from your computer:
After making up your mind about the product that suits you, install, and then activate it.
Now you can make use of all the features and customization capabilities of that product on your site.
Generally, a premium theme allows you to customize everything to a greater extent compared to the free ones.
If you want to create a WordPress blog using a premium theme, we recommend a modern and stylish product called Kata.
Read on to get more information about the fantastic features of this professional WordPress theme:

The Ground-breaking Kata Theme
Kata is a highly advanced WordPress theme intended to allow users to create whatever website they can imagine without much effort.
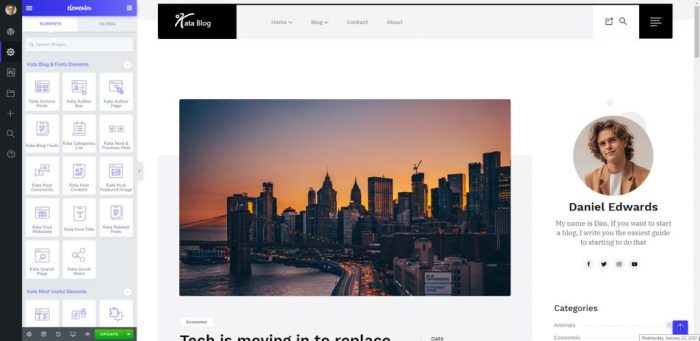
The functionality of Kata is based on Elementor, the most renowned WordPress page builder that lets people personalize the smallest details on pages.
Using the Elementor plugin equals fully-customized pages, headers, footers, and content.
The live preview capability of this tool provides you with a simple drag-and-drop editor to see the final outcome of your changes while you are making them. Aside from these great options, you are not just limited to them since Kata has added even better items to these capabilities.
The innovate Styler tool is an excellent asset of Kata, allowing you to change color, backgrounds, fonts, etc. all in one place.
You might have heard about the importance of CSS files in designing a website, which requires a good knowledge of coding to personalize everything as per your preferences.
But this is not the case with Kata. This Styler tool can be considered as a CSS code changer by a drag-and-drop interface instead of writing long lines of codes. The same conditions apply for header and footer building as well.
The customization tools are not only limited to elements since you can apply whatever font you wish on your site using Kata.
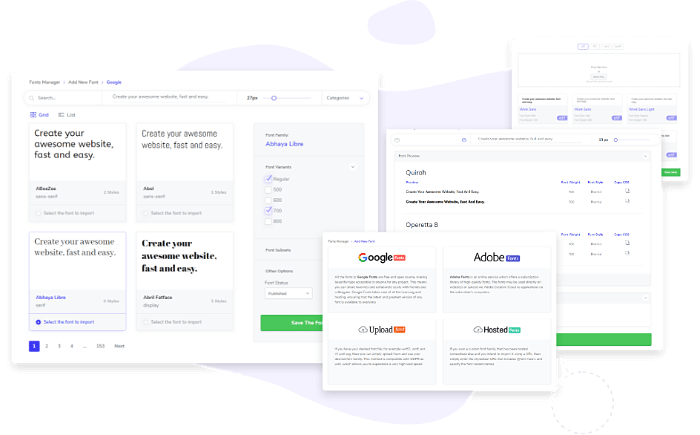
It has the most advanced font manager among WordPress themes that consist of four sections: Google Fonts, Adobe Fonts, Hosted Fonts, and Upload Fonts.
So no matter what font you need and where it is located, there is no limit for you.
The Blog Builder tool is another excellent tool of Kata, providing users with easy-to-use controls for styling the appearance of a blog most conveniently.
Watch the following video that shows you the way you can make use of it on your site:
Kata comes with a default demo importer to use the published demos in a matter of few seconds. There are multiple unique and advanced demos available for this product that give you real content and design based on your main activity.
To create a WordPress blog, you can choose from the exclusive demos in this regard named Personal Blog, Fashion Blog, Minimal Blog, and Portfolio. These demos are developed in a way that makes them available to use with the smallest modifications.
The necessity of responsive design is no longer hidden to anyone.
By using Kata, you will not be limited to the typical three sizes of responsive controls since there are three added displays to control the content of a website.
4. Creating a Blog Post for the First Time
Now that you know the essential steps of launching a WordPress website and found out about the perfect Kata theme let’s get down to creating a blog post on WordPress.
First off, click Posts > Add New from the dashboard.
A new editor window appears that lets you write the content of your post. By default, WordPress uses an editor that is based on blocks.
It means that the final result of content is created by adding different blocks that consist of text, pictures, and other elements.
You can easily add the content you want by clicking on the blocks. On the right side, you can select categories and tags to make your posts more organized.
Once you’re done, click Preview on the right top side of the page, see the final result, and then click Publish.
For Elementor-based themes, like Kata, an additional button appears that takes you to the exclusive interface of this plugin to create a blog post.
Unlike the previous editor, there are no block-based designs for this purpose.
You can quickly drag whatever you need from the left panel and drop it on the right side.
Since all the changes take place live, you can observe the final page layout simultaneously without having to click the Preview button.
The competition is now very high on the internet among bloggers in every niche.
We recommend keeping SEO in mind from the very beginning of your blogging adventure.
Thanks to the useful WordPress SEO plugins, there is no need to master a vast knowledge in this regard.
Among the available products, RankMath is an elegant free WordPress theme that allows you to optimize every single one of your pages with a user-friendly interface.
Compared to other famous tools such as Yoast SEO, RankMath gives you more customization options in the free version.
So without spending money, you can enhance your pages’ visibility on SERPs without much effort and time.
Wrapping Up
Many beginner-level users who don’t know programming decide to create a WordPress blog for their specific needs every day.
Here we went through a step-by-step tutorial to show the way you can start your website and write the first post on it.
This is the basic procedure for blogging, and you can make everything more personalized using other practical WordPress plugins.
Start your own blog today, update it consistently, and enjoy the positive results you see over time.


