We don't think there could be anyone not familiar with Elementor, the best WordPress page builder with more than 5 million installations. If you're new to this fascinating page builder, or you just want to sharpen your tools, read this Elementor tutorial to the bottom.
Not a long time ago, creating website pages could give people so much hassle and take them a lot of time for even the most straightforward changes to be applied.
A team of experts with various skills and excellent collaboration between them was vital to reach the expected results.
But luckily, a change of scene happened, and things have significantly changed for the better.
How to Use Elementor in WordPress 2020 Tutorial
Thanks to the great features provided by WordPress CMS, users can now build amazing websites without knowledge of coding.
Among these capabilities, page builders assist website owners to create whatever site they want in a simple and time-saving approach.
Here we have got down to reviewing the Elementor plugin or a guide of Elementor for beginners, which is the best WordPress page builder bringing tons of features for designing website pages.
In the next paragraphs, you will find out about the way this tool can help you turn your ideas into a remarkable website on your own:
What is Elementor?
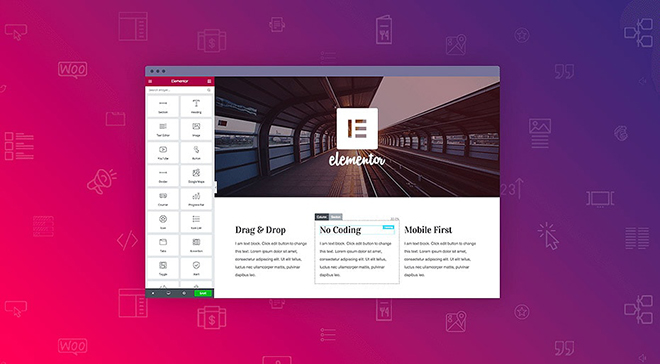
Elementor is an easy-to-use drag-and-drop WordPress page builder that is focused on the quick creation of website elements with varying designs.
This plugin helps to create a WordPress blog alongside headers, footers, and other parts on your site in a friendly platform.
You can add different colors, backgrounds, and motion effects to your elements so that they match your brand and style efficiently.
What Can You Do With Elementor?
Your team can get the best of both worlds by using the Elementor plugin. Whether you are a beginner user or a high-level programmer, you can benefit from the flexibility and capabilities of this tool to create stylish pages and widgets.
For instance, if you need promotional or landing pages for your products, everything is ready to start from scratch or by using pre-made templates.
Custom forms are also available to use between the text lines, on the header, or the sidebar, and you can customize each of these parts based on your preferences.
Another perfect time-saving capability in this plugin is the global widgets by which you can make changes on multiple widgets on the site all at the same time.
In simple words, you can build everything by any stretch of the imagination without specific knowledge of programming and coding.
It can easily compete with other costly page builders around. This all-in-one tool allows you to remove many other plugins, such as pop-ups so that your WordPress website runs more smoothly with faster loading speed.
Aside from the editing features, Elementor is a great asset to be synchronized with your marketing and eCommerce tools like Mailchimp or Drip. Reading this Elementor for Beginners guide will help you understand the most important concepts.
Should You Install Elementor?
If you are quite serious about creating a WordPress blog that thrives over time, you absolutely need this fantastic plugin.
Consider that you decide to change your eCommerce platform after a while and shift your data to another tool.
Starting everything all over again is the last thing you ever want in this case! So if you're going to make a proper long-term decision, it is the most appropriate option on the market.
Even if you feel like changing the WordPress theme at any time, you will have no concerns since it is compatible with all themes.
As long as you use standard WordPress themes, there is nothing to worry about since Elementor is well-suited with all.
Free Version or Pro?
First of all, you should clearly define your expectation from a page builder tool. Above two-thirds of the Elementor features are available to use in the free version.
But if you need a premium license for one personal site, no more than $49 per year will be required to pay. After all, compared to the whole package of features it entails, Elementor really costs next to nothing!
To get a better idea about the prices, you should know that the yearly license of Elementor is far less than the amount you would have to pay for other tools such as Instapage or Leadpages.
Overall, we suggest to start with the free version and then upgrade to a Pro license if the free features wouldn't meet your needs.
Now that you know it is the best page builder plugin to create a WordPress blog, let's have a look at this Elementor tutorial and dive into quick instruction about installing and using it:
Elementor Tutorial for Beginners: How to Use it?
First things first, let's start by installing the plugin on your WordPress website:
- Installing Elementor
Elementor can be installed on a WordPress site as quickly as other plugins. However, you should be aware that the Pro version is not the same plugin as the free version, and it will need to be installed separately.
You can head over to Elementor.com and download the plugin directly to your computer. The below window appears that requires you to enter an email address.
Once the download finishes, go to your site's dashboard and click Plugins > Add New. Upload the downloaded zip file and activate it.
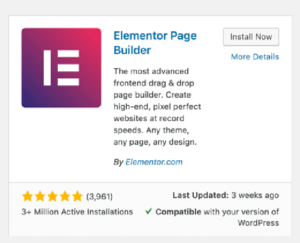
Otherwise, you can install it directly from the WordPress panel by searching for Elementor and selecting the Elementor Page Builder plugin that appears as below:
Click Install Now and then activate it.
- Using Elementor
Now that you have successfully installed and run Elementor on your site, you will see a new option that appears in different parts of your website.
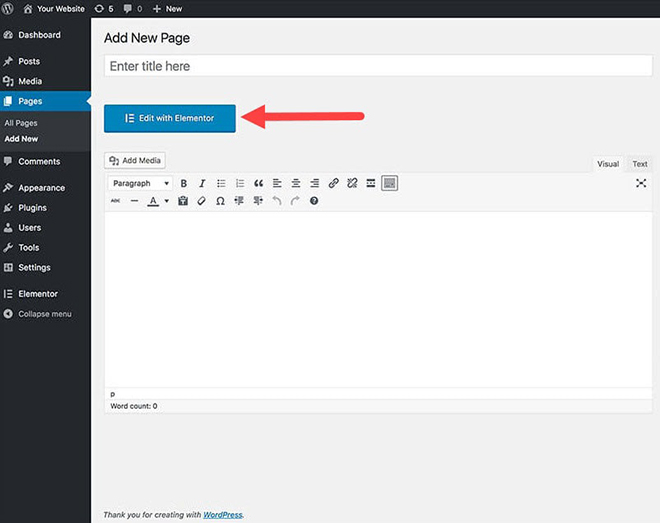
The best way to use this plugin is by clicking the Edit with Elementor button that displays on the page when you want to add a new post:
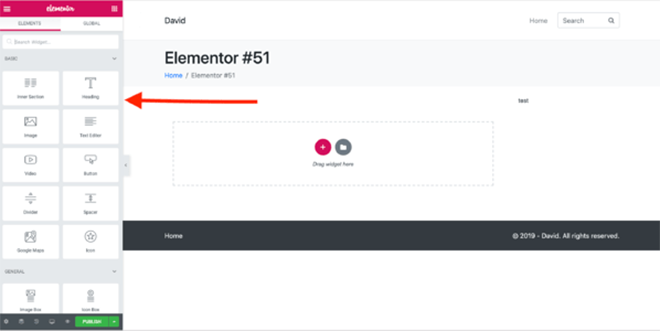
Doing so will activate the plugin's panel that brings a series of different options and settings. The drag-and-drop features appear on the left, and you can see the live preview of the page you are building on the right side.
You can search for all the basic or advanced elements and add them to your page fast and conveniently:
- Making Adjustments in Elementor
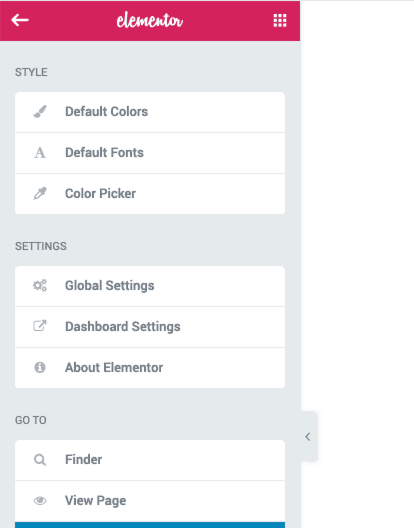
The STYLE and SETTINGS menu is the place to define the fonts or colors to be used as the default option on your pages. Additionally, you can set global settings for all of your sites from here:
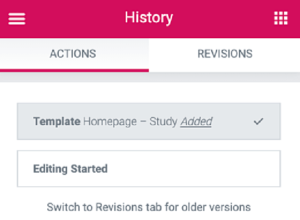
Just like many other tools and applications, Elementor is equipped with a section for tracing your actions and making revisions where necessary.
Under the ACTIONS tab, you can switch between the steps and the changes you have made. The REVISIONS tab on the other side is meant to switch between revisions and get back to the one you prefer most:
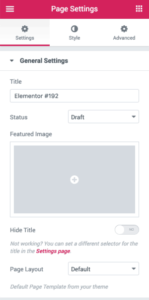
The Page Settings tab is where you can make customizations in the entire page's style and update other sections, such as titles, thumbnails, and page layouts.
Don't forget that you should choose Elementor Full-width or Elementor Canvas in case you need full-width pages.
Else, adding elements into existing posts or the regular area of content is done through the default option.
Also, you should know that changing the layouts only leaves an effect on the posts and full pages.
Although the menu also appears when building widgets, nothing will be changed if you use it.
If you are willing to create a WordPress blog, changing the style of individual elements in Elementor is possible to do most efficiently. Changing padding, margins, and different sections inside the text are all critical, which are often ignored by website authors.
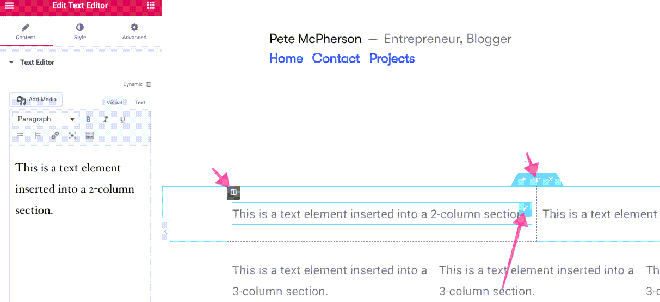
When you create text blocks using Elementor, hovering the mouse cursor over the text box shows some controls that are meant to change these details.
The largest box of content in Elementor is called "section," and you can add one when you start creating a new page with this plugin. Next, you can add different columns to each section.
The width of your content can be increased or decreased by using the "boxed" option and moving the slider.
Right-clicking on any box allows you to add columns or make copies of the existing ones. It can be best for the columns you have already created specific styles for.
Also, in order to move objects, you can either drag them to where you want or use the navigator by pressing "Ctrl-L".
- The Responsive Design of Elementor
The settings and elements of Elementor are mobile-friendly by default, so you will have no concerns after you create a WordPress blog by this plugin.
Yet, you may sometimes need to make changes in fonts or formats to keep the content look sharp on mobile and tablet devices.
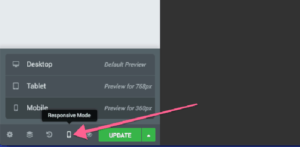
There is a dedicated button that allows you to see every page and content in the mobile view mode:
- More Practical Features
As earlier stated out, creating global elements can save you a lot of time in the long run if you plan to create a WordPress blog.
Using Elementor, you will be able to create forms, icons, buttons, and some other elements once, and copy them on your posts or headers afterward.
This feature is available in the simplest way since you only need to right-click the desired element and choose Save as a Global. All the global items will then be accessible form the GLOBAL tab.
Example of Using Elementor
Elementor is an all-in-one plugin that can be used for creating any element or page on a website.
It is an excellent fit for all types of sites and industries since you can create whatever crosses your mind in the easiest way possible.
A proper combination of these high capabilities with a proper theme results in a personalized website that looks professional and neat.
Kata is a perfect WordPress theme that includes advanced and easy-to-use Elementor-based features for the best user experience possible.
If you have completed the Elementor for Beginners guide, below we have gone through a quick procedure to make a customized layout based on our preferences.

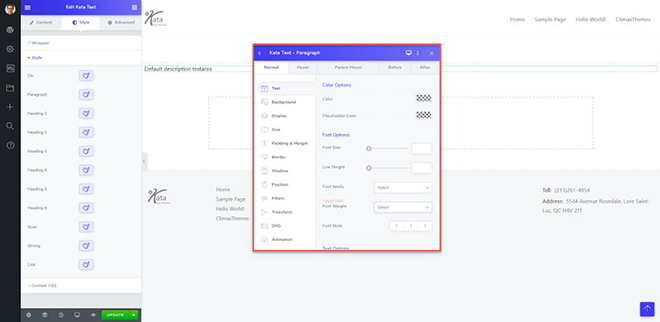
Styler is the most important tool in Kata as it allows you to customize your website using a simple and straightforward user interface.
You can change fonts, backgrounds, colors, and almost any other element present in Kata using the Styler. One could claim that even without any programming knowledge, all CSS codes are available to you via the Styler so you can change any element.
The Styler consists of 4 sections that allow you to make everything customized without limitations.
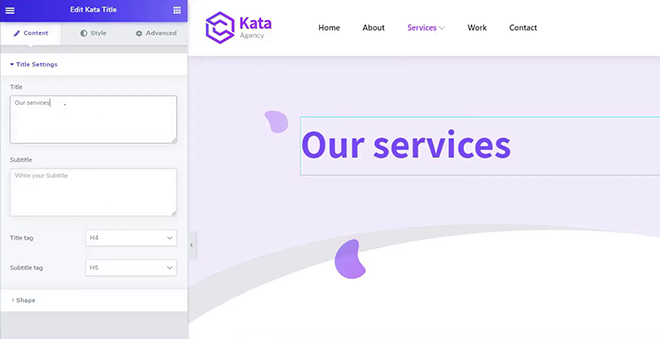
For example, you can add a title and include a subtitle for it and assign different tile tags (H1 to H6) to each of them.
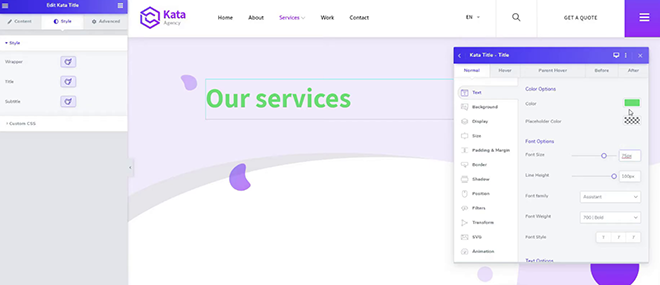
After finishing the text of our title, we can modify the styles. All the visual aspects, including colors, fonts, paddings, and alignments, are available to be changed in this section.
You can even choose another view except for the standard desktop display and make your content appear differently on other devices.
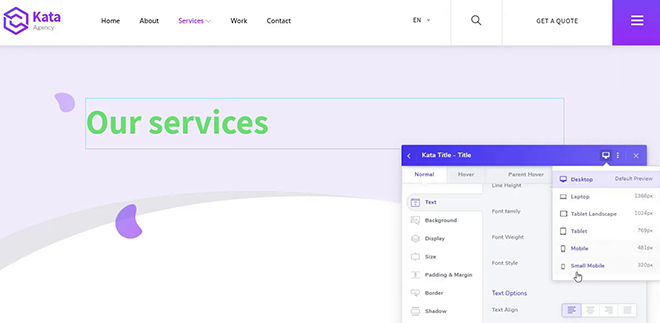
Modifying text boxes are likewise fast and straightforward. You can change every element on that box, including the wallpapers and set gradient or classic colors on it.
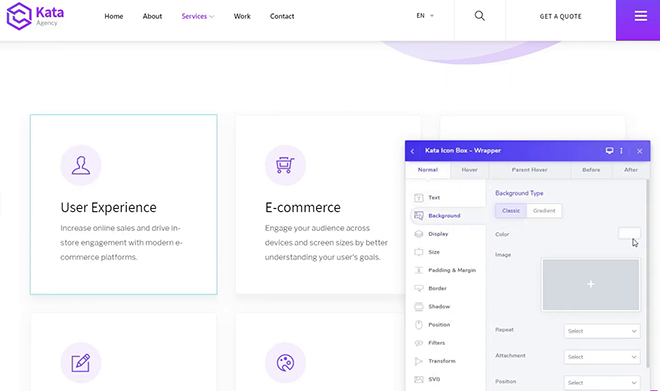
The same procedure can be applied to other parts of each page, which allows you to create a WordPress blog with a unique and stylish final design for every single part of it. Watch the following video that shows you these steps in action.
Conclusion
Elementor is a WordPress page builder plugin that has brought custom design into focus for regular users.
The simple drag-and-drop interface allows you to make professional designs for every part of your website and make it look stunning.
The combination of WordPress open-source programming and the enormous potential of Elementor for tailor-made designs make this tool the best choice for individuals who want to create a WordPress blog.
After reading this Elementor for Beginners guide, you can start using it today and present your brand to your audience most engagingly.


