If you own a website, monitoring the site's performance and the way your visitors react to your pages is a crucial step to achieve online success.
The best way you can adjust your content to what your customers really like is to analyze their behavior when they land on the pages.
By assessing the user interactions, you find out the parts that have performed better and get useful insights into what needs to be changed.
Google Analytics is a free and powerful tool that collects data and provides you with useful details about your site. WordPress users can easily add this amazing product of Google to their site and benefit from the in-depth reports it generates.
Using this data, you'll be able to attract new customers while retaining the old users for increased sales.
In this tutorial, we'll take you through a step-by-step guide to install Google Analytics on your WordPress site. But before that, let's see why you should care about this tool and how it benefits your online presence.
An Introduction to Google Analytics

Google is a leading name in the world of digital services.
Despite its fantastic search engine, Google offers plenty of other products to help online businesses. As you know, the top priority of every website is to increase the traffic, and Google Analytics is the solution of this company for this aim.
This service monitors your site and provides you with detailed reports and stats to help you make effective, data-driven decisions for your activities. You can easily get insights into the language and location of your visitors, their favorite internet browser, the part of your site where visitors spend the longest time, etc.
This tool offers plenty of advantages as below:
- Figuring Out the Source of Traffic
Using Google Analytics, you can find out how people find your site. Let it be the organic traffic from search engines, referral links, or direct links, you'll know exactly how you perform and make the necessary adjustments to your content marketing strategies accordingly.
You can also break down each of these sources for further details. For instance, if you get most referrals from Facebook, you should provide your audience on this platform with high-quality content to engage them further.
Additionally, you might find out that you receive considerable traffic from a specific website, and it's better to promote cooperation with them.
- Finding Out Who Visits Your Site
This tool gives you information about the geographical location of your visitors and the browsers they use to open your pages. Knowing these details is extremely helpful since you can adjust your custom designs to be compatible with your audience.
Consider that the majority of your website visitors don't have Flash support. Using Google Analytics reports, you find out that it's not wise to add more Flash elements to the pages.
Plus, you'll know about the screen size of your visitors and adjust your designs accordingly.
- Creating Useful Content
Using Google Analytics, you can track the website content and pages and put a greater focus on the sections that boost your traffic.
The reports tell you how long people stay on each page and show the percentage of users who have clicked on your links. The A/B test feature is also a practical tool to experiment with your content and see what fits your goals best.
The overall result of using Google Analytics is to say goodbye to the guesswork and shift your focus on actions based on real stats.
What Steps to Take to Add Google Analytics to Your Site?

Adding Google Analytics to your WordPress site is a simple process that you can do in four steps.
- Log into Your Account
The first step is to log into your existing Google account or sign up for a new one. If you don't have an account, you can easily create one by heading over to the registration page.
Once done, click on the 'Set up for free' button on the homepage. The next steps show you options for setting up your account.
The necessary items are checked by default, and you can continue the process without changing anything if you want to have the default features.
Google Analytics allows you to add multiple websites to one single account. Each property requires a name so that you can find them in your panel easily. You can also adjust the time zone, industry, business intent, and size.
Finally, your account gets prepared by clicking on the 'Create' button.
- Choose A Plugin
Now that you have your account running, you can either connect it to your site manually through the dashboard or use a WordPress plugin.
There are plenty of plugins you can install on your site to see the features of Google Analytics in your WordPress admin panel. Here we've introduced five of the quality options available.
- Analytify
The first item is Analytify, a user-friendly plugin that provides you with different stats to keep track of your activities. This tool shows the reports directly in the main dashboard while giving you the option to use a widget, too.
Once you set up and run Analytify, you can choose from your Google Analytics profiles to define where the plugin should receive data from. You also have the option to modify the settings and exclude the tracking features you don't need.
For more professional options, you should purchase Analytify Pro starting from $19 a month. There are also additional bundles that add to the functionality of this tool further.
- Site Kit by Google
Site Kit by Google is developed by the Google team and has more than one million active installs. Using this tool, you'll be able to not only add Google Analytics to your site but also five other services of Google like AdSense and Tag Manager.
Activating the plugin will create a new panel in the admin menu called 'Site Kit.' All the settings and reports are accessible from this section.
Although the plugin automatically adds the tracking code to your site and provides you with overviews of your pages, you need to head over to the Google Analytics website for full details.
- MonsterInsights
When it comes to adding Google Analytics dashboard to WordPress, MonsterInsights is one of the most reliable names that crosses the mind. It has over two million active installations and provides users with useful details about their website performance.
Aside from the main tracking code, you can add additional tracking for affiliate marketing plans and other famous tools like WooCmmerce and MemberPress. The launch wizard has made it simple to run the plugin and access what you want to track.
The Pro version of this plugin is available from $99.50 a month and adds plenty of practical capabilities such as Facebook Instant Articles and Google AMP to your site.
- GA Google Analytics
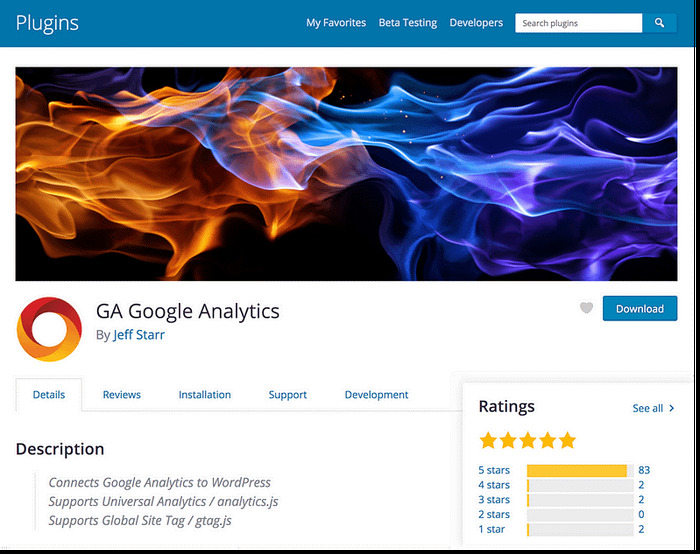
GA Google Analytics is another solution that allows you to easily define what your Google Analytics account tracks on your site. You can quickly integrate your Google account with your website by entering the GA tracking ID.
The addition of custom codes, displaying advertising, and IP anonymization are among the other features of this plugin. The Pro version also comes at a reasonable price that starts from $15 a month and expands what you can do on your WordPress site with your analytics data.
- 10WebAnalytics
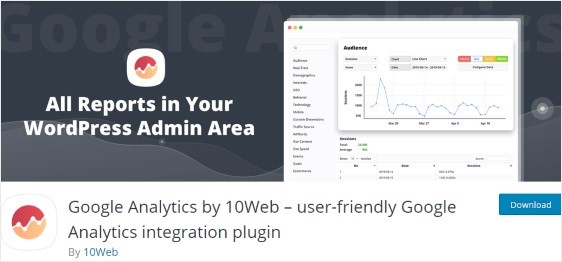
The last plugin we suggest is 10WebAnalytics. Even though it's not as popular as other products, it offers several practical options to see insights on your site.
Once you add the tracking code to your WordPress website, you can enable additional options like IP anonymization and outbound link tracking as well.
Campaign goals, different alerts, and report adjustments are likewise available in this tool. The reports are restricted in the free version, and you need to upgrade the plan to unlock additional features.
The Pro packages start from $85 a month.
Integrate the Plugin and Start Analyzing Your Site
No matter what plugin you install, you need to complete the activation process to receive data from Google Analytics appropriately. This process is usually straightforward and takes no more than a few minutes.
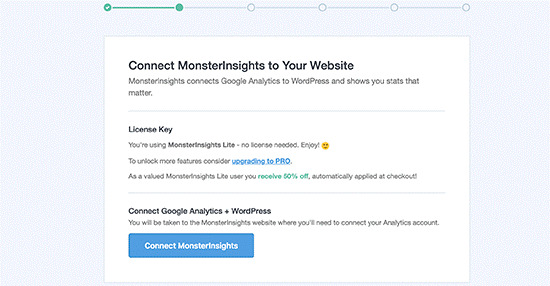
For example, if you use MonsterInsights, the setups wizard brings up the step where you should connect the plugin to your data source.
After you click on the 'Connect MonsterInsights' button, a pop-up appears asking you to choose your Google account. In the end, you'll define the appropriate profile and save the changes.
Once you're done, it might take a while until the data appears on the panel of your plugin.
You may need to wait up to 24 hours until the statistics roll in and you view them. To begin with, you can start by finding out the location of your visitors and try to make improvements on your site where possible.
Depending on the plugin you install, there are usually multiple useful metrics available within the dashboard. So it's just a matter of time until you get used to the interface and start using the data to your benefit.
Keeping an eye on your insights consistently is the key to success in your activities.
Conclusion
Seeing exactly how you perform on the internet and studying your audience's behaviors is a key step in online success.
Google Analytics is a top-performing tool that makes it possible for you to see exact reports of your website and highlight your activities' positive and negative aspects.
Here we covered how you can benefit from this tool and showed you shat you should do to activate it on your WordPress site with ease. Follow these easy steps and boost your traffic with the accurate data you receive.


