The WooCommerce Sale Notification feature offers a range of options that are both simple and intricate, allowing you to notify your website visitors of the purchase of specific products made by a particular user or from a specific country. This feature is a valuable addition to any website, providing a professional and respectful way to keep users informed of important transactions.
Activating WooCommerce Sale Notification
To activate the WooCommerce Sale Notification module, kindly head over to the ShopPress menu, select “Modules,” and toggle the Sale Notification switch to enable it. Then, click on the Config button to enter the Sale Notification settings.
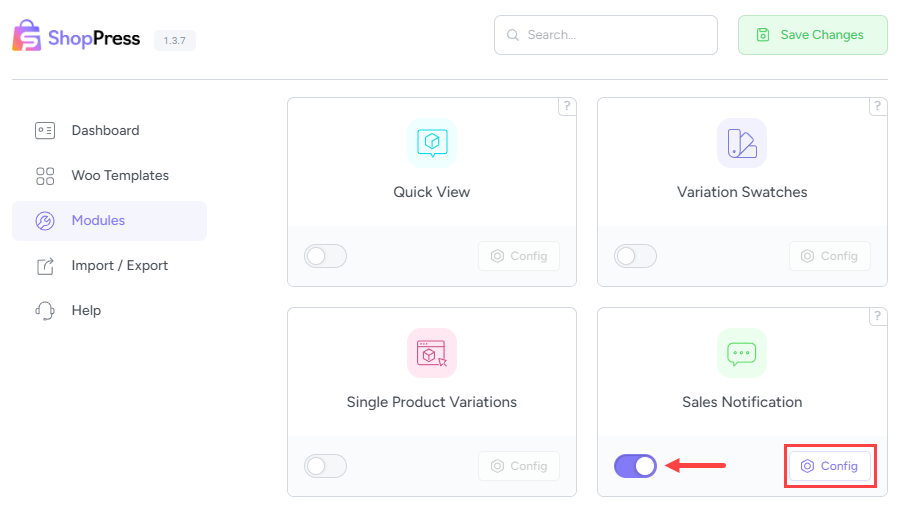
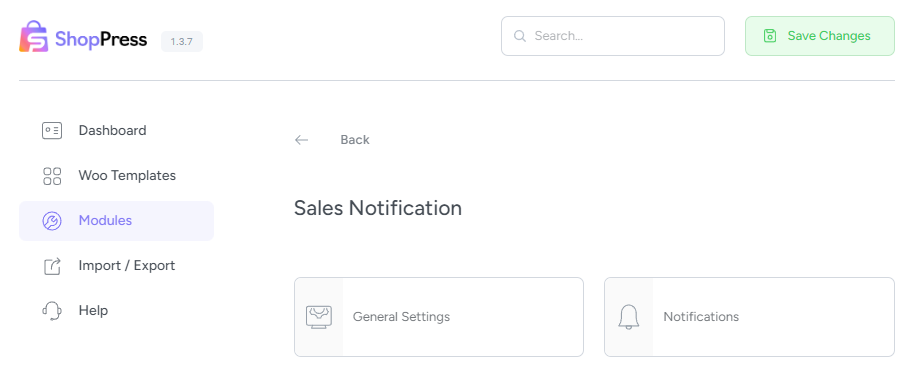
On the config page, you will have the ability to create a Notification or customize the Sale Notification’s General settings.
Create WooCommerce Sale Notification
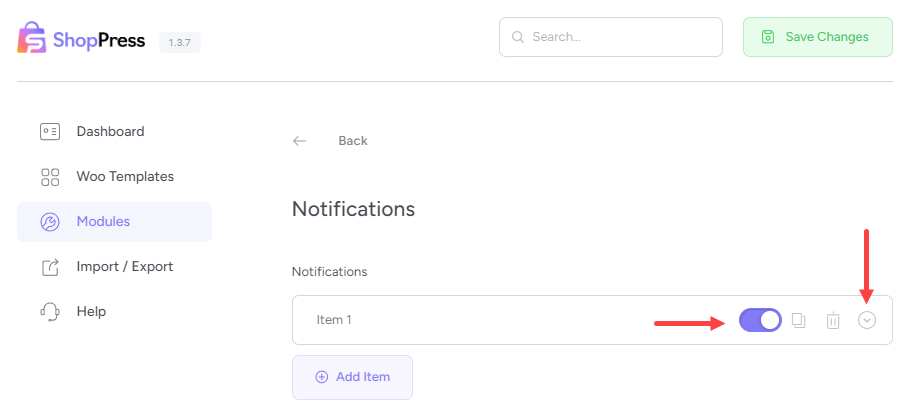
To create a WooCommerce sale notification, Firstly, click on the notification option and then select the “Add New” button. This will create a new item. Once done, activate the switch button, and you will see a set of notification settings appear in an accordion format.
1- Name: In this option, you can give a name to your notifications.
2- Notification Type: In this option, you can select whether you want to show real or dummy orders in the notifications.
3- Max notifications per page: Here, you can specify the maximum number of notifications that should be displayed on one screen.
4- Order Status: In this option, you can choose the status of orders that you want to be displayed in the notifications. You can select Completed Payment, Processing Payment, and On Hold Payment.
5- Get Orders from the Last [X] Days: In this option, you can specify that notifications should only display orders created within the last [X] days.
6- Message: Here, you can write the notification text and use the default placeholders for this section.
7- Show notifications to: In this section, you can specify whether notifications are displayed to all users, only to logged-in users, or only to guest users.
8- Display Rules: This section is for specifying the rules and conditions for displaying notifications. You can choose to display all products or only specific products. You can also specify which categories the products should belong to and on which pages the notifications should be displayed.
9- Popup Position: In this option, you can specify where the notification pop-up should appear on the page.
10- Show out of stock products: By activating this option, out of stock products can be displayed.
11- Random orders: By activating this option, the orders will be randomly selected and displayed.
12- Hide notification on mobile: By activating this option, the notification will not be displayed on mobile devices.
13- Notification sound: By activating this option, a sound will be played for the user when the notification appears.

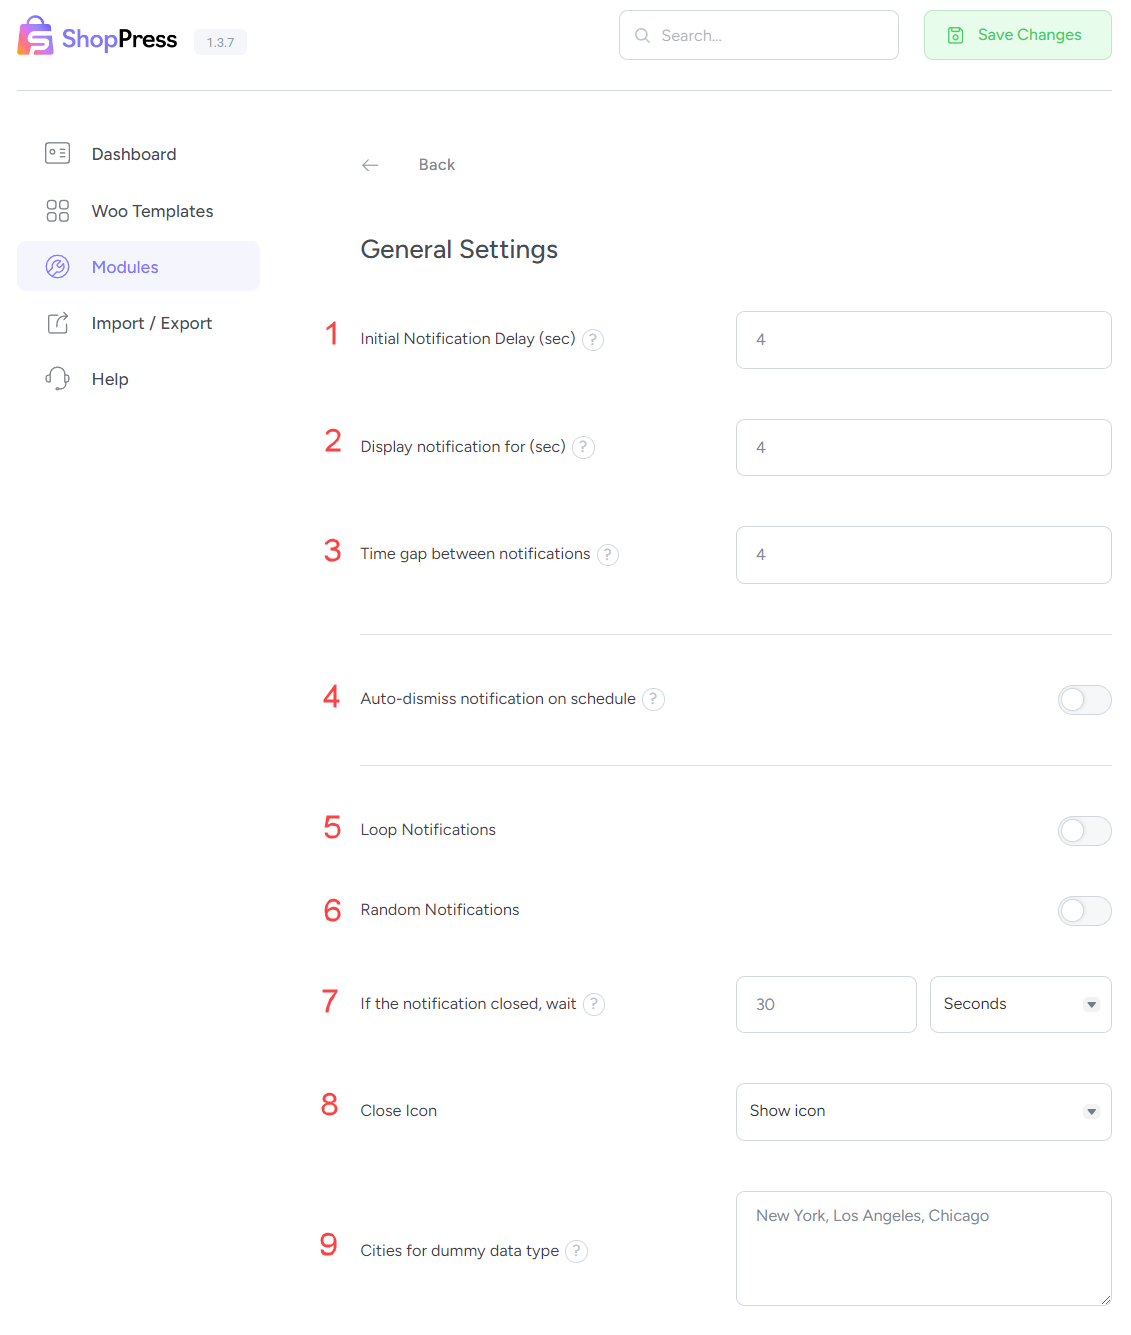
WooCommerce Sale Notification General Settings
Once you create your notification, you can use General Settings to configure its settings.
1- Initial Notification Delay: With this option, you can set the time before the first notification is displayed.
2- Display notification for: This option allows you to determine the duration of each notification.
3- Time gap between notifications: In this option, you can set the time interval between displaying notifications.
4- Auto-dismiss notification on schedule: By selecting this option, you can prevent notifications from being displayed automatically after a specific period.
5- Loop Notifications: Enabling this option will cause notifications to be displayed repeatedly in a loop after completing all notifications.
6- Random Notifications: By activating this option, orders will be randomly chosen and displayed.
7- If the notification closed, wait: In this option, you can specify the waiting time for displaying the next notification after a user closes a notification.
8- Close Icon: This option allows you to choose whether to always display the close notification icon, display it on hover, or not display it at all.
9- Cities for dummy data type: in this option, you can enter the names of cities to create dummy data type notifications.