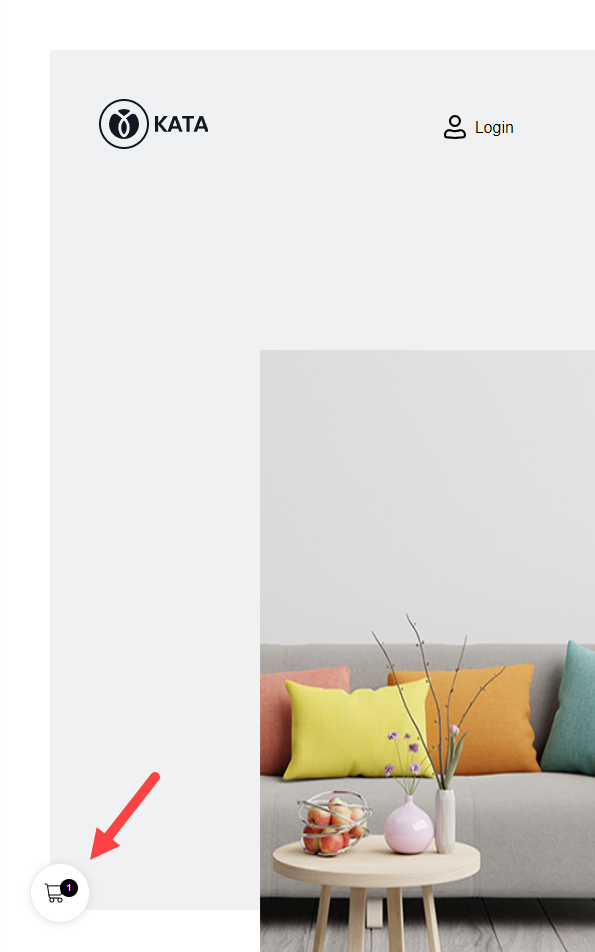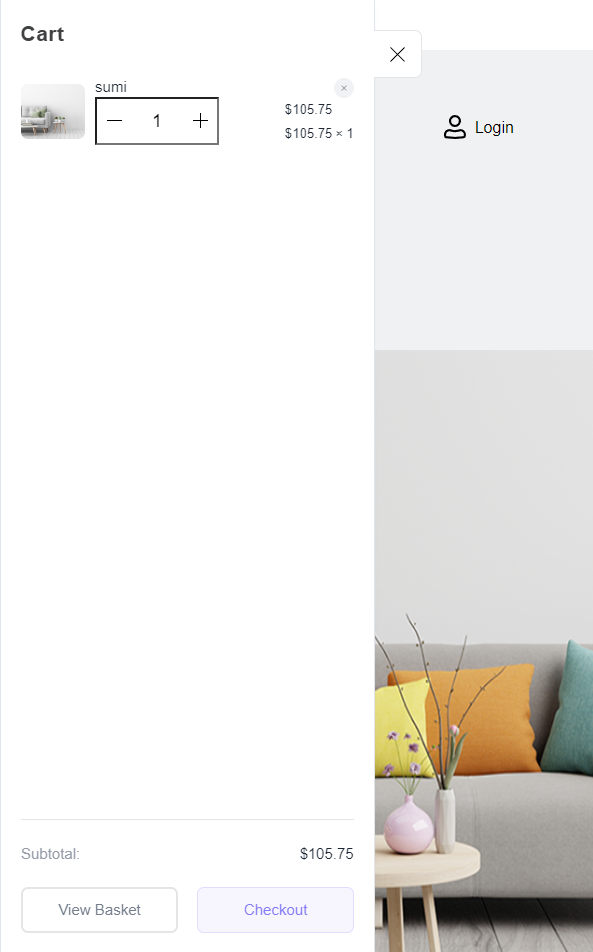
In this article, we are going to learn how to activate the WooCommerce Mini Cart Drawer module. WooCommerce Mini Cart Drawer is a ShopPress module using which you can display your cart in a drawer format using a floating button.
Enabling WooCommerce Mini Cart Drawer
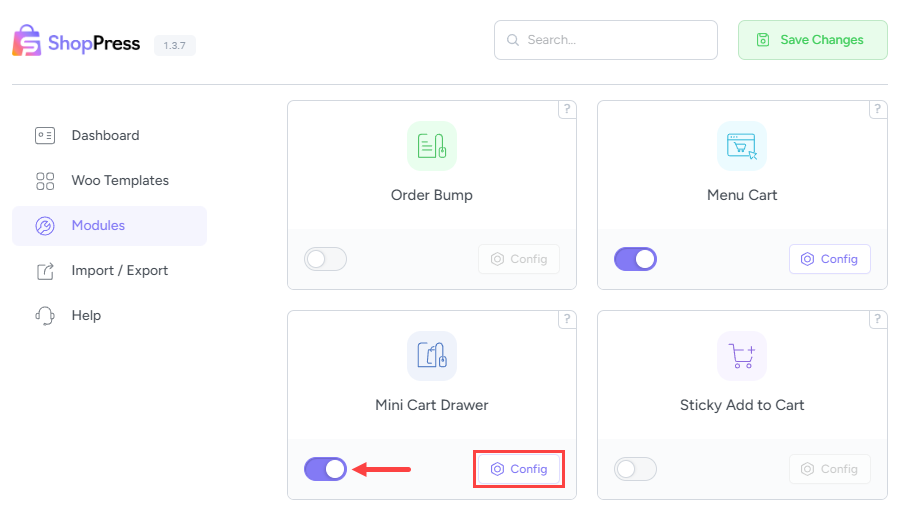
In order to activate the module, go to ShopPress > Modules > Mini Cart Drawer, and after activating it, click on the Config button, now enabled.
WooCommerce Mini Cart Drawer Settings
On the settings page, you will see the following:
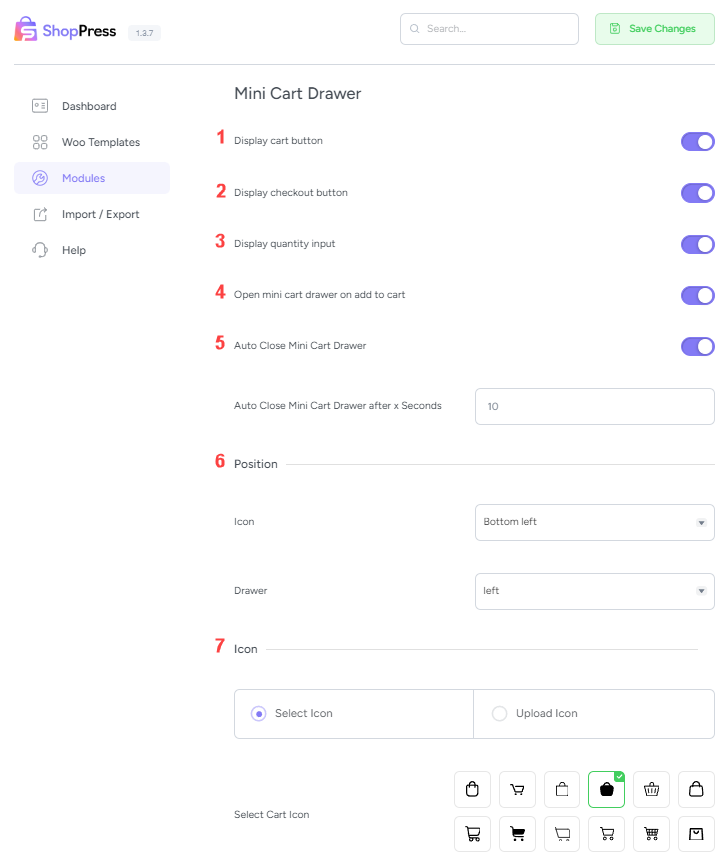
- Display cart button: For displaying/hiding the cart button in the cart menu.
- Display checkout button: For displaying/hiding the checkout button.
- Display quantity input: For displaying/hiding the quantity of the products
- Open mini cart drawer on add to cart: By activating this, the cart drawer is automatically opened after clicking on the Add to Cart button.
- Auto Close Mini Cart Drawer: By activating this, the cart drawer hides automatically after a few seconds. You can adjust the time for this using the Auto Close Mini Cart Drawer after x Seconds.
- Position: This includes two sections: Icon and Drawer. The Icon is for adjusting the position of the cart icon. The Drawer is to determine if the cart drawer opens on the left or on the right.
- Icon: Here you can choose the icon for your cart using the Select Icon, or upload an image of your choice using the Upload Icon.