In this article, we are going to see how to use the WooCommerce Quick Checkout module. This module enables you to optimize the checkout process, enhancing the user experience, and increasing the conversion rate in the end.
How to activate the WooCommerce Quick Checkout Module?
In order to activate the quick checkout ShopPress module, please go through the following steps:
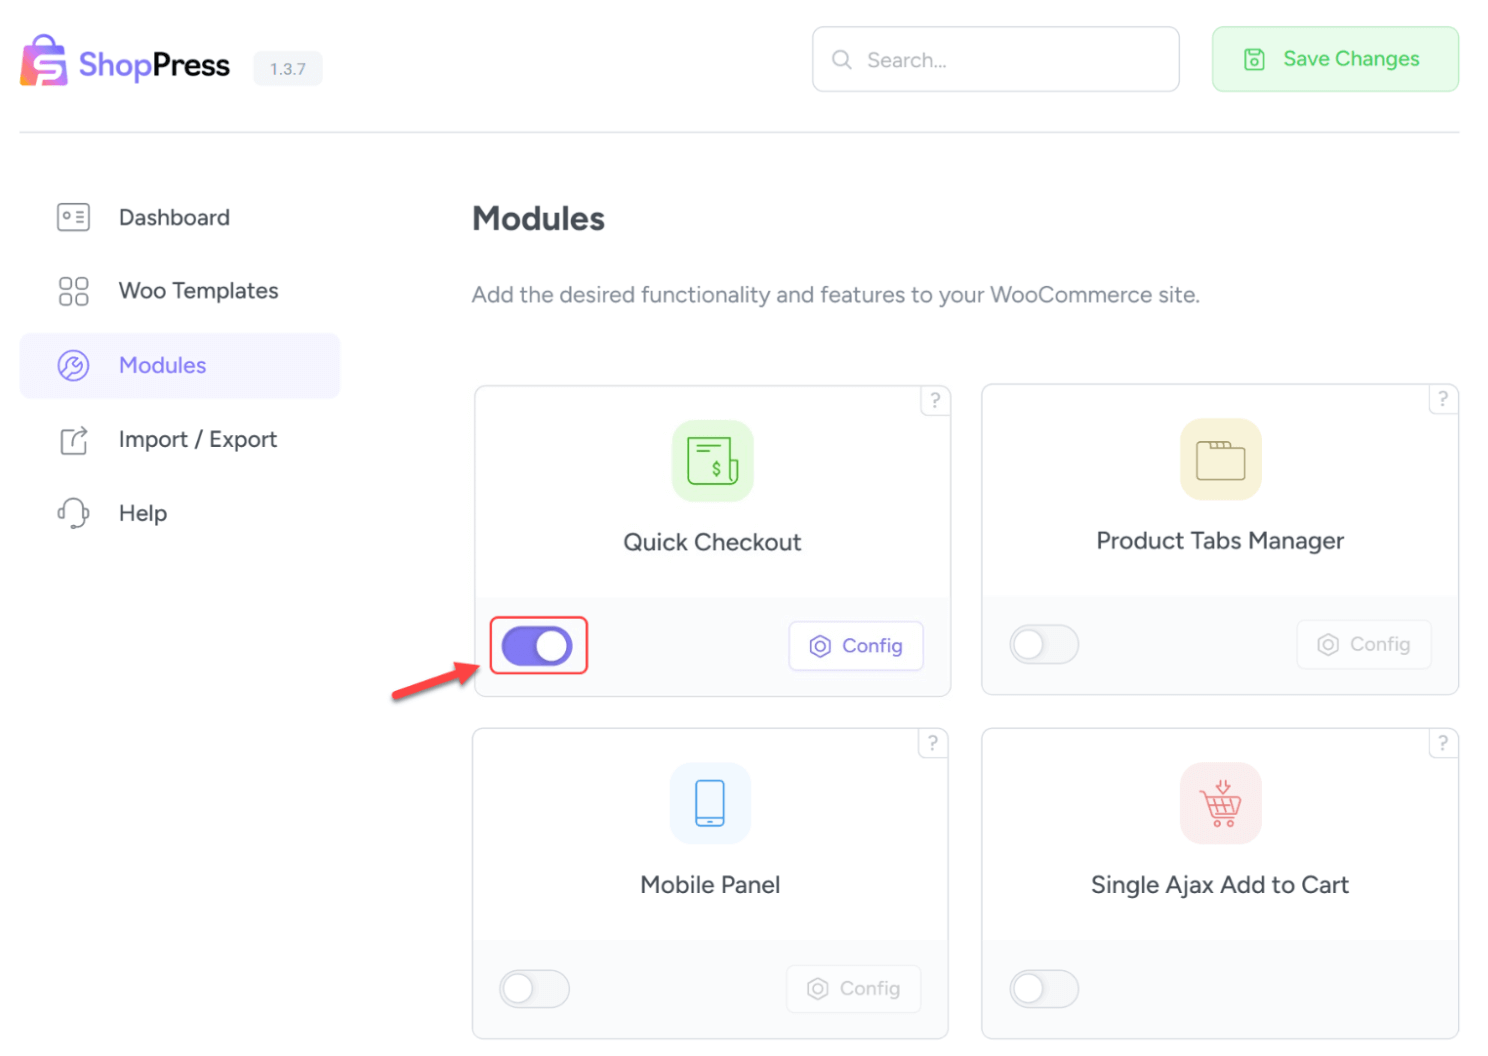
Firstly, go to your WordPress dashboard. Then go to ShopPress > Modules and activate the Quick Checkout from the list of modules.
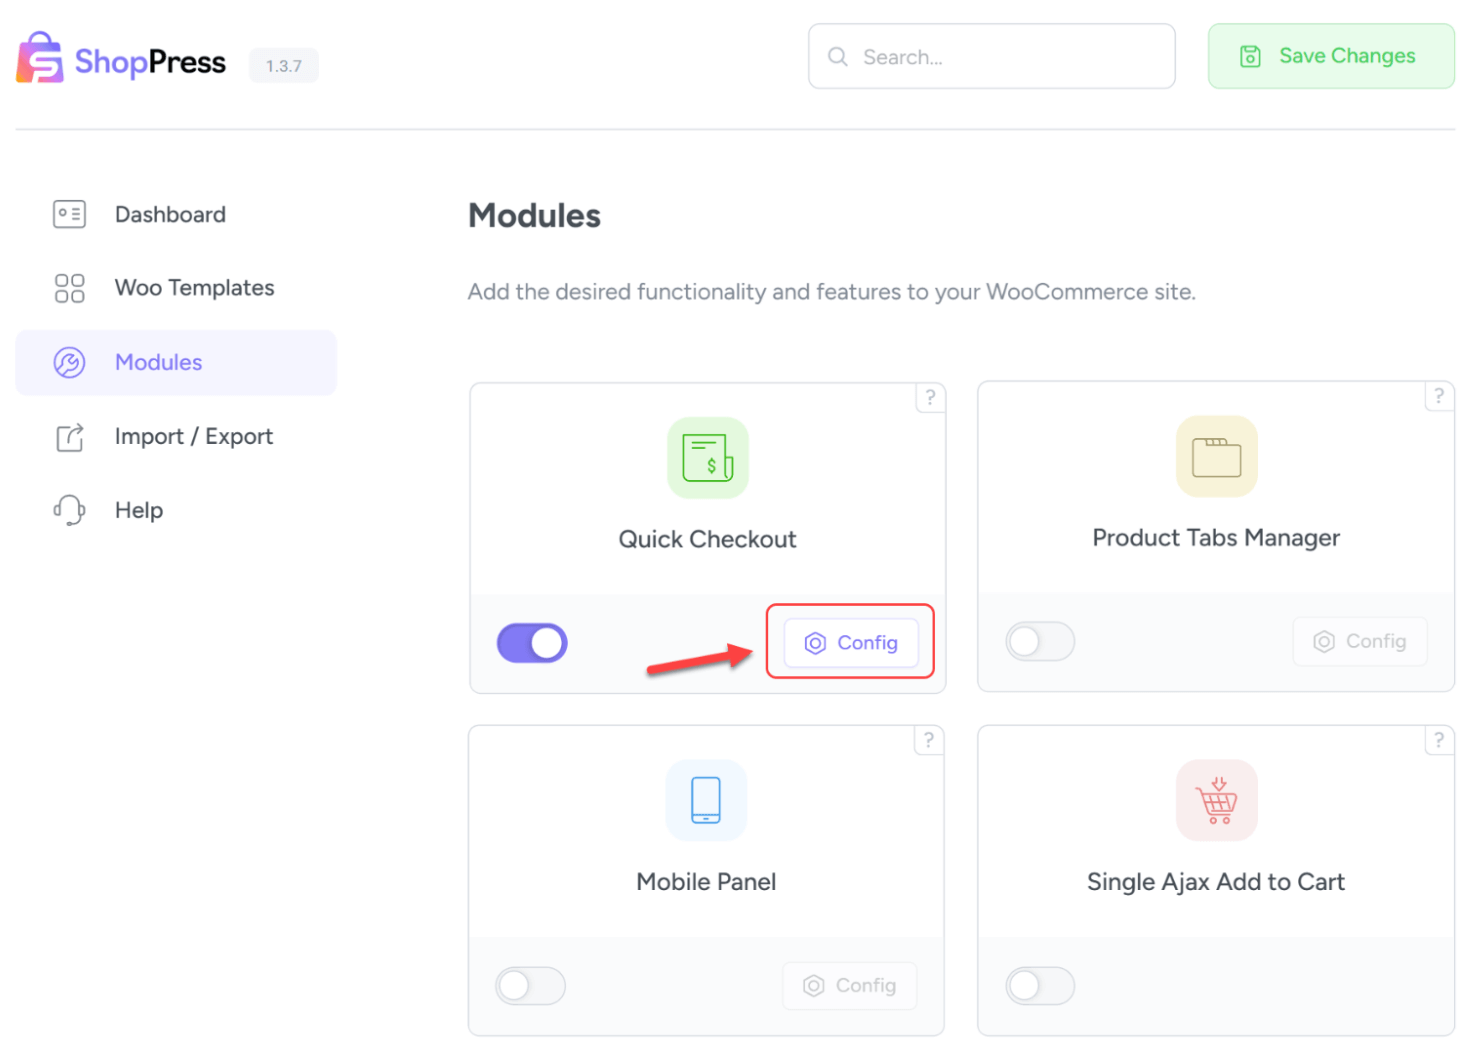
Then you will see that the Config icon is now clickable. Click on it to go to the module’s settings.
WooCommerce Quick Checkout Settings
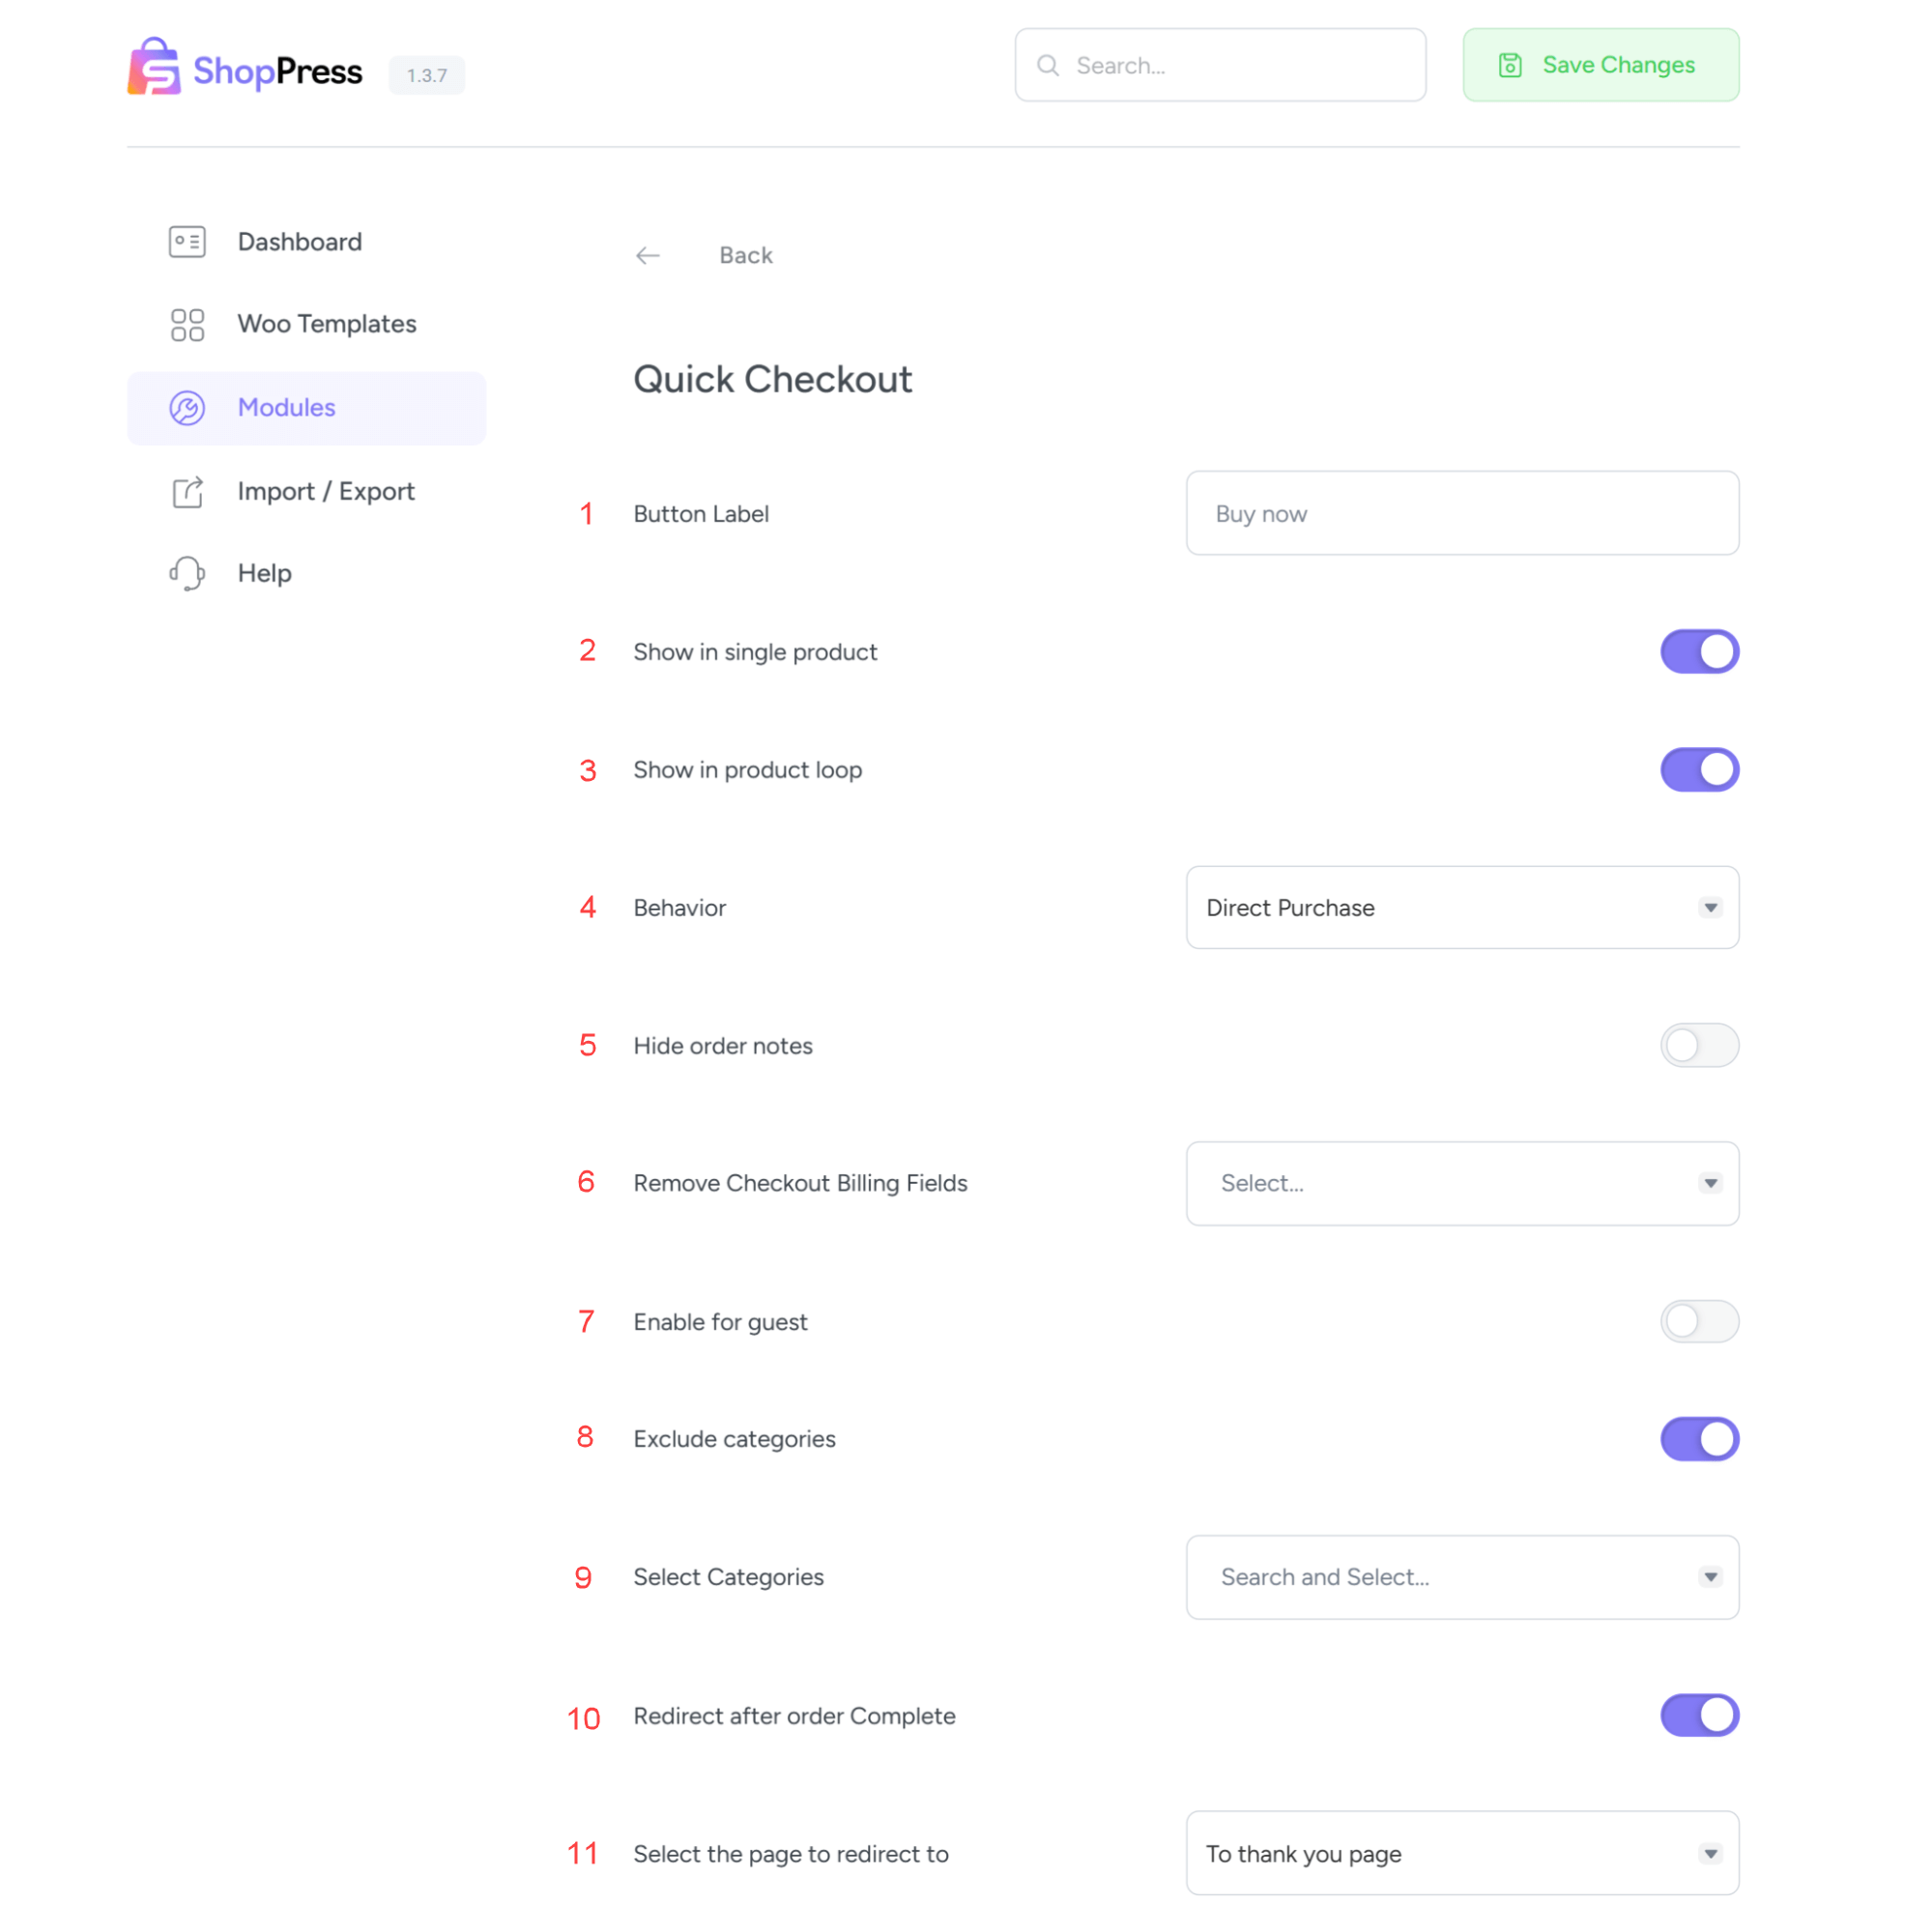
1- Button Label: You can customize the Quick Checkout button.
2- Show in Single Product: The button will be displayed on the single product page.
3- Show in the Product Loop: The button will be displayed in the product loops.
4- Behavior: You can set the behavior after the clicks.
5- Hide order Notes: Activating this will hide the order notes from the Quick Checkout page.
6- Remove Checkout Billing Fields: Activating this allows you to choose which checkout billing fields will be omitted.
7- Enable for guests: Activating this allows your guests to use the Quick Checkout.
8- Exclude Categories: Activating this allows you to exclude your categories.
9- Select Categories: Here you can select the categories for exclusion.
10- Redirect After Order Complete: Activating this will allow you to choose which page to be directed to after the checkout is complete.
11-Select the Page to redirect to: You can select the page you wish to redirect after checkout.
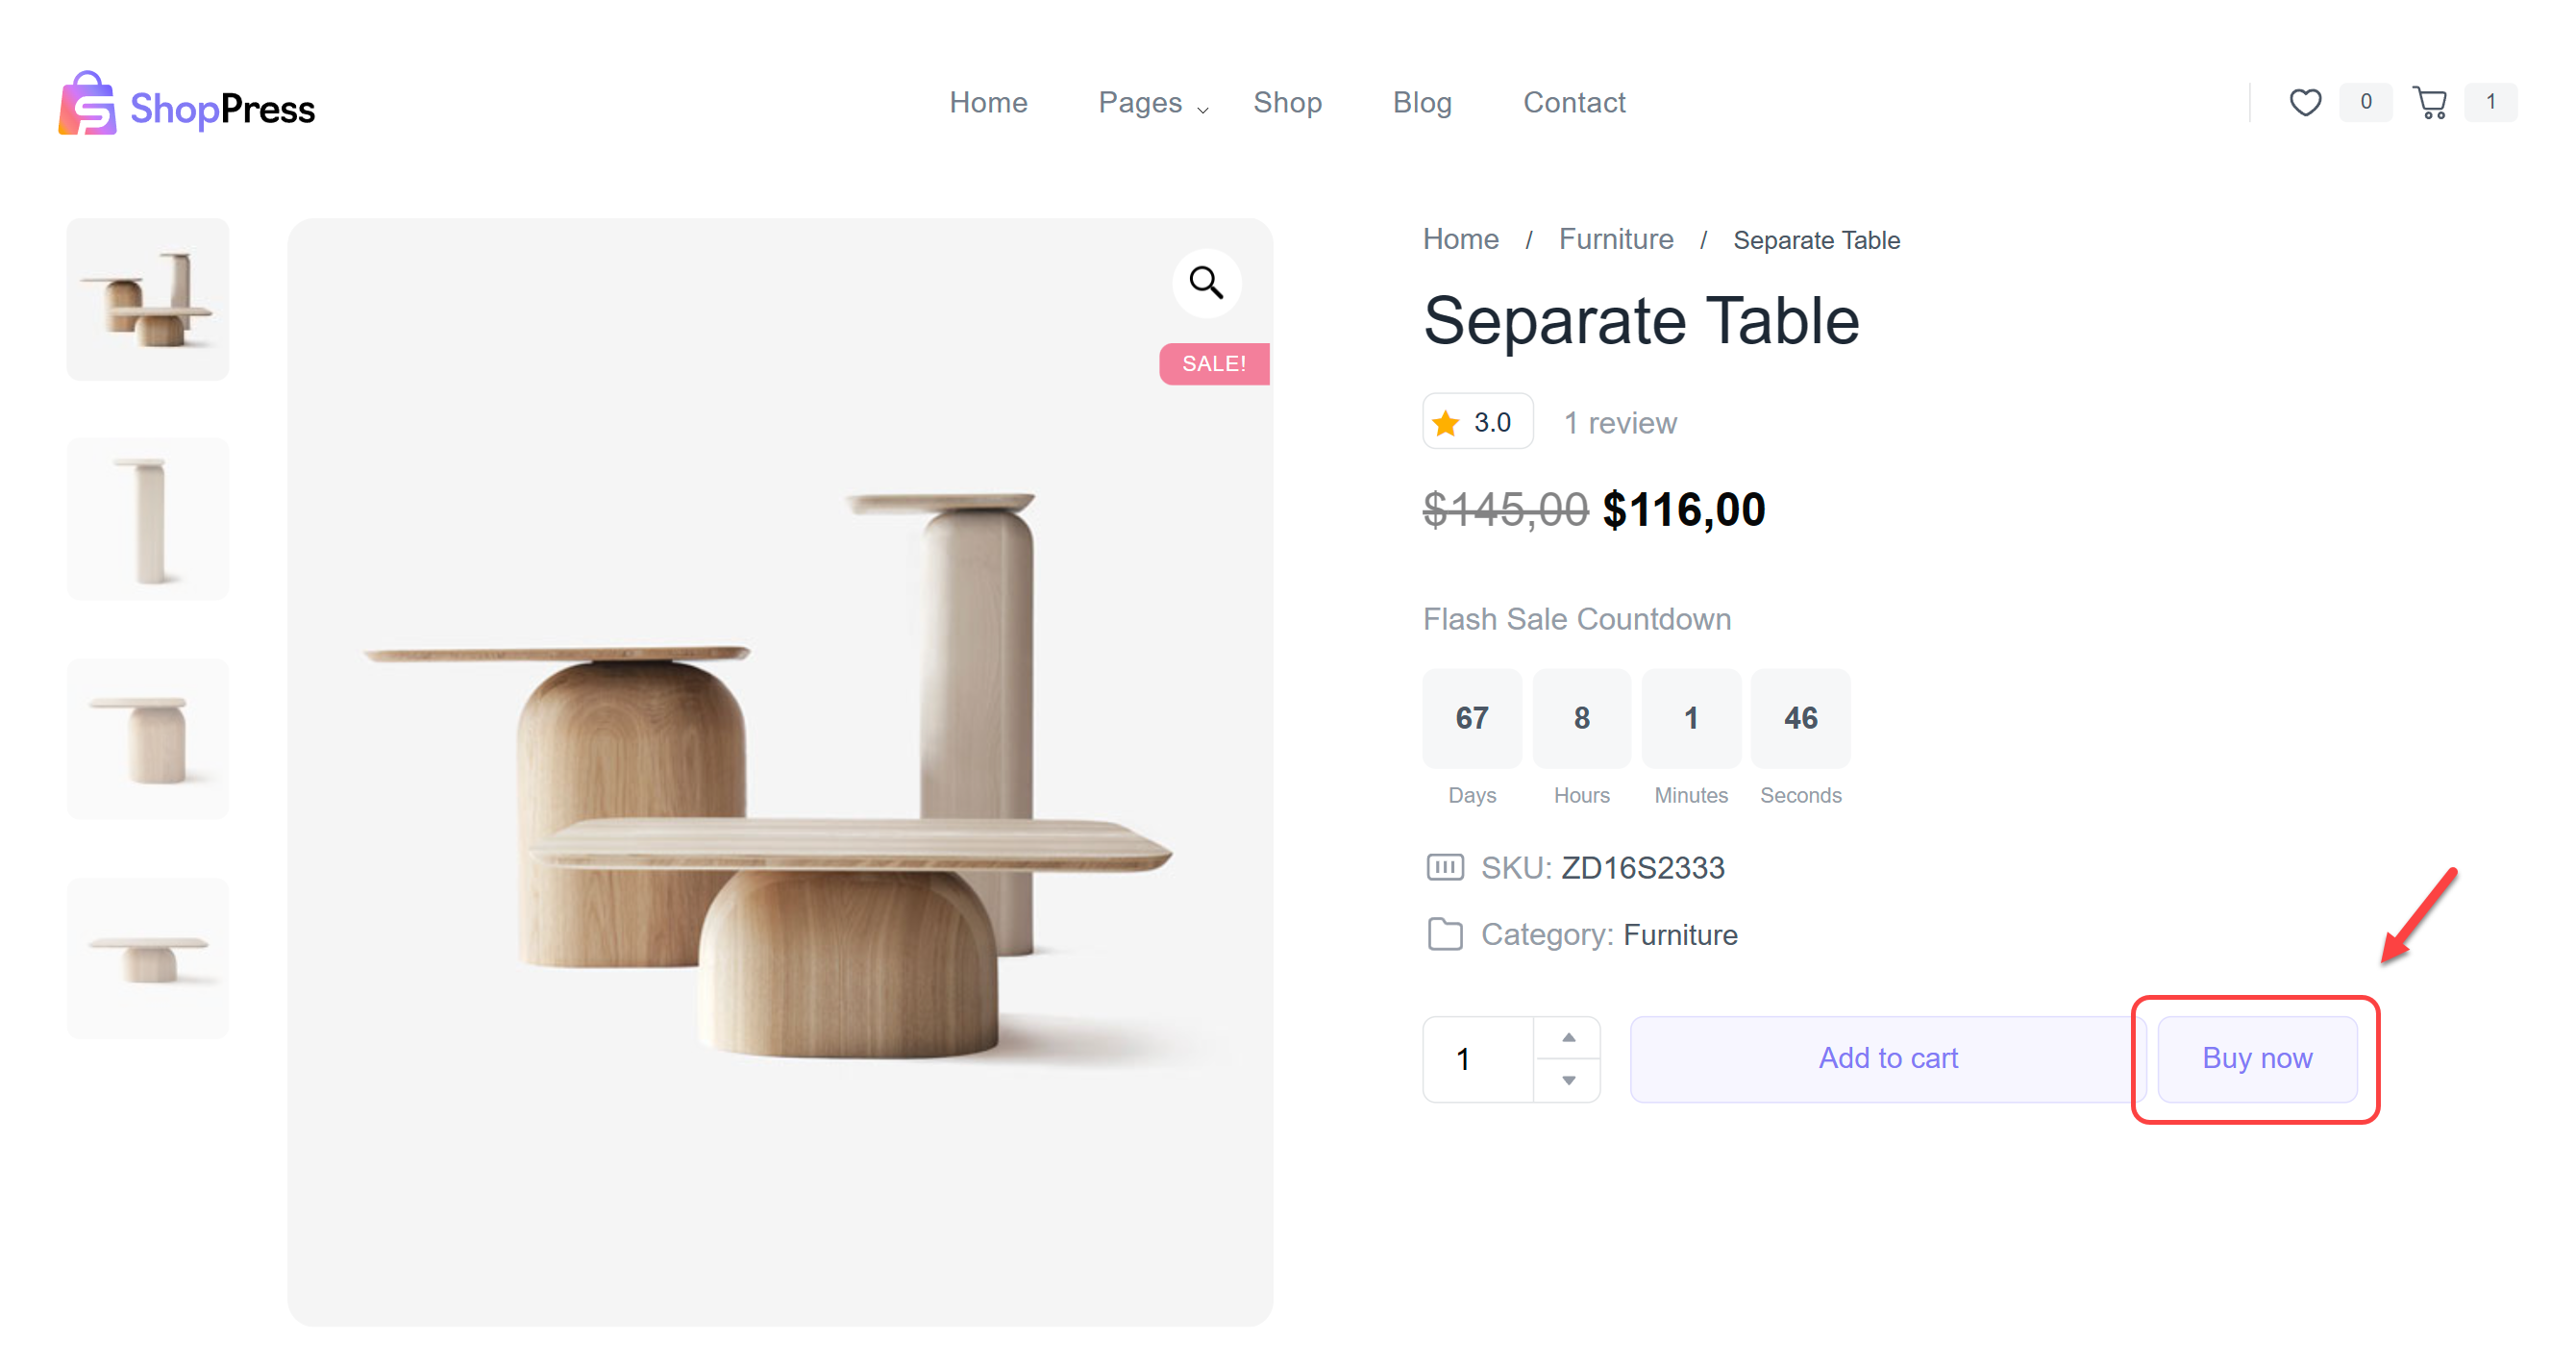
Here’s an example of how this module appears in action.