In this article, you will learn How to Create a WooCommerce My Account Page with Elementor.
ShopPress allows for customizing various WooCommerce pages. This tutorial explains how to create and customize the My Account-related pages.
Create a WooCommerce My Account page
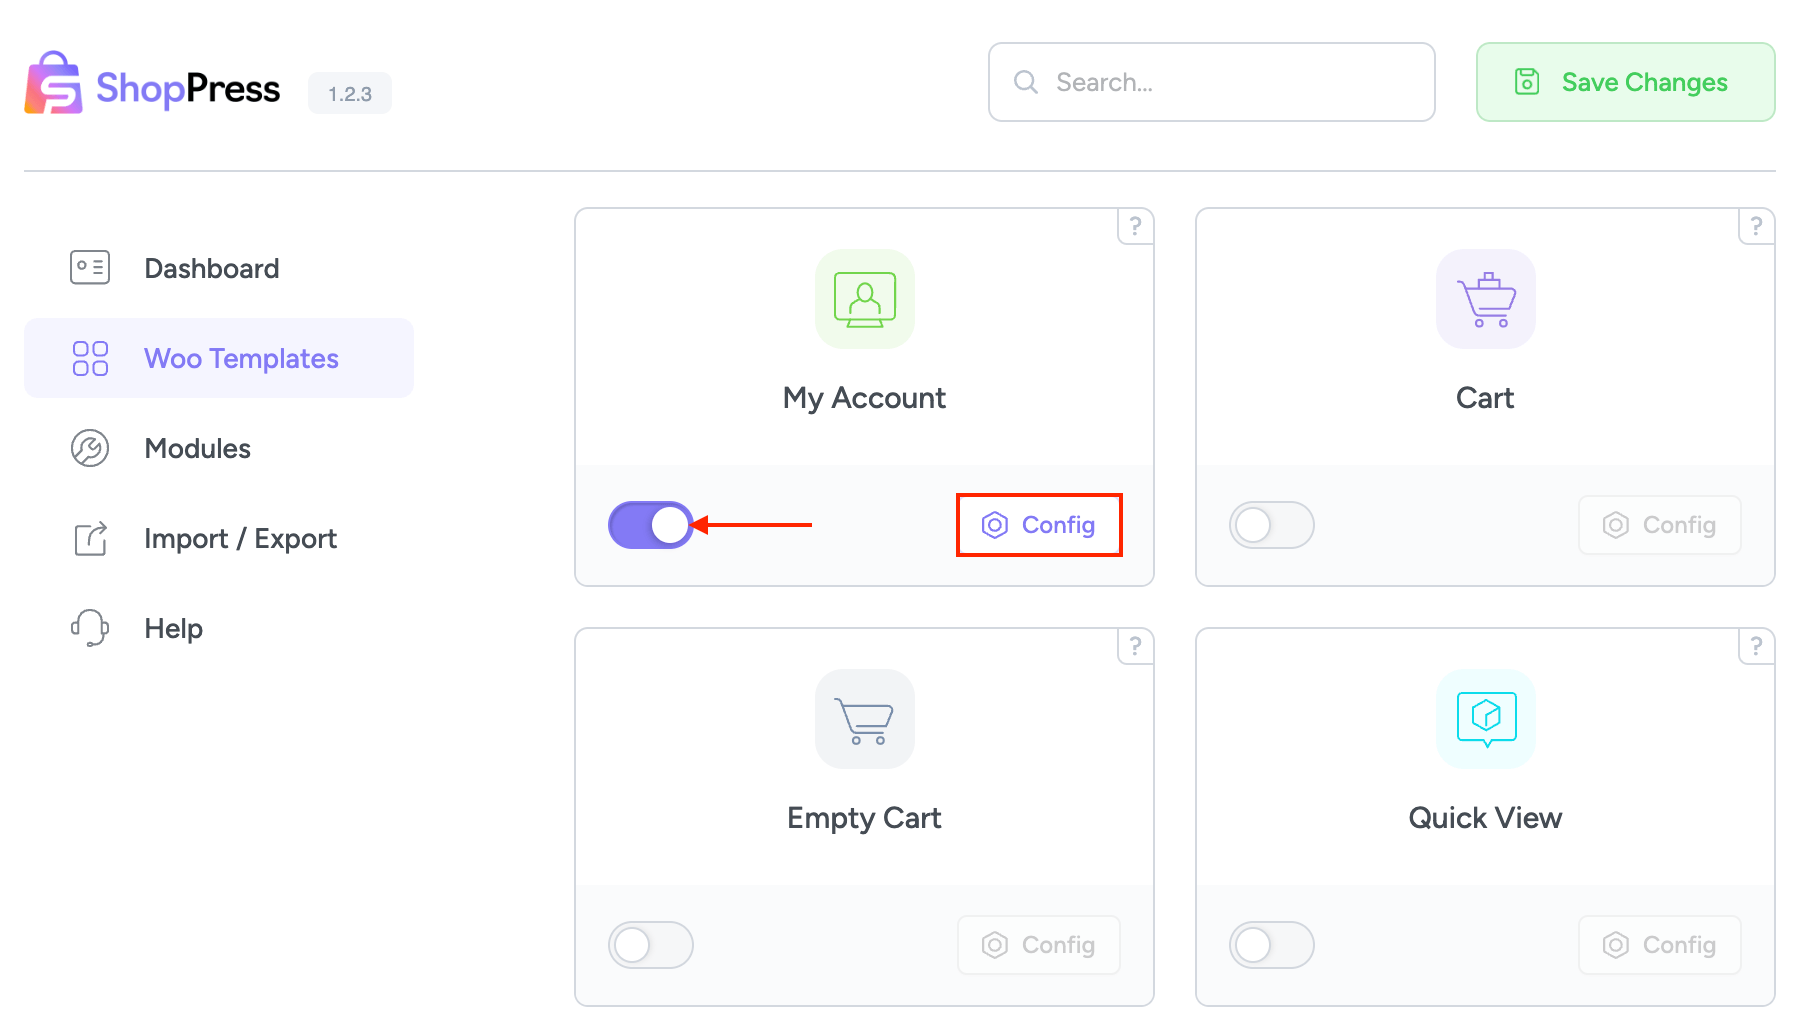
From the WordPress dashboard menu, head to ShopPress > Woo Templates, enable the My Account page, then hit the Config button to enter the component settings.
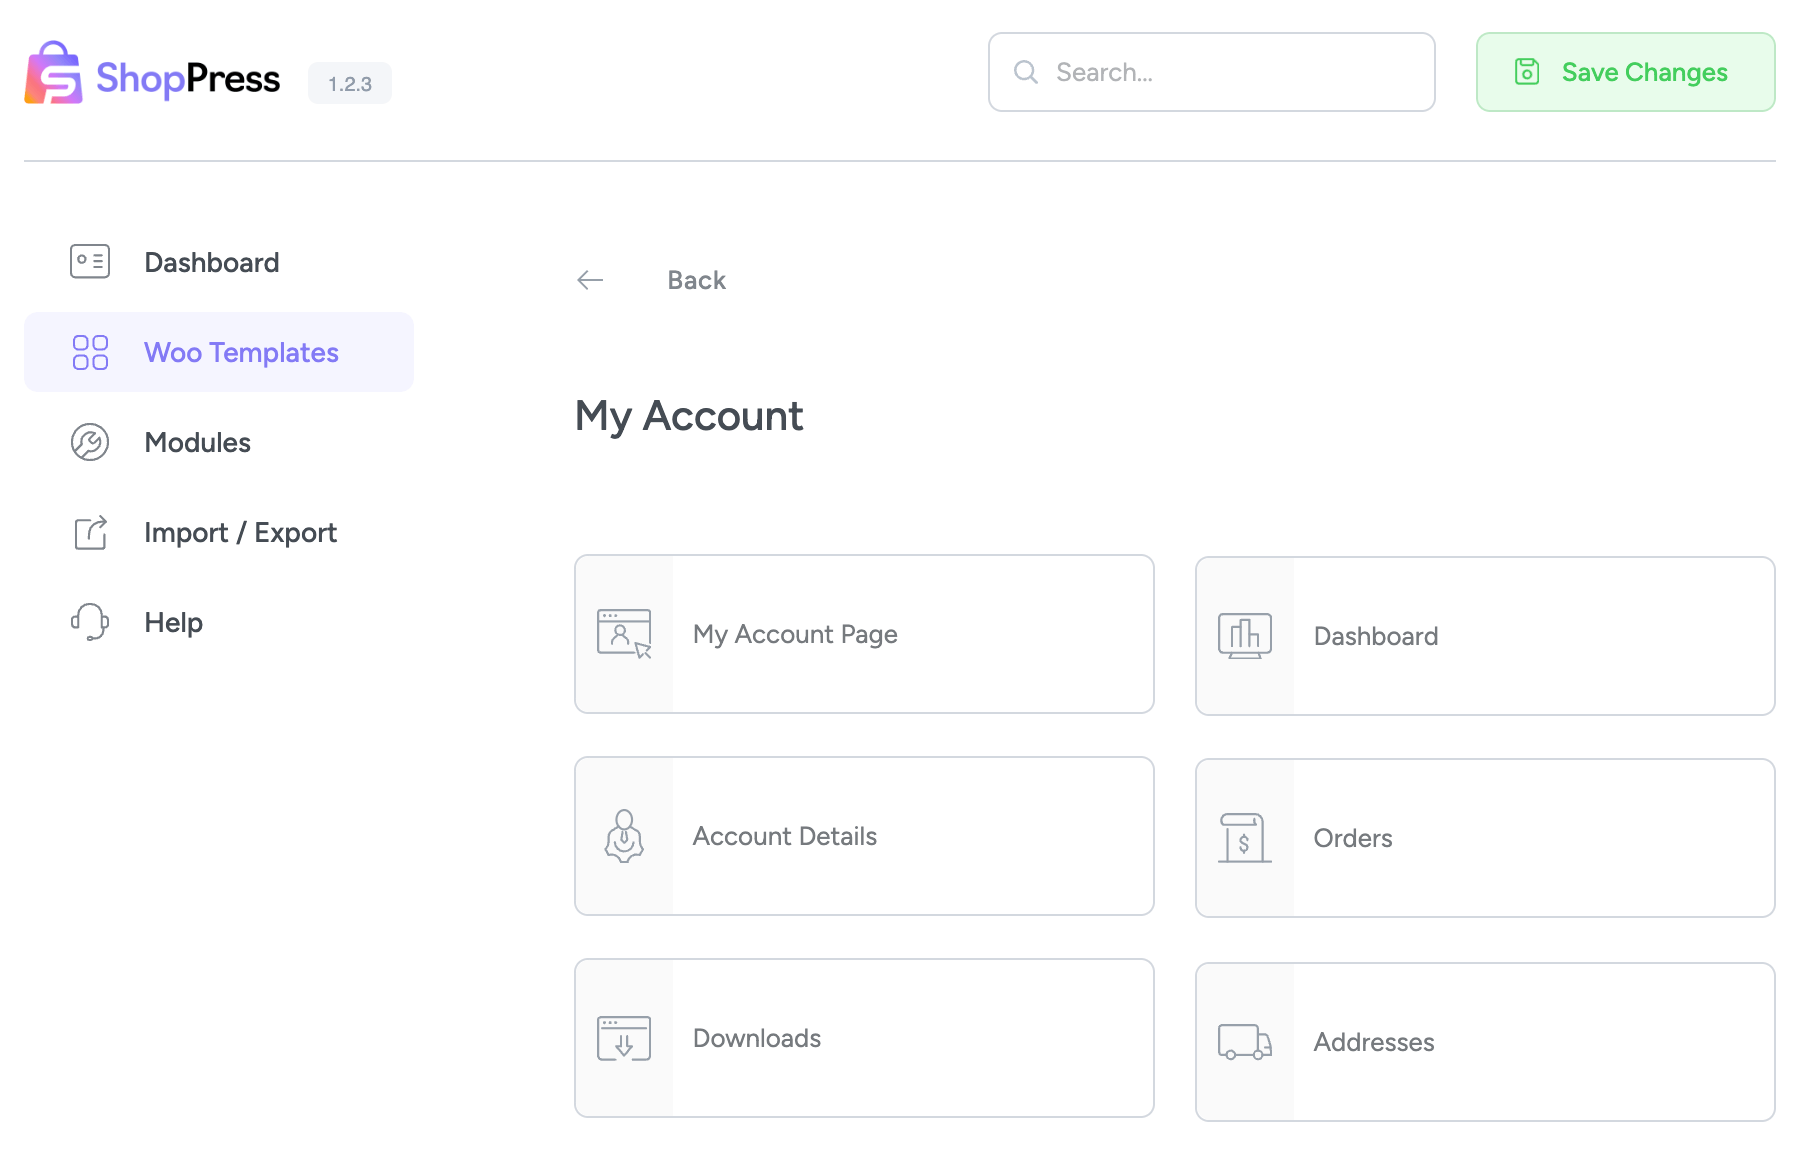
This page provides a comprehensive list of all available customizable components. To modify a template, please click on it to initiate the process.
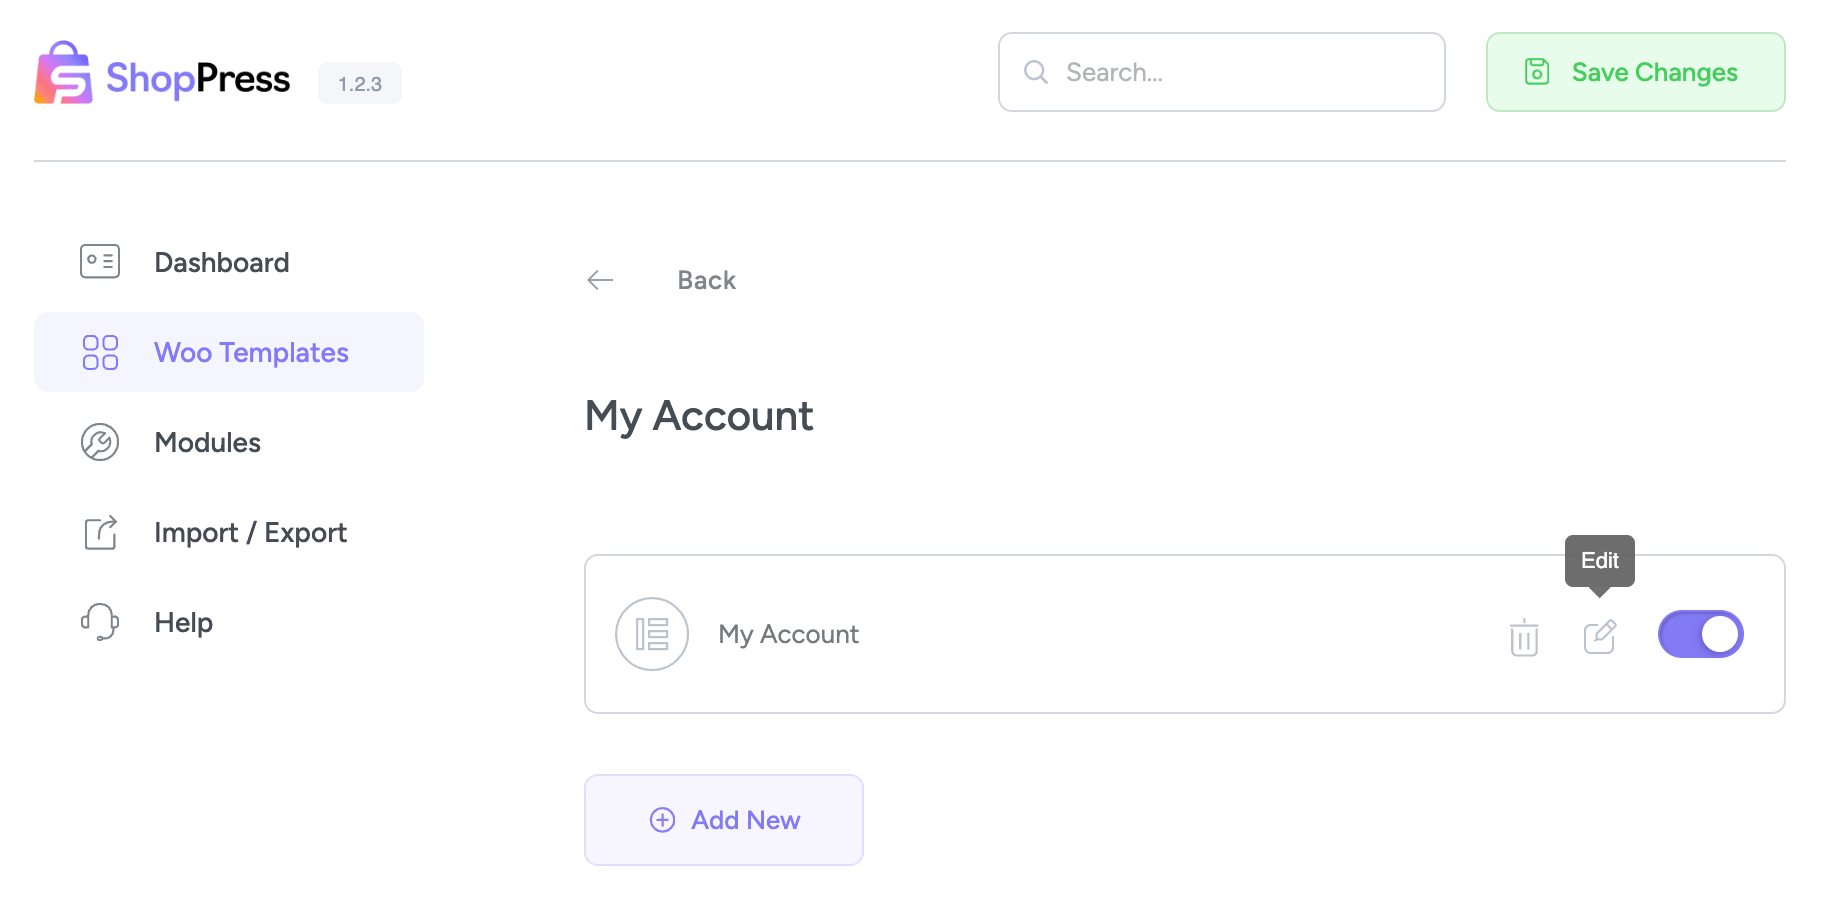
For the next step, click on the Add New Button to create a new template for the “My Account” page, then hit the edit icon to enter the Elementor edit page and begin modifying.
Edit My Account Page With Elementor
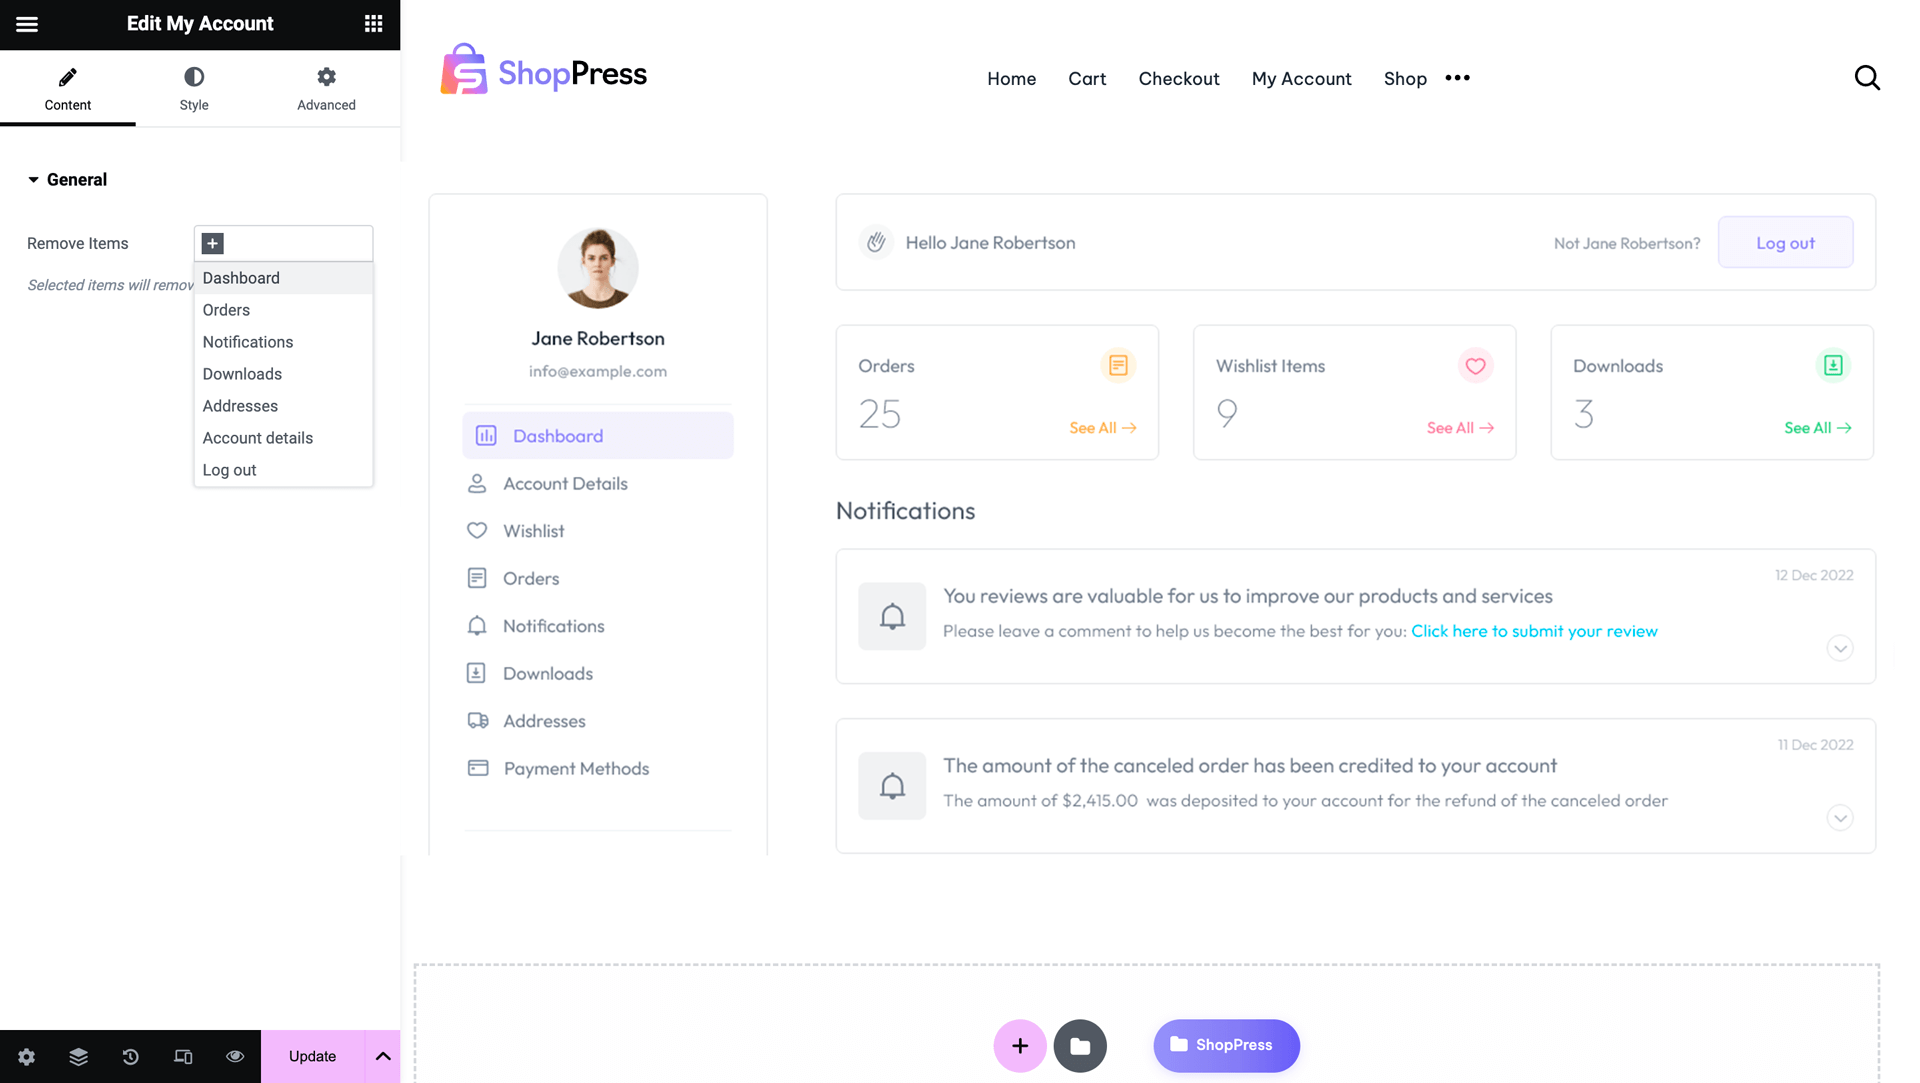
Upon selecting the edit icon, you will be redirected to an Elementor page, where the My Account widget is available to enable editing of the left-side navigation menu for the WooCommerce My Account page. Within this widget, there is an option to remove any unnecessary menu items from the My Account page navigation menu.
To add the payment gateway to the My Account page, installing and activating the Woocommerce Gateway Stripe plugin is necessary.

WooCommerce Dashboard Page
In order to edit the Dashboard page, click on the Add New Button to create a new template for the “Dashboard Account” page, then hit the edit icon to enter the Elementor edit page and begin modifying.
Edit the Dashboard page using Elementor
Now, you can edit the whole widget using the Styles tab, which has been provided in the widget (Box, Paragraph, Name, Link).

Create a WooCommerce Account Details Page
In order to edit the Account Details Page, click on the Add New Button to create a new template for the “Account Details” page, then hit the edit icon to enter the Elementor edit page and begin modifying.
Customizing WooCommerce Account Details with Elementor
Then, you can edit the whole widget using the Styles tab, which has been provided in the widget. (Box, Labels, Inputs, Notes, and Button)

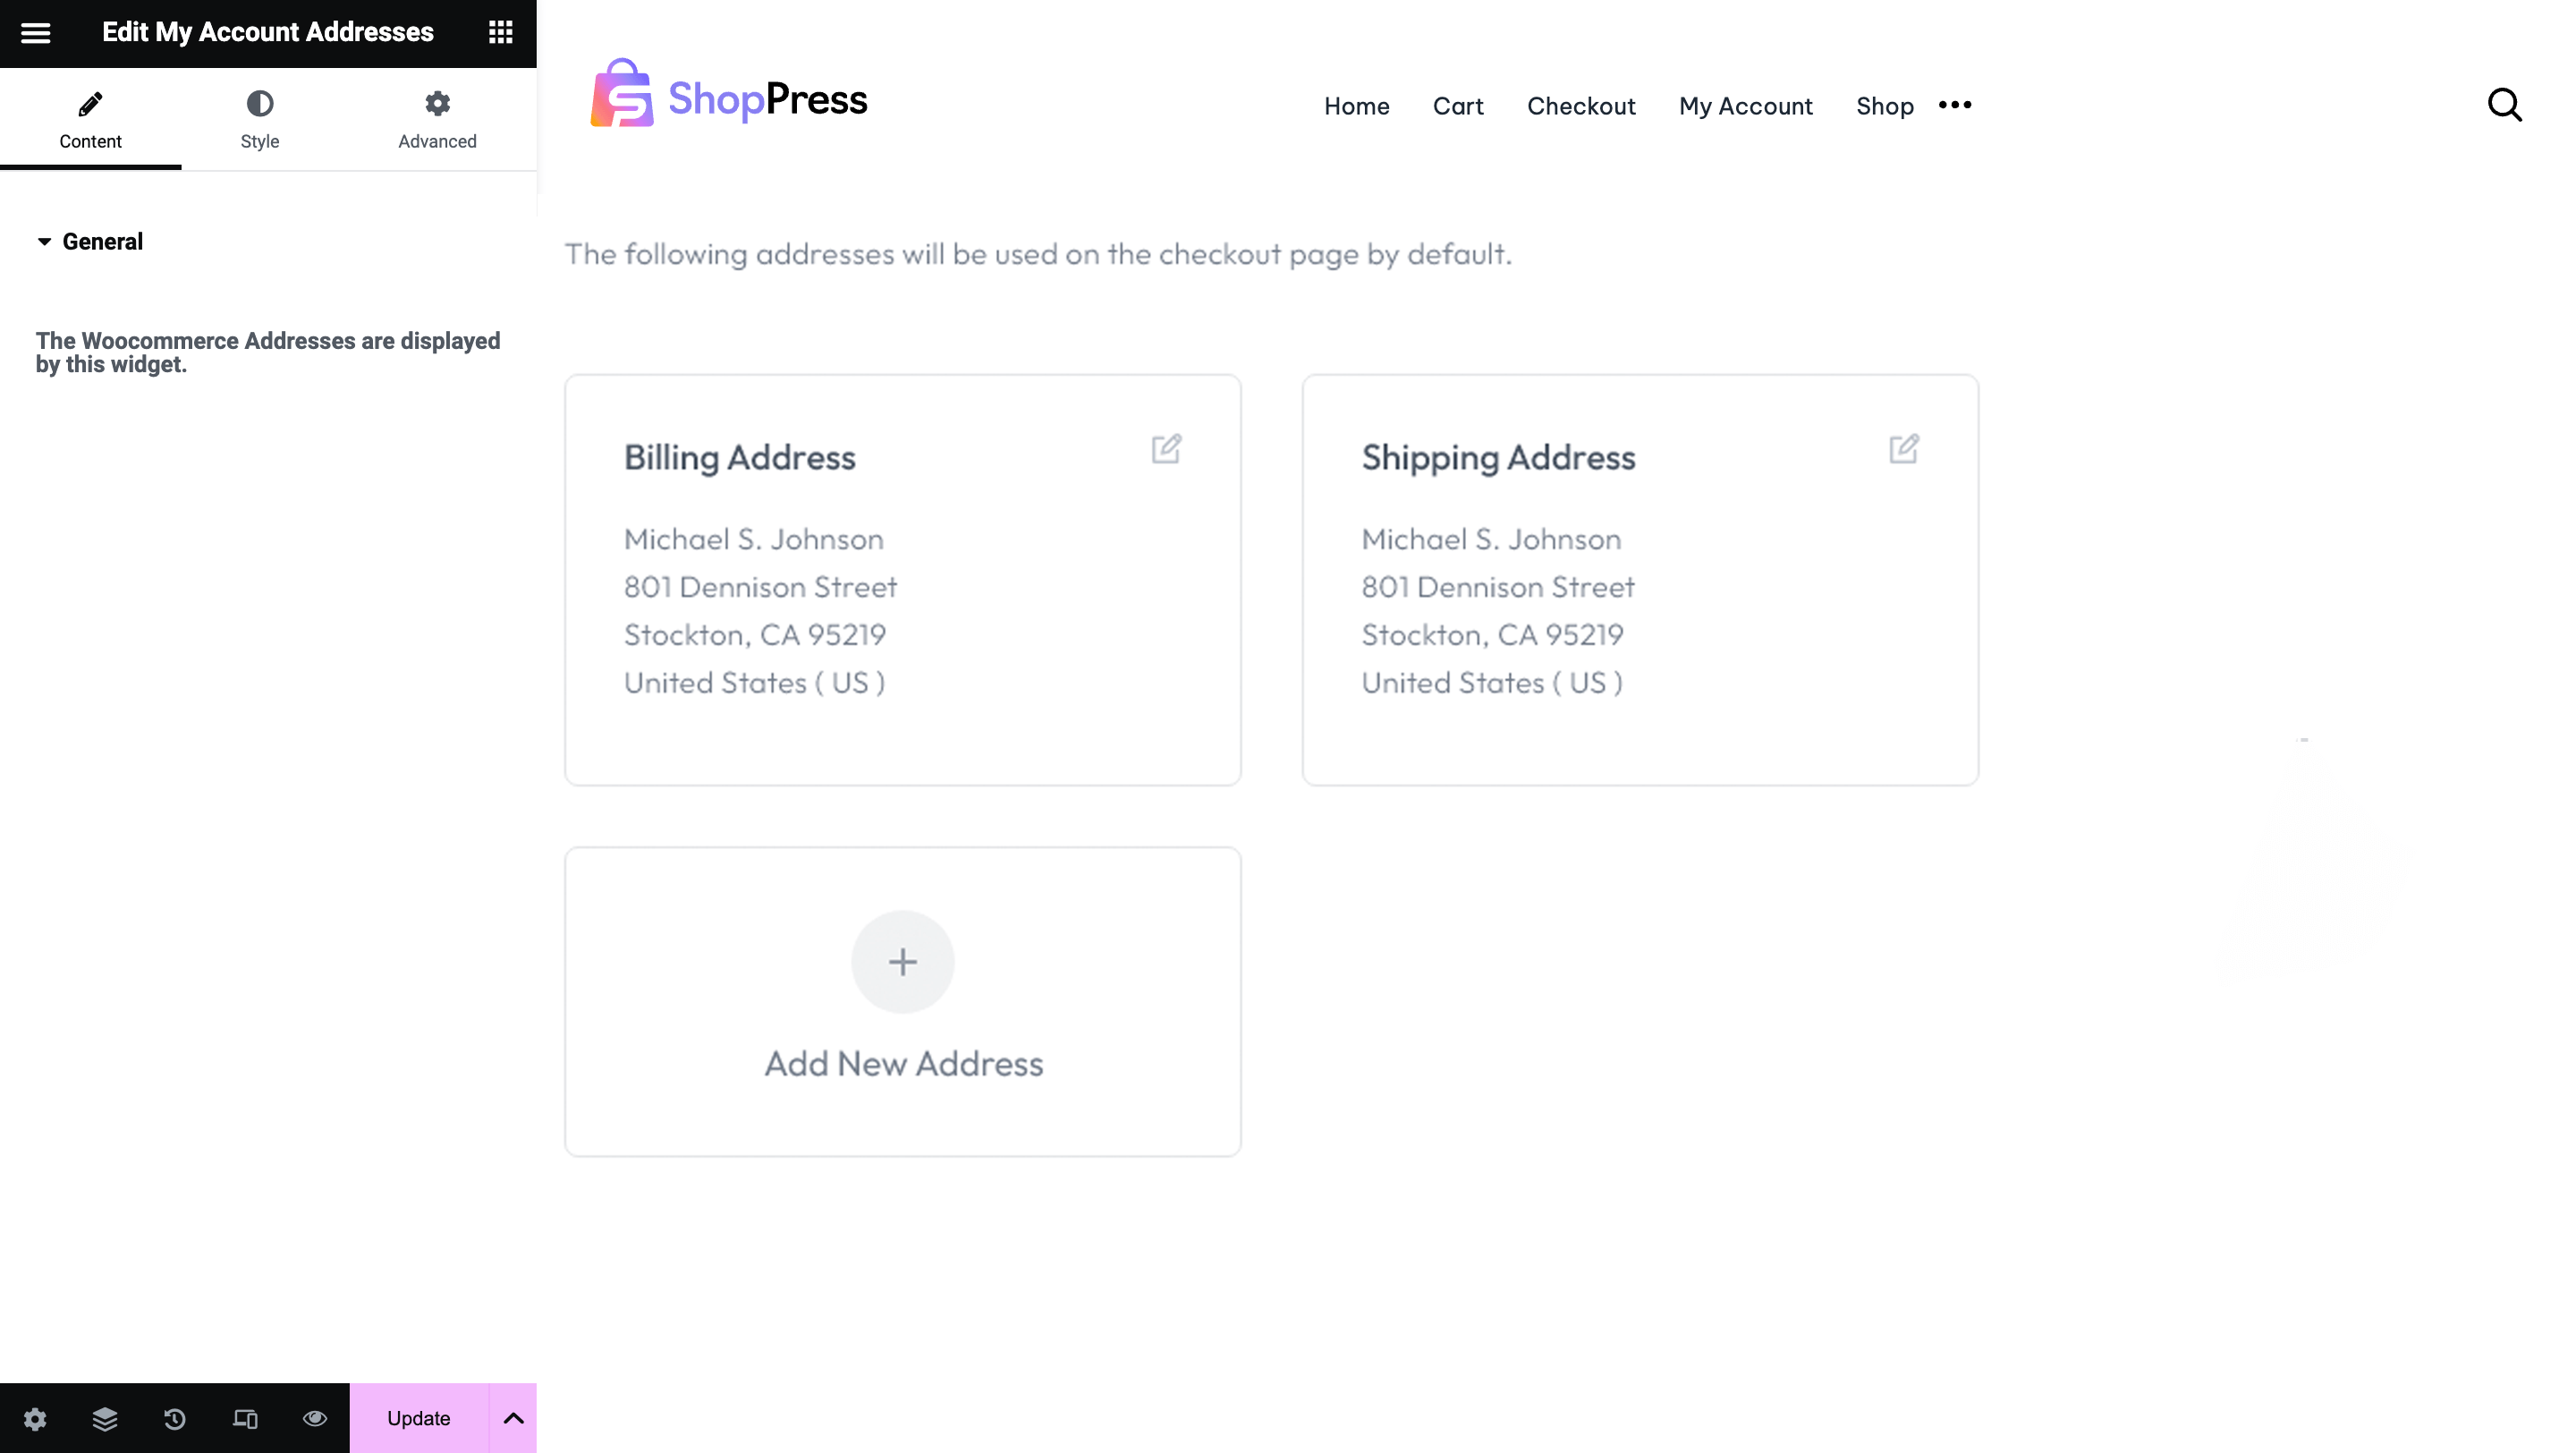
Create a WooCommerce Address Page
In order to edit the Addresses Page, click on the Add New Button to create a new template for the “Addresses” page, then hit the edit icon to enter the Elementor edit page and begin modifying.
Customizing Addresses Page using Elementor
Then, you can edit the whole widget using the styles tab, which has been provided in the widget. (Box, Description, Title, Add Address Button, and Addresses).
Create a WooCommerce Orders Page
In order to edit the Orders Page, click on the Add New Button to create a new template for the “Orders” page, then hit the edit icon to enter the Elementor edit page and begin modifying.
Then, you can edit the whole widget using the styles tab, which has been provided in the widget. (Box, Table, Table Head, Head Cells, etc.)

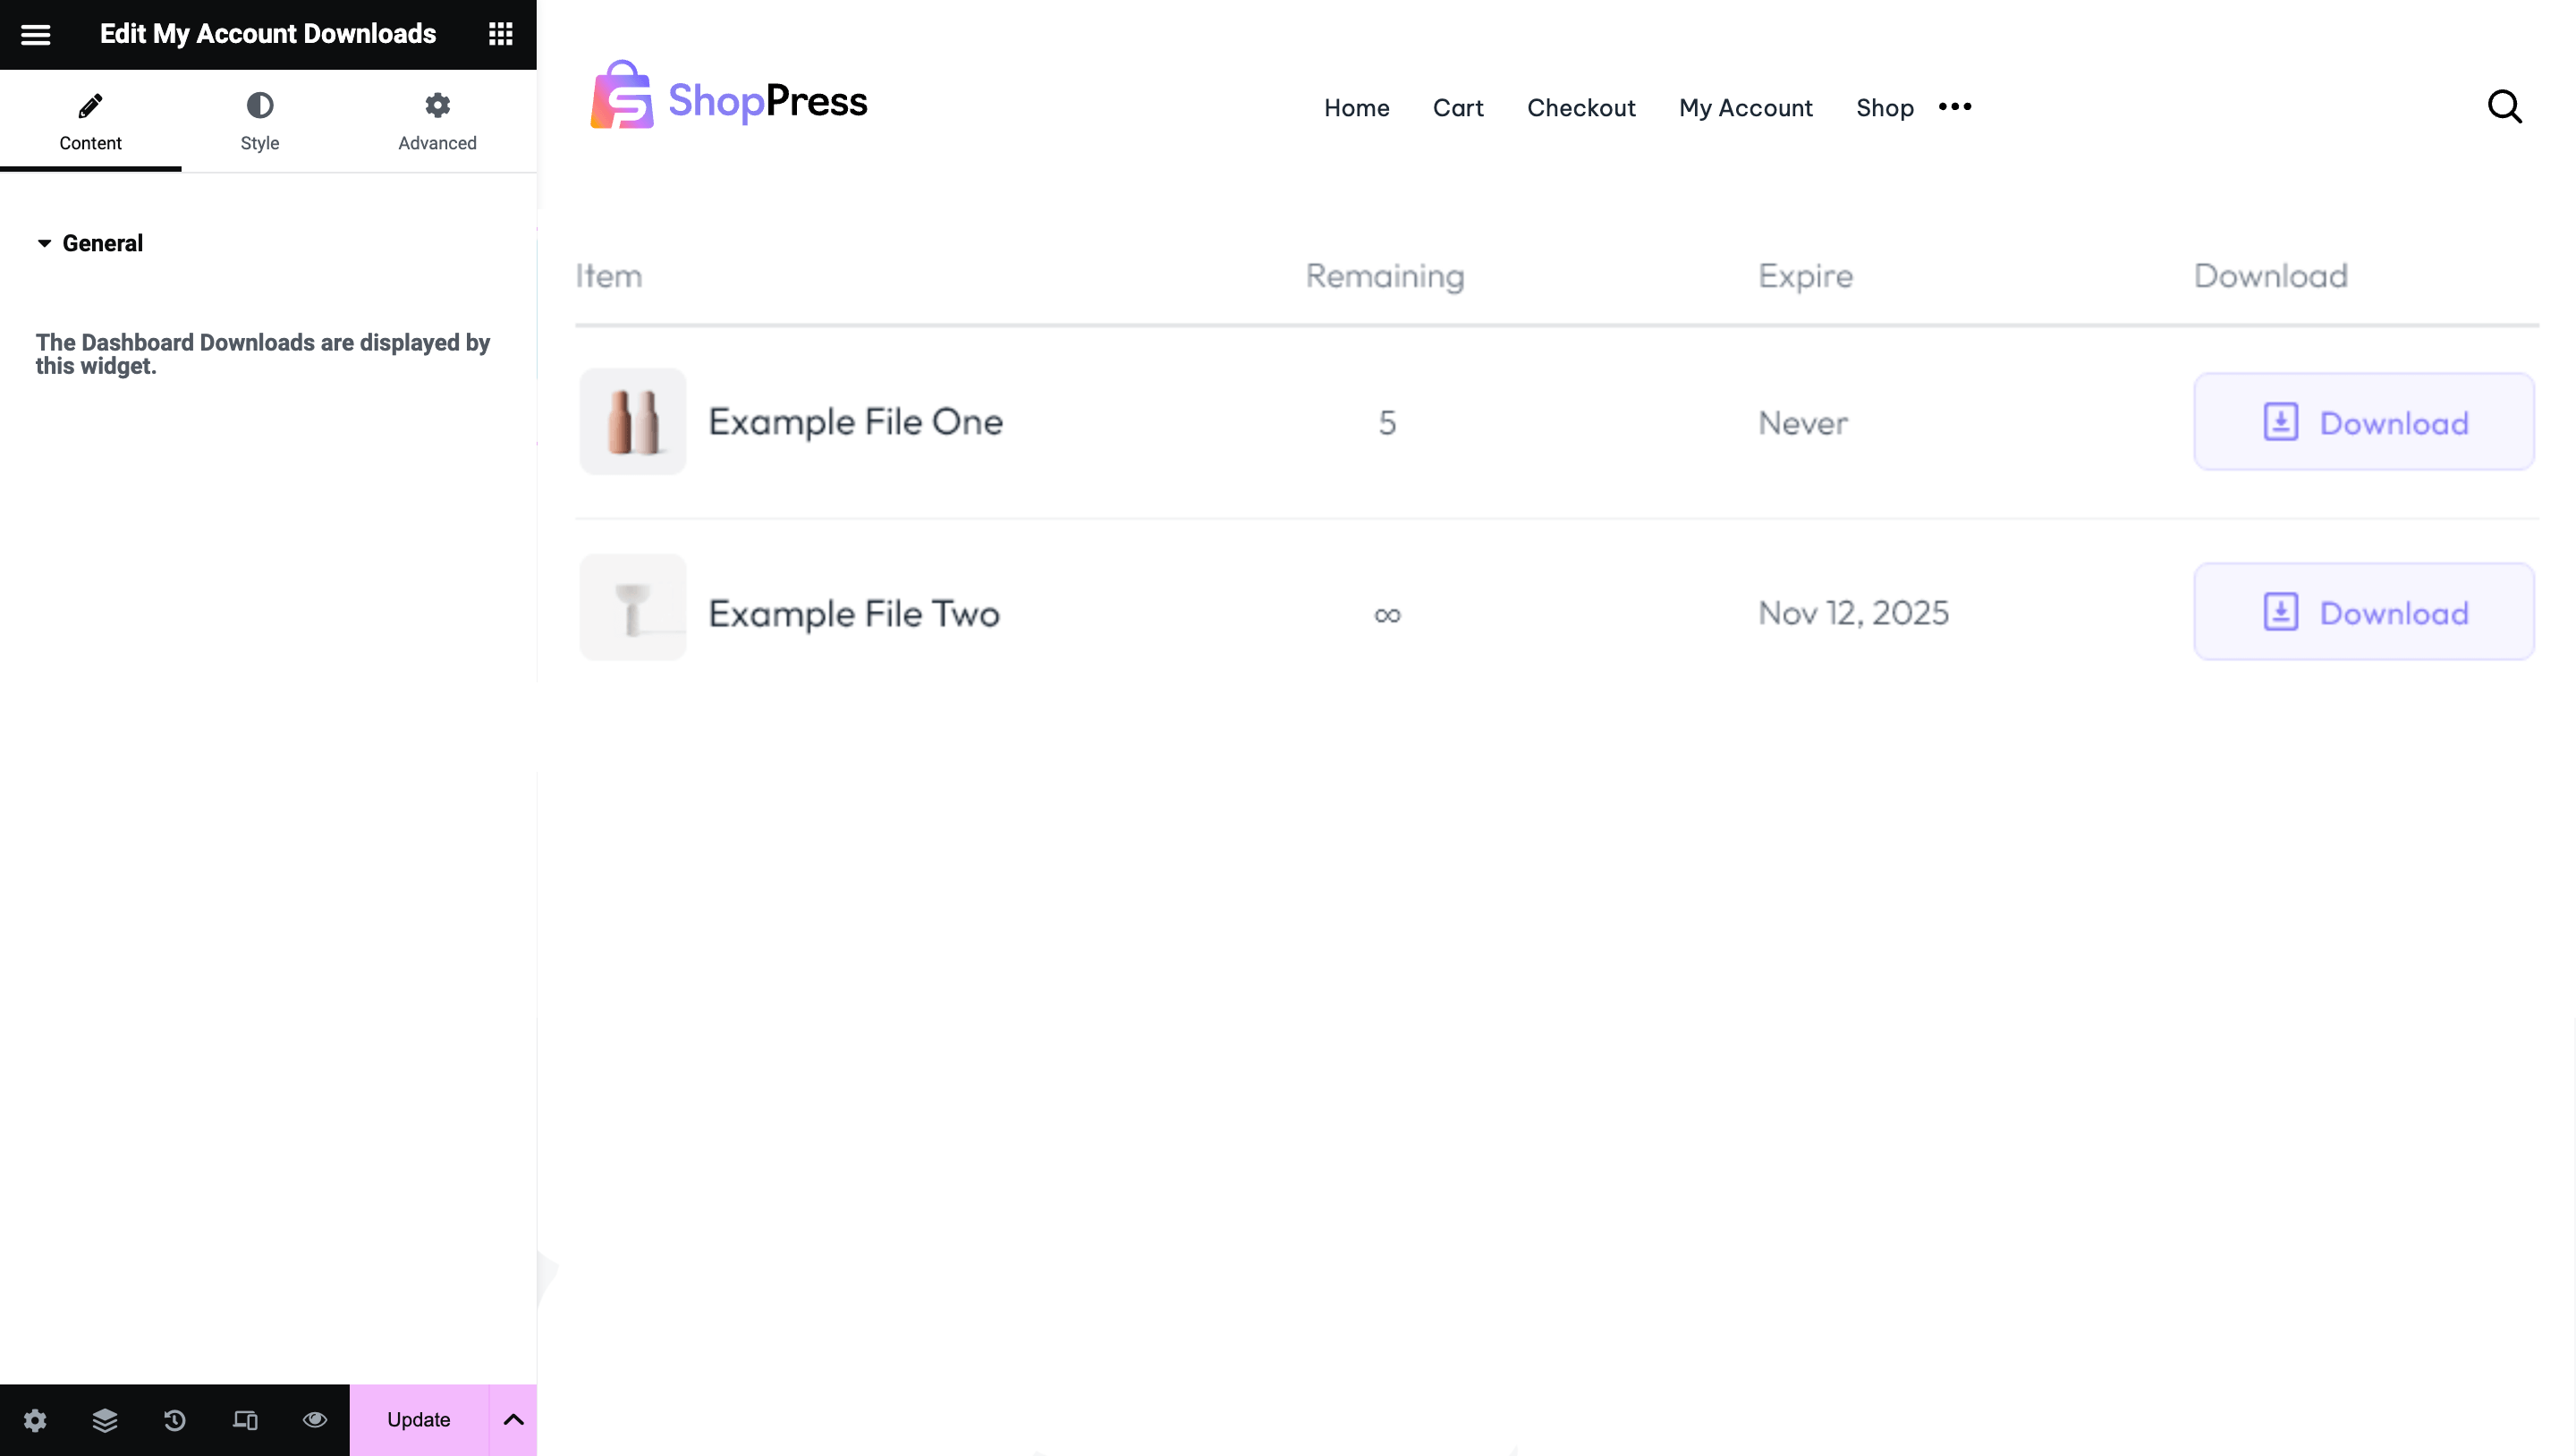
Create a WooCommerce Downloads Page
In order to edit the Downloads Page, click on the Add New Button to create a new template for the “Downloads” page, then hit the edit icon to enter the Elementor edit page and begin modifying.
Customizing Downloads Page
Then, you can edit the whole widget using the Styles tab, which has been provided in the widget (Box, Table, Table Head, Head Cells, etc.).