In this guide, we are going to talk about how you can use the WooCommerce Partial Payment feature.
This is a payment feature that enables you to receive part of the total price in an initial payment and then decide how to get the rest of it. For example, you can ask for 20% of the total price online and then take the rest in cash or through other payment methods.
How to Use WooCommerce Partial Payments
To activate WooCommerce Partial Payment, please follow these steps.
First, go to the WordPress dashboard, then head to ShopPress > Modules. Once there, enable the Partial Payment Module.
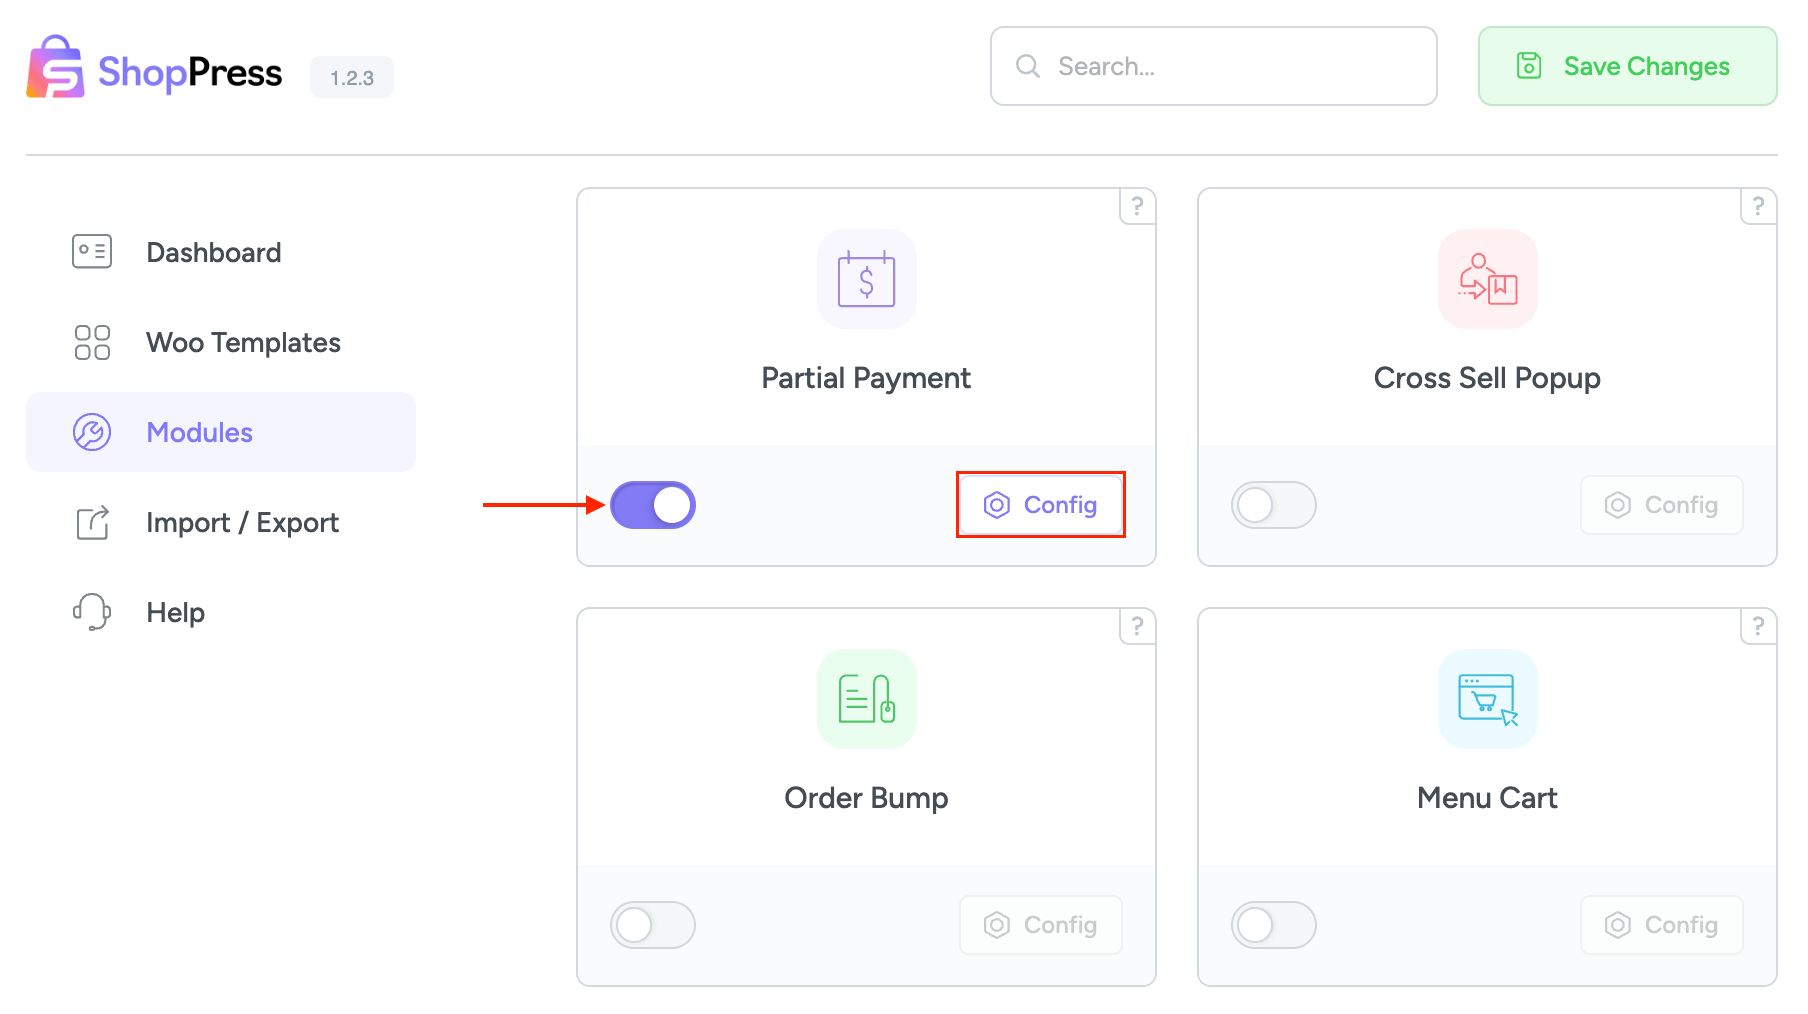
After that, you will see the Config button enabled, and you can click it to enter the module settings.
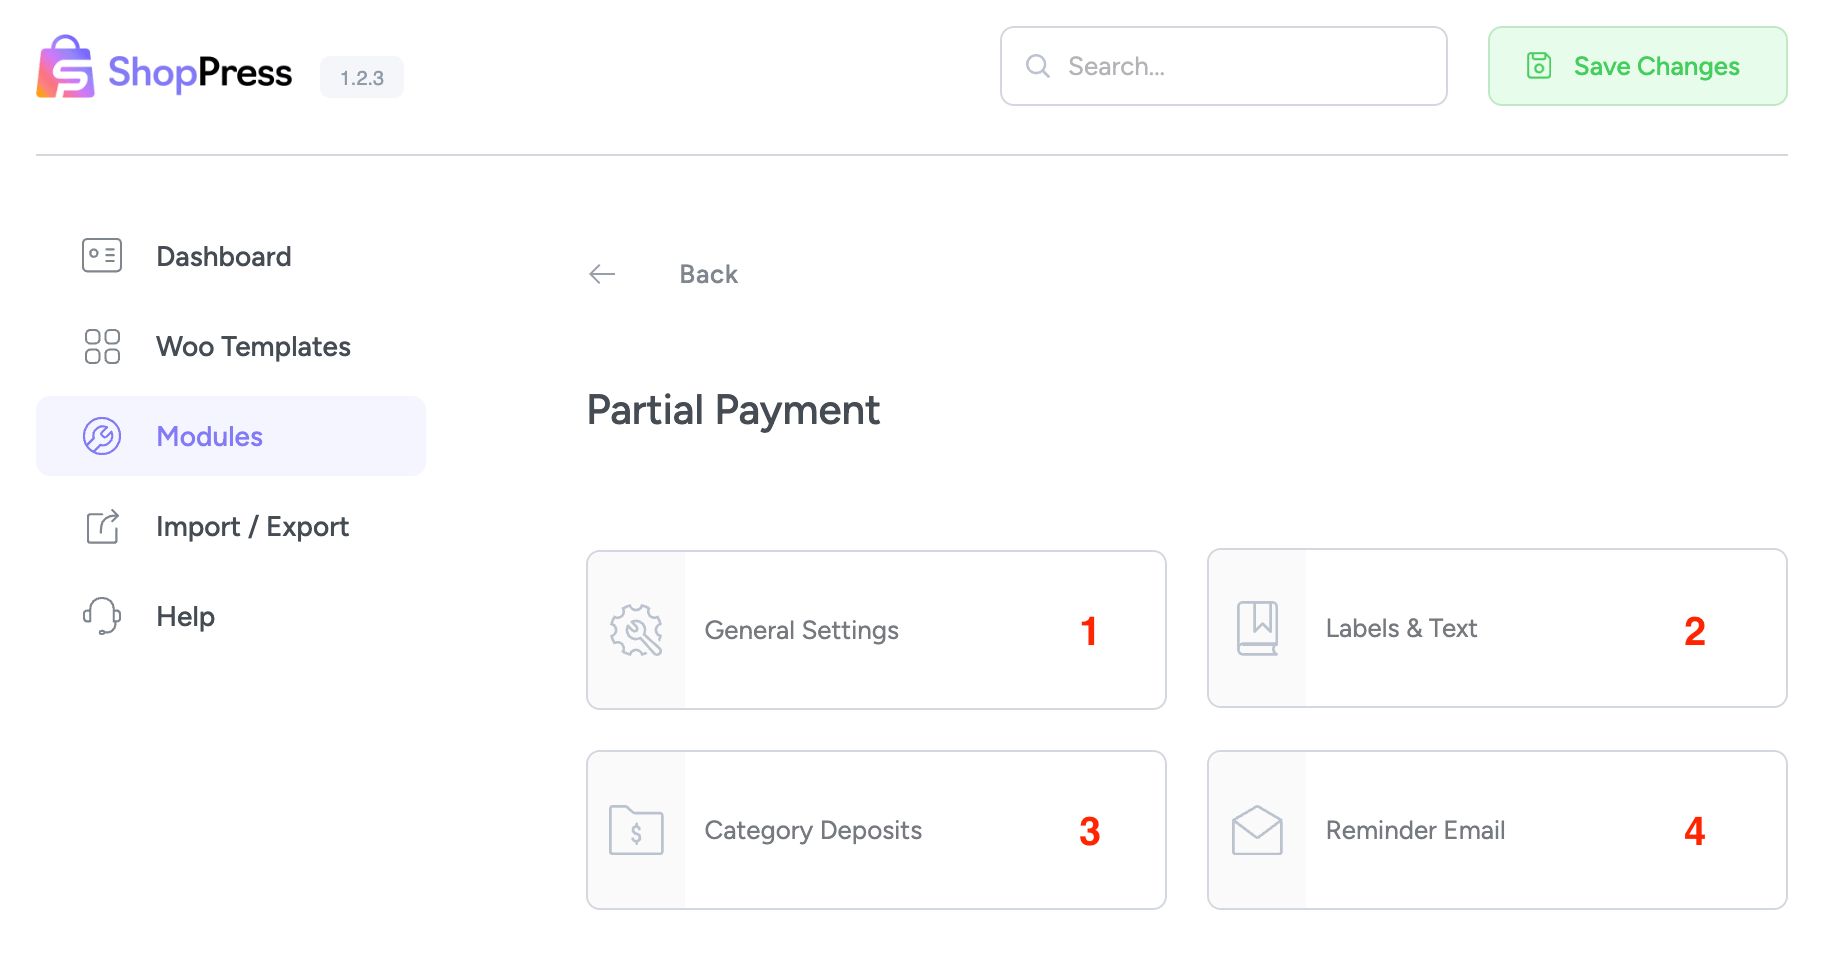
1- Partial Payment General Settings
General Settings include login requirements, deposits at the checkout page, selecting user roles, etc.
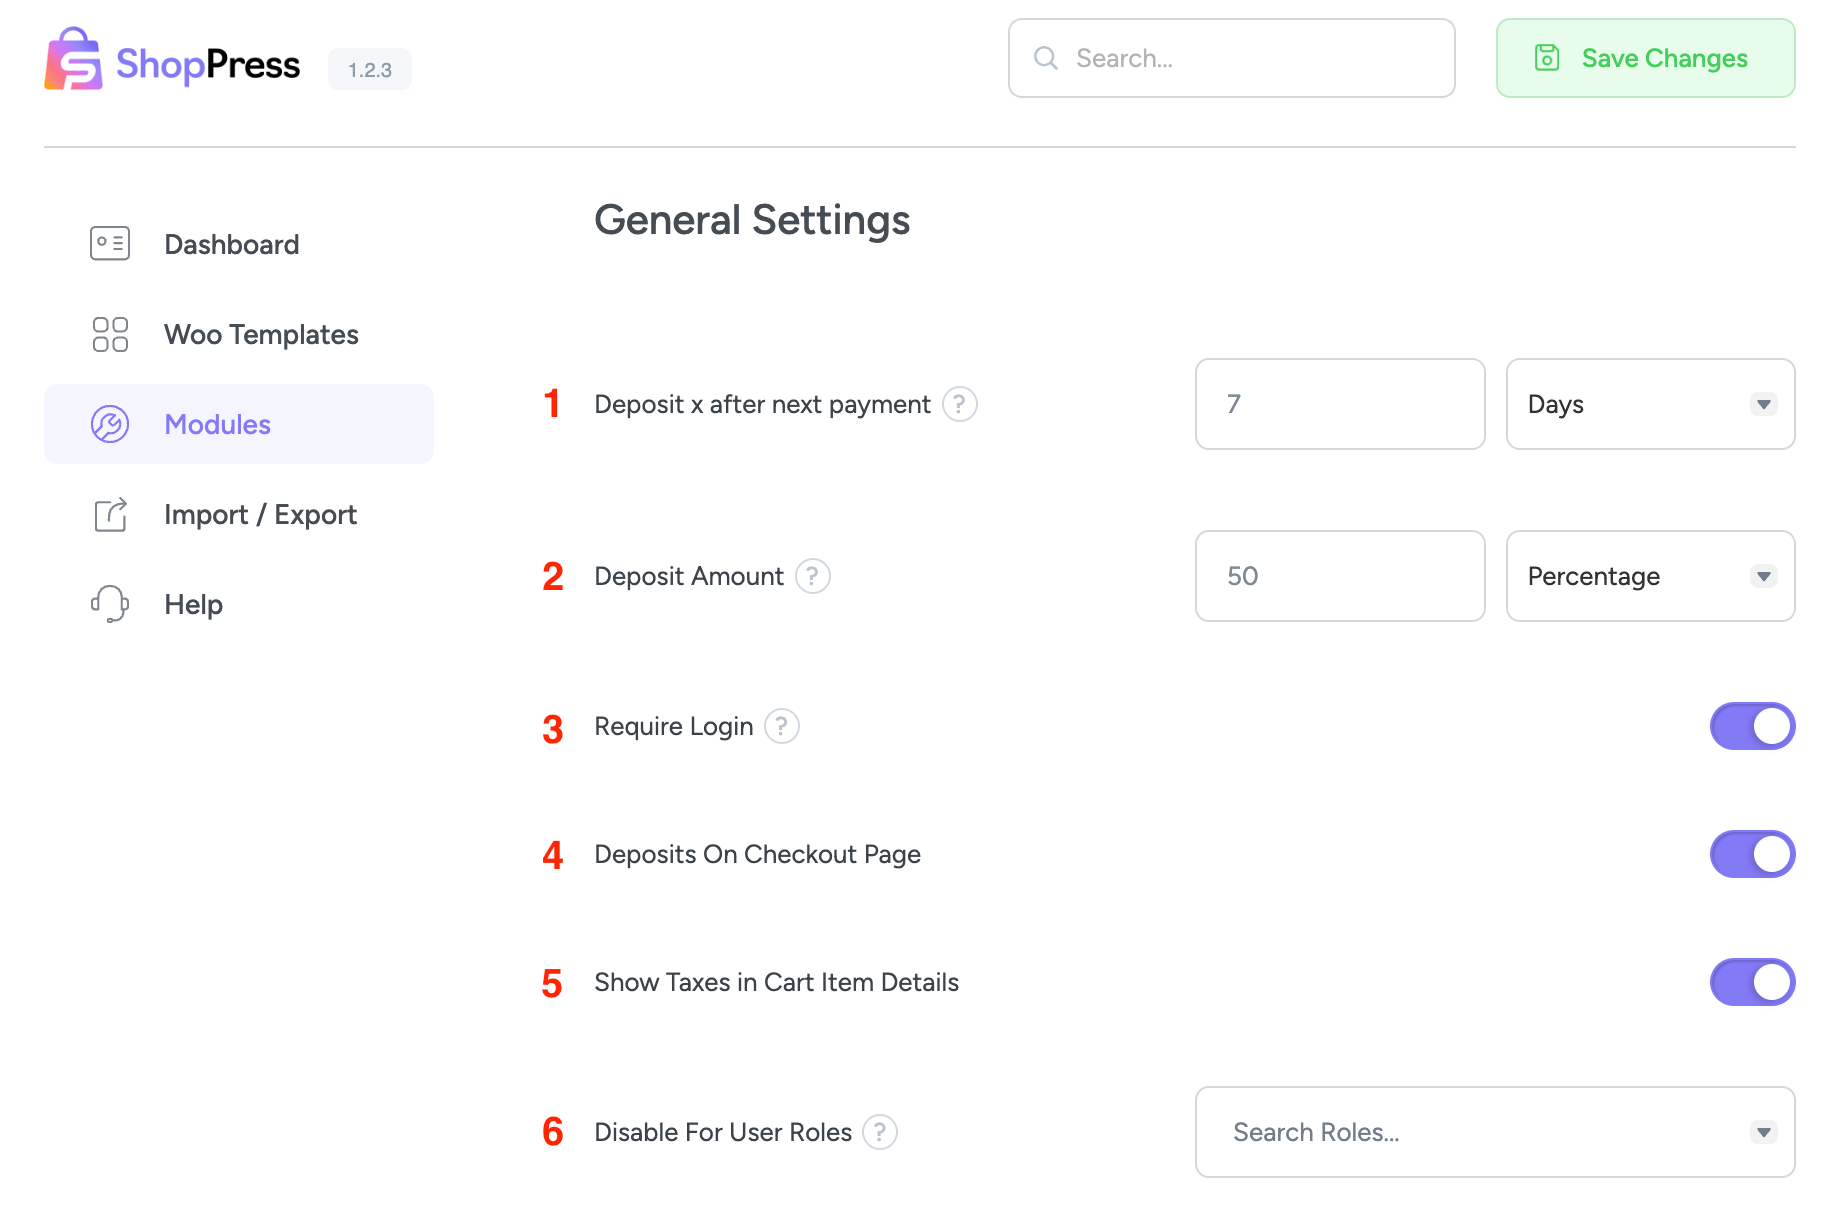
1- Deposit x after next payment
This option is for determining the time of the second payment.
2- Deposit Amount
Set the amount for the first deposit.
3- Require Login
This will enable the feature only for logged-in users.
4- Deposits On Checkout Page
Show the information pertaining to this module at the checkout page.
5- Show Taxes in Cart Item Details
This option is for showing tax-related details for this particular section in the cart.
6- Disable For User Roles
This option will disable partial payments for the selected user roles.
2- Labels and Text
This section gives you control over the labels and texts used for various options.
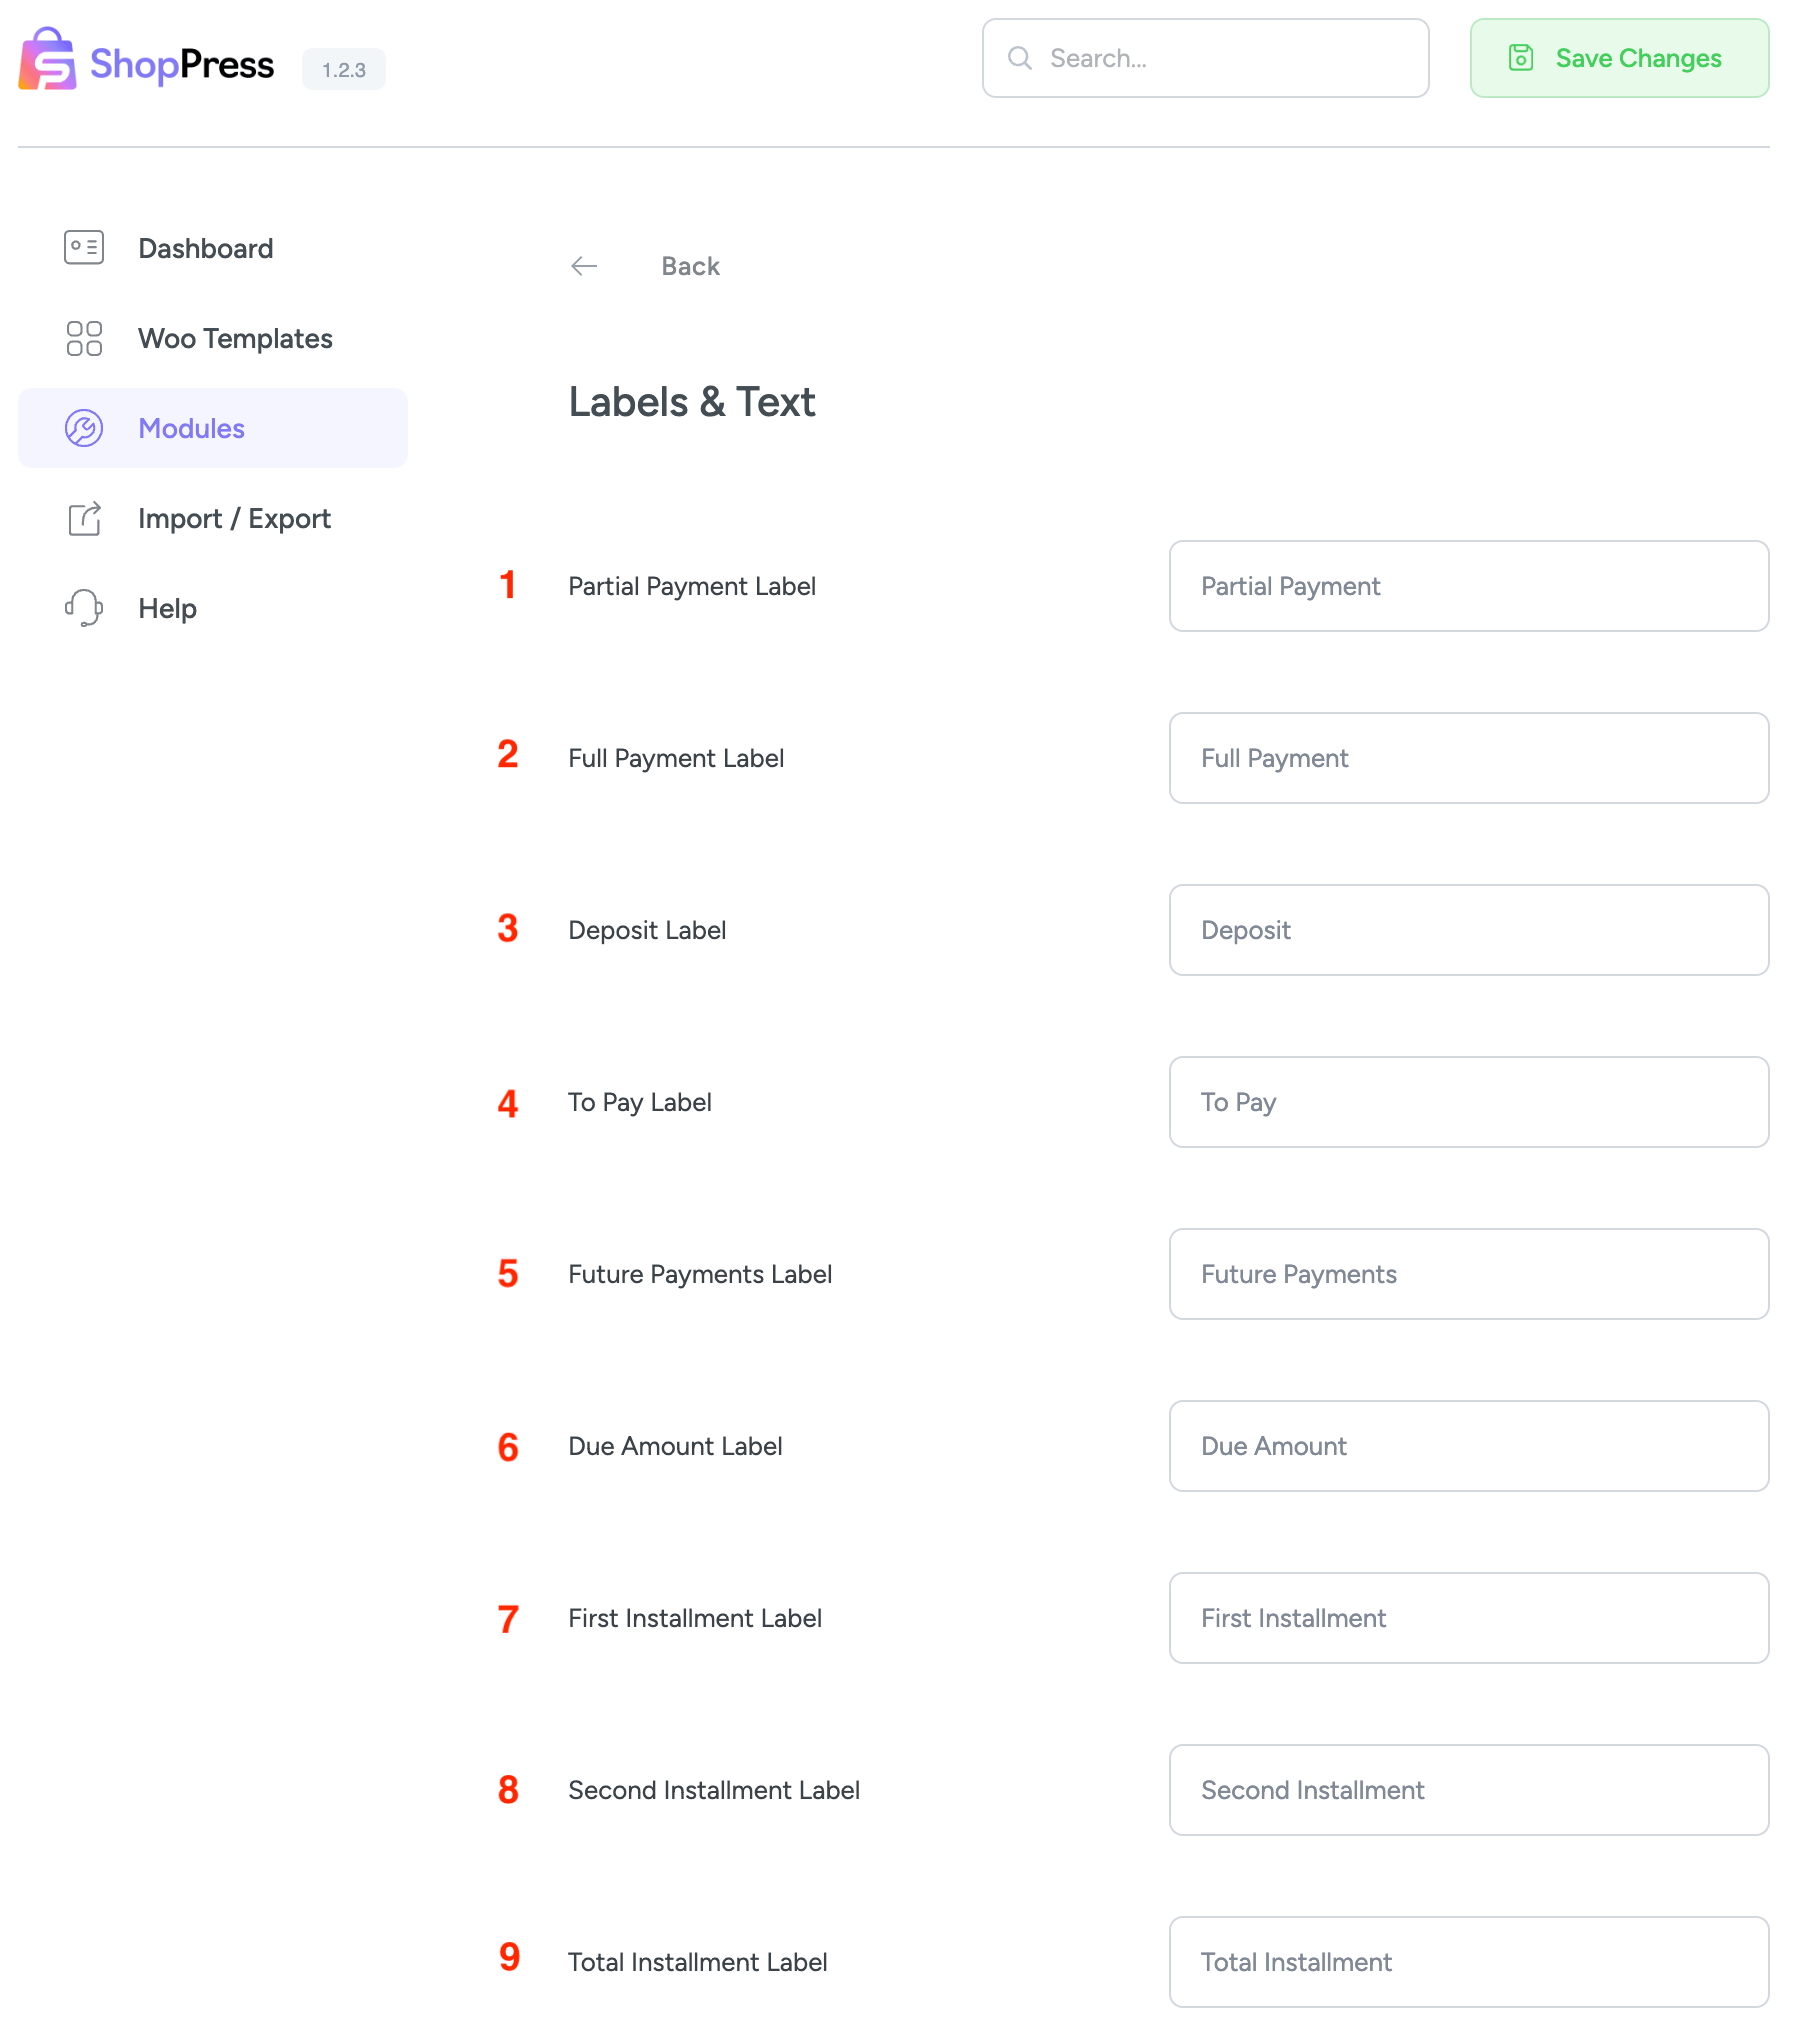
1- Partial Payment Label
Set the label for the partial payment.
2- Full Payment Label
Set the label for the total price.
3- Deposit Label
Set the label for the deposit.
4- To Pay Lapel
Set the label for the To Pay button.
5- Future Payments
Set the label for the future payment.
6- Due Amount
Set the label for the due amount.
7- First Installment
Set the label for the first payment.
8- Second Installment
Set the label for the second payment.
9- Total Installment
Set the payment for the total installment.
3- Category Deposits
Here, you can set deposits based on various categories. To do this, click on Add Item and enter the required information in the open window.
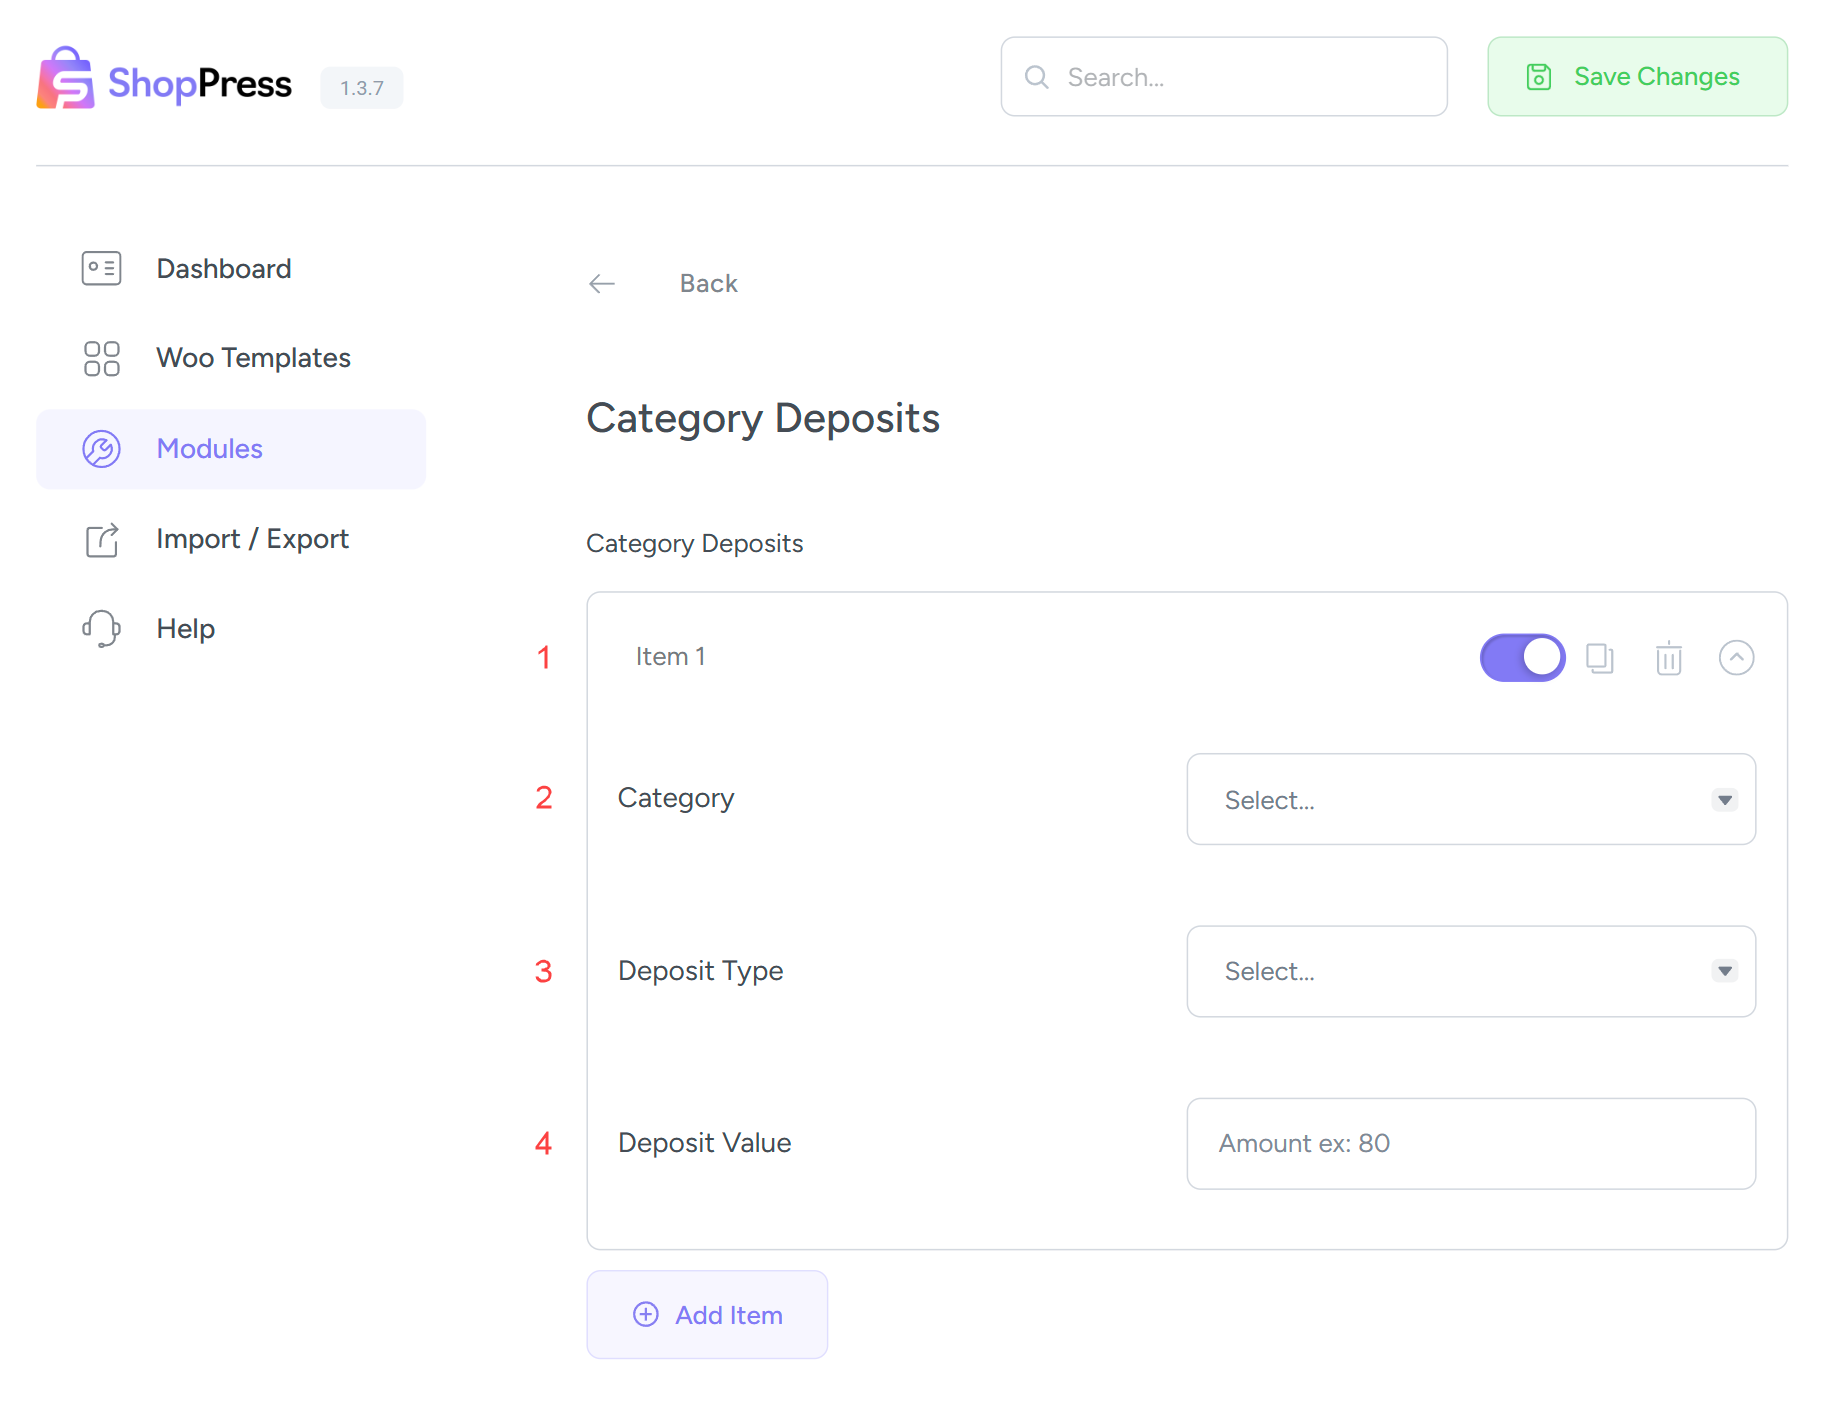
1- Item
Item name or tagline.
2- Category
The category of the product.
3- Deposit Type
Set the type of the deposit, whether absolute or percentage-based.
4- Deposit Value
The value of the deposit.
4- Reminder Email
Here, you can manage the settings for the payment reminder email and set the time for each email to be sent.
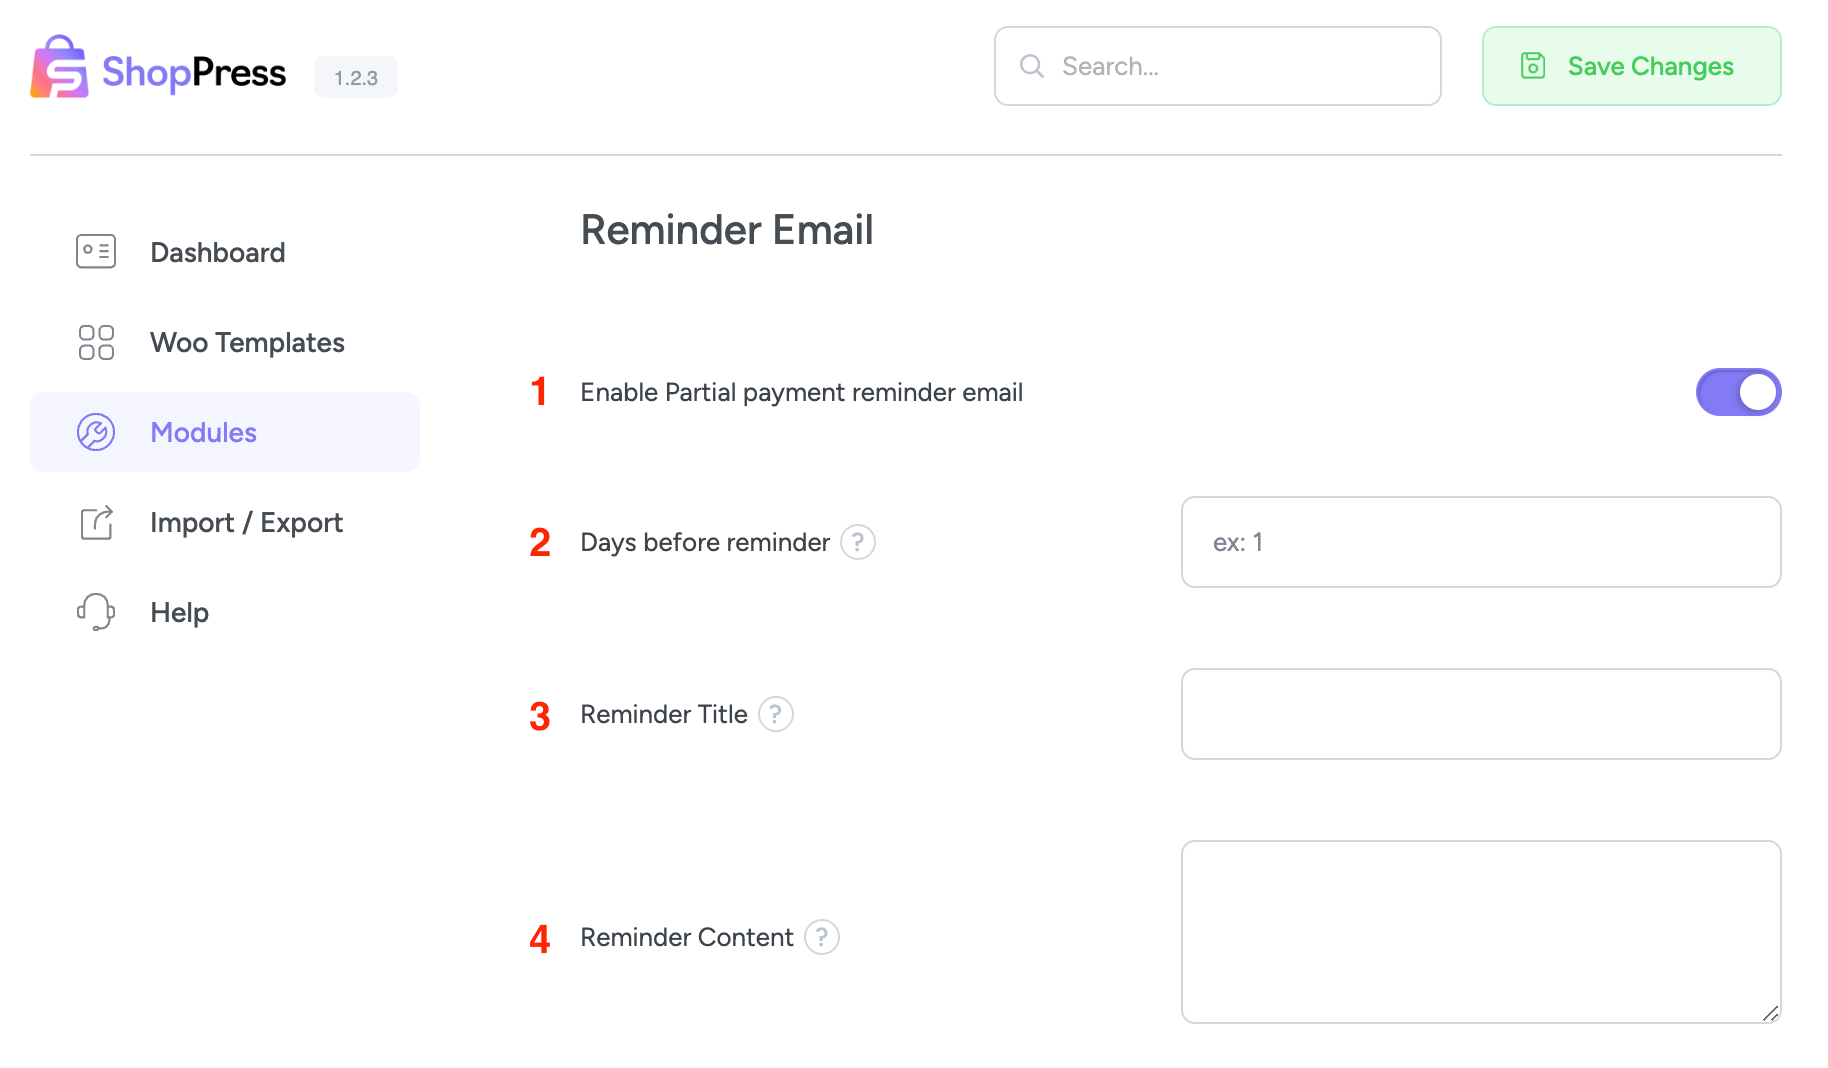
1- Enable Partial payment reminder email
Disable or enable the feature.
2- Days before reminder
Manage the number of days before the due date to send the email.
3- Reminder Title
The title of the reminder email.
4- Reminder Content
The body of the reminder email.
Final words
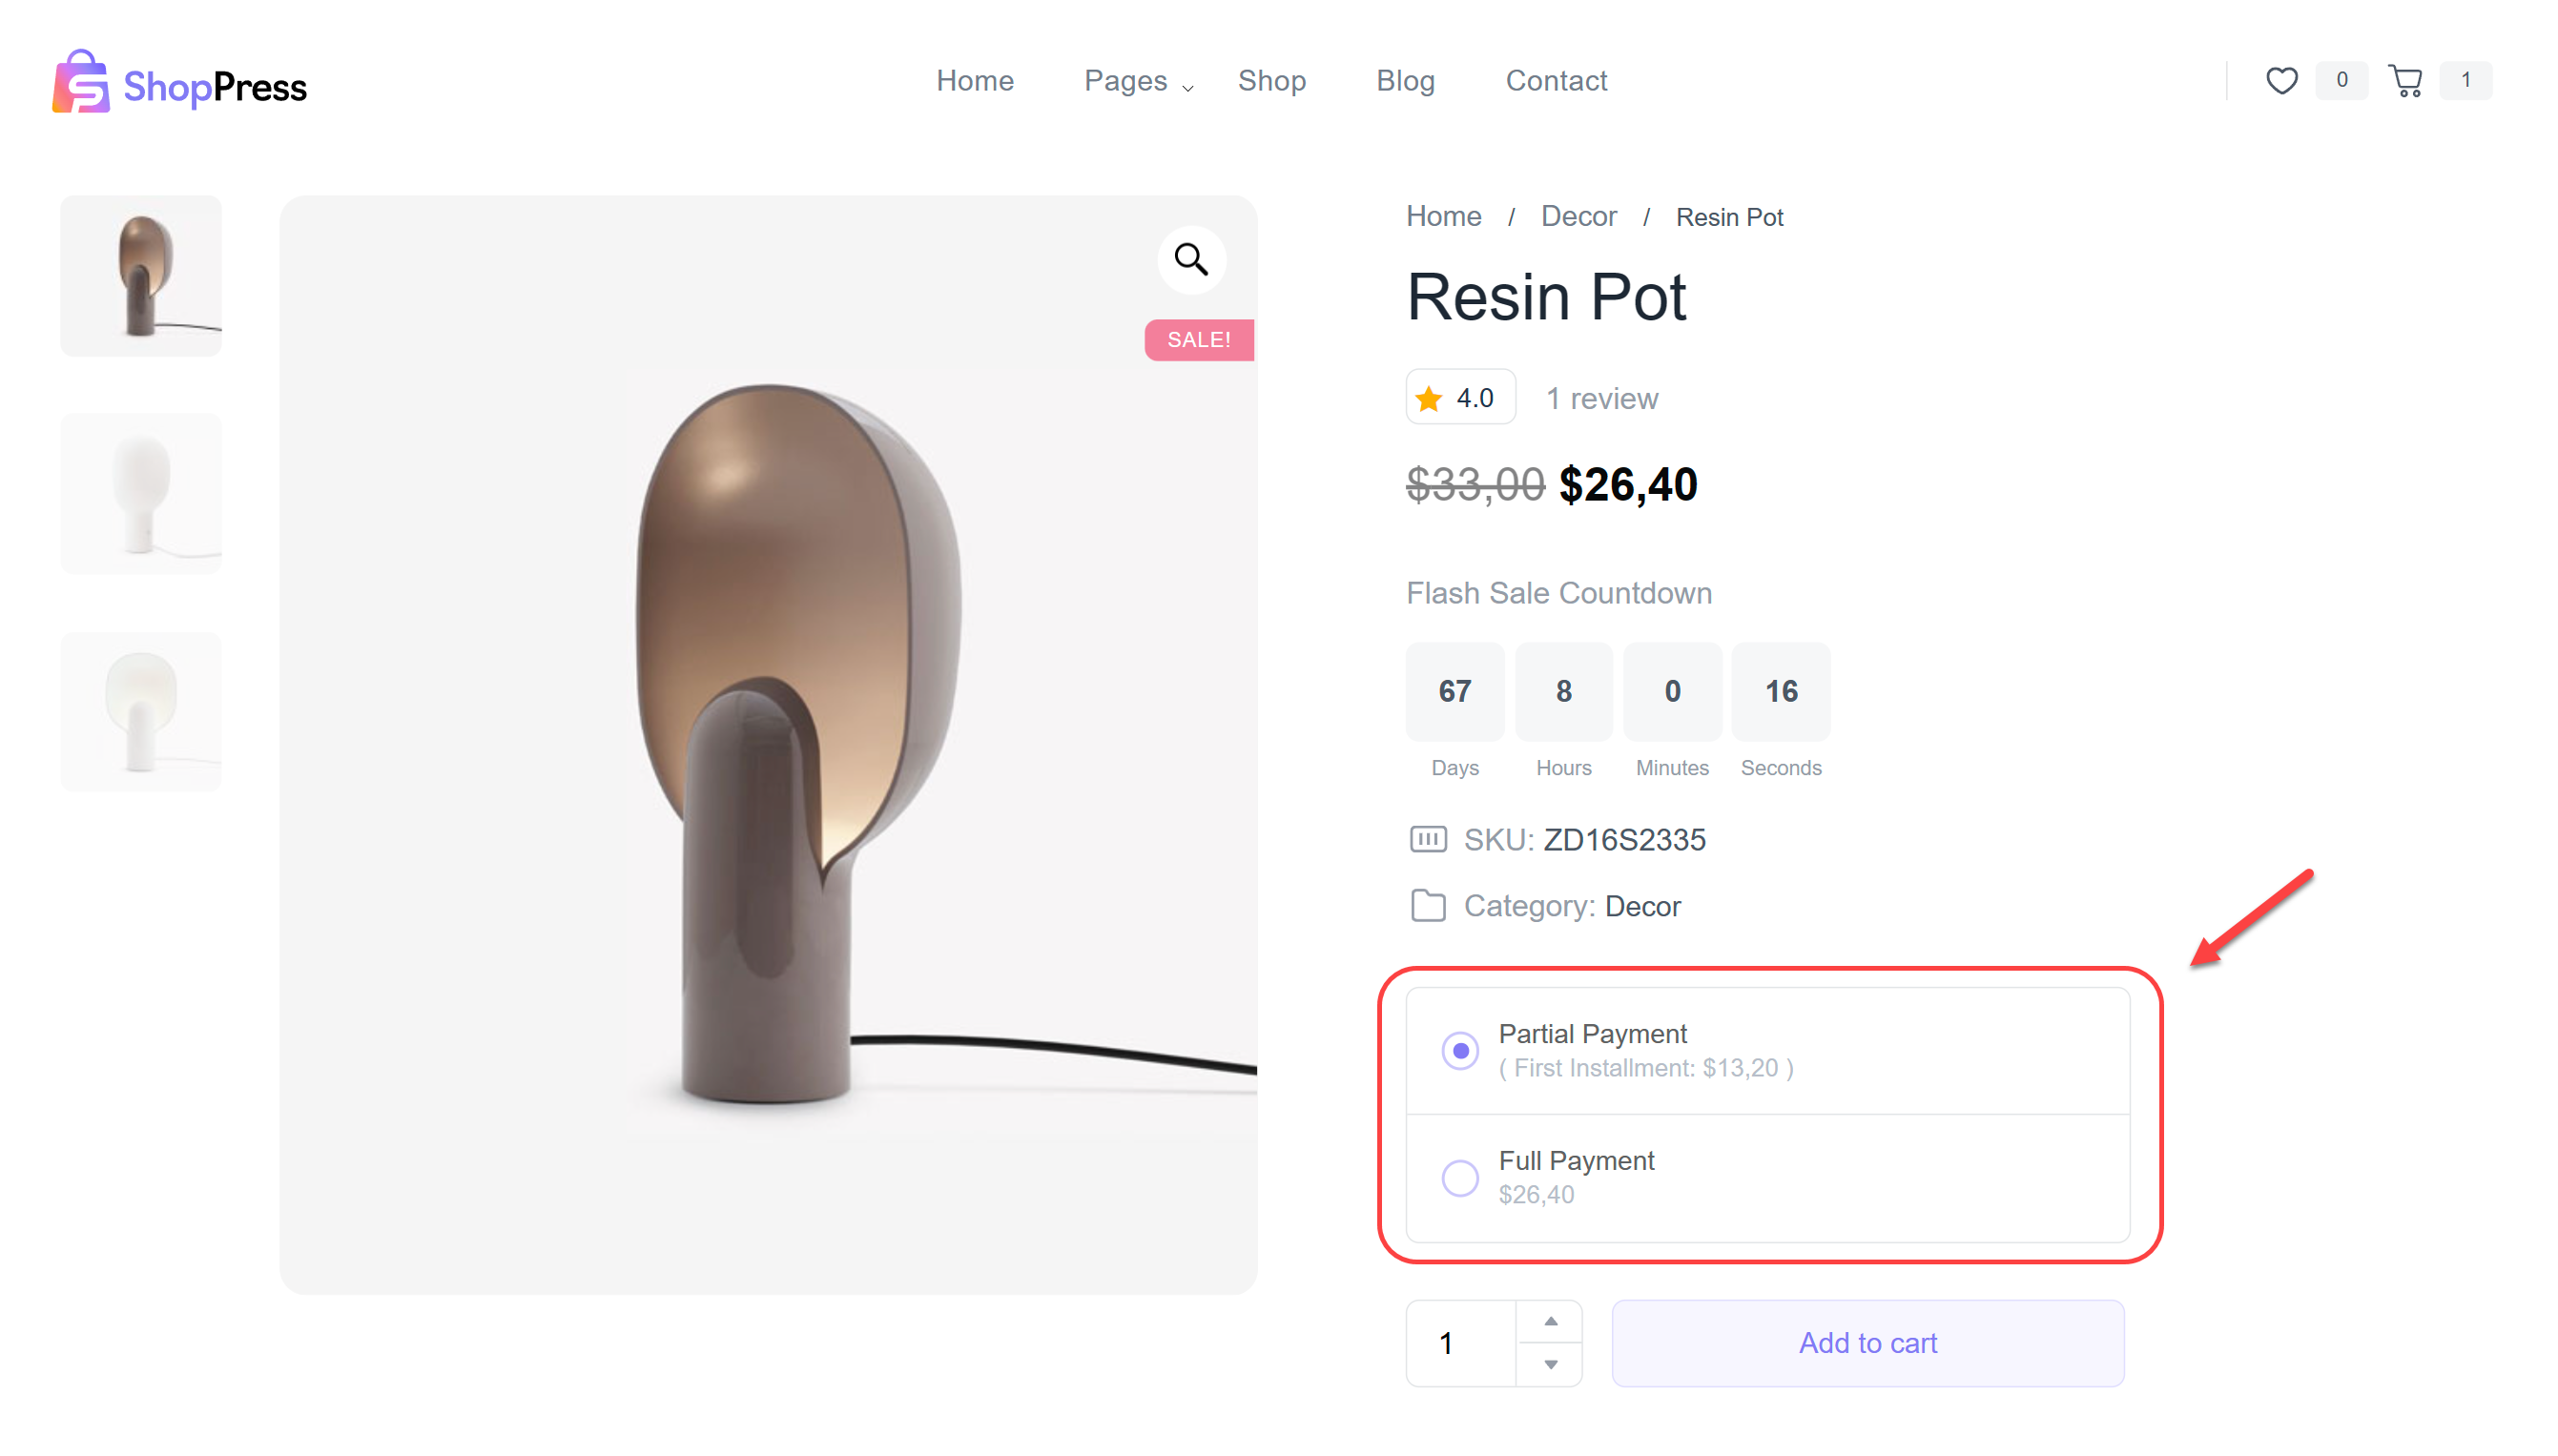
Once you’ve set up the Partial Payment module, you’ll notice a new tab in the Product data section when creating or editing a product. Simply head over to it and activate it to start using the Partial Payment module.
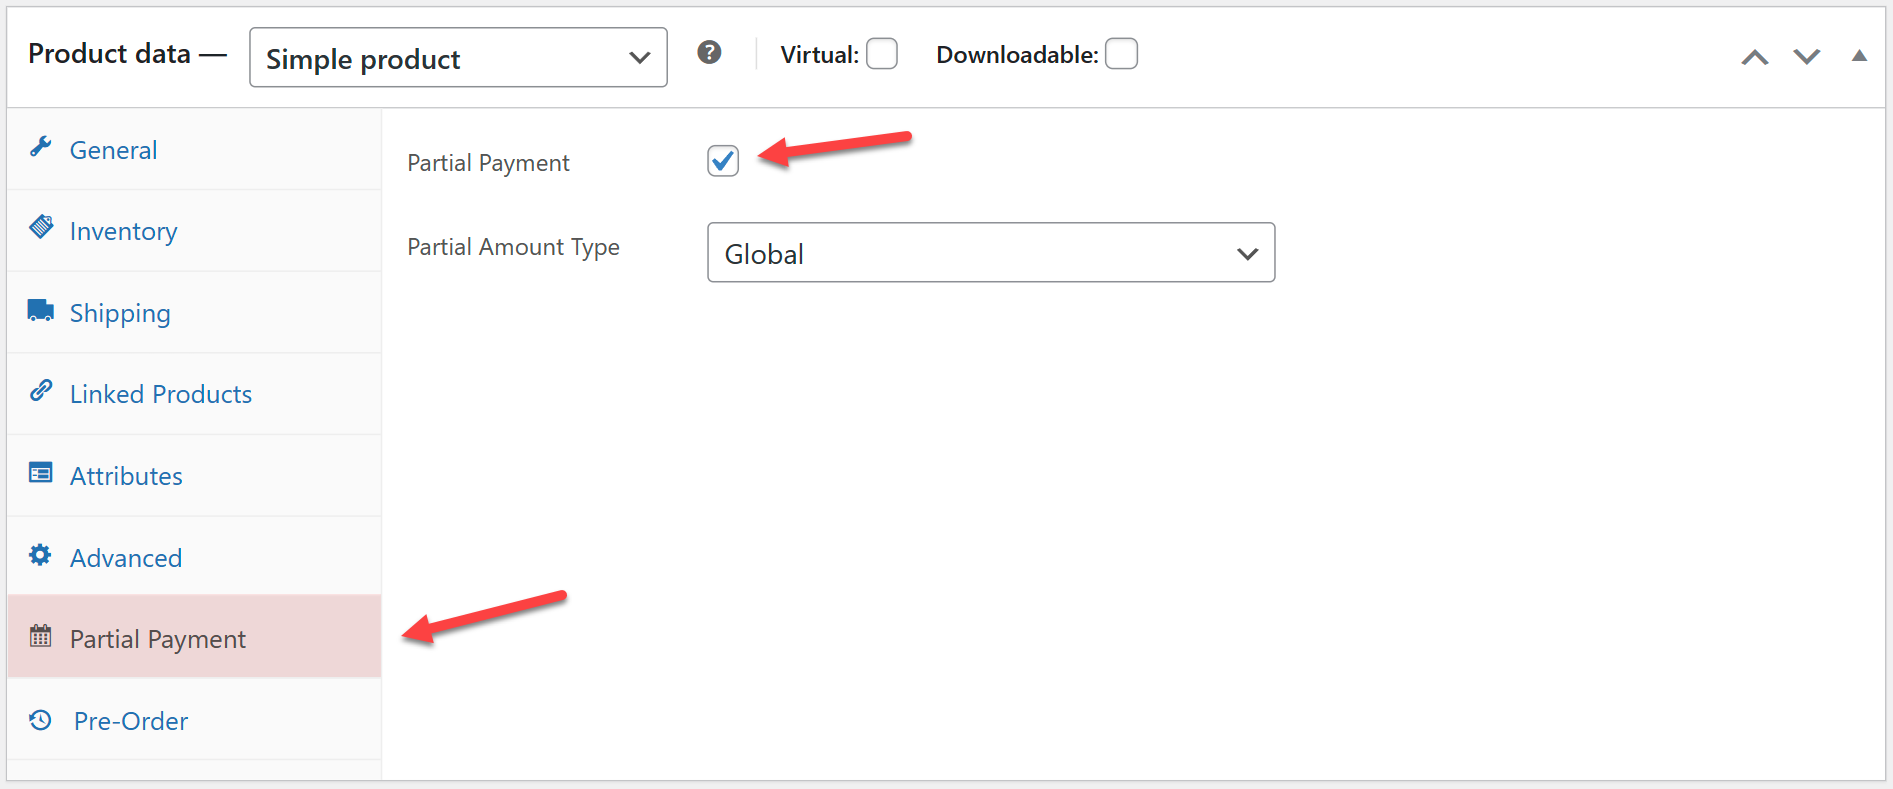
Here’s an example of how this module appears in action.