In the following article, we will guide you through the steps of creating a WooCommerce Order Bump, providing you with a clear and concise overview of the process.
Attention to detail is a key factor that distinguishes your online store from others. A successful online store focuses on accurately estimating customers’ needs on every webpage. This approach is crucial for creating a unique and prosperous e-commerce website.
One of the key factors that can significantly impact our sales performance is the implementation of the Order Bump module. With the help of Order Bump for WooCommerce, you can improve the overall Average Order Value of your website by displaying supplementary offers to your customers right before they checkout. This feature allows you to create tempting offers that complement the customer’s current purchase and present them in such a way that they won’t be able to resist. By providing these last-minute offers, you can increase the chances of your customers buying more items, making your website more profitable.
Enabling WooCommerce Order Bump
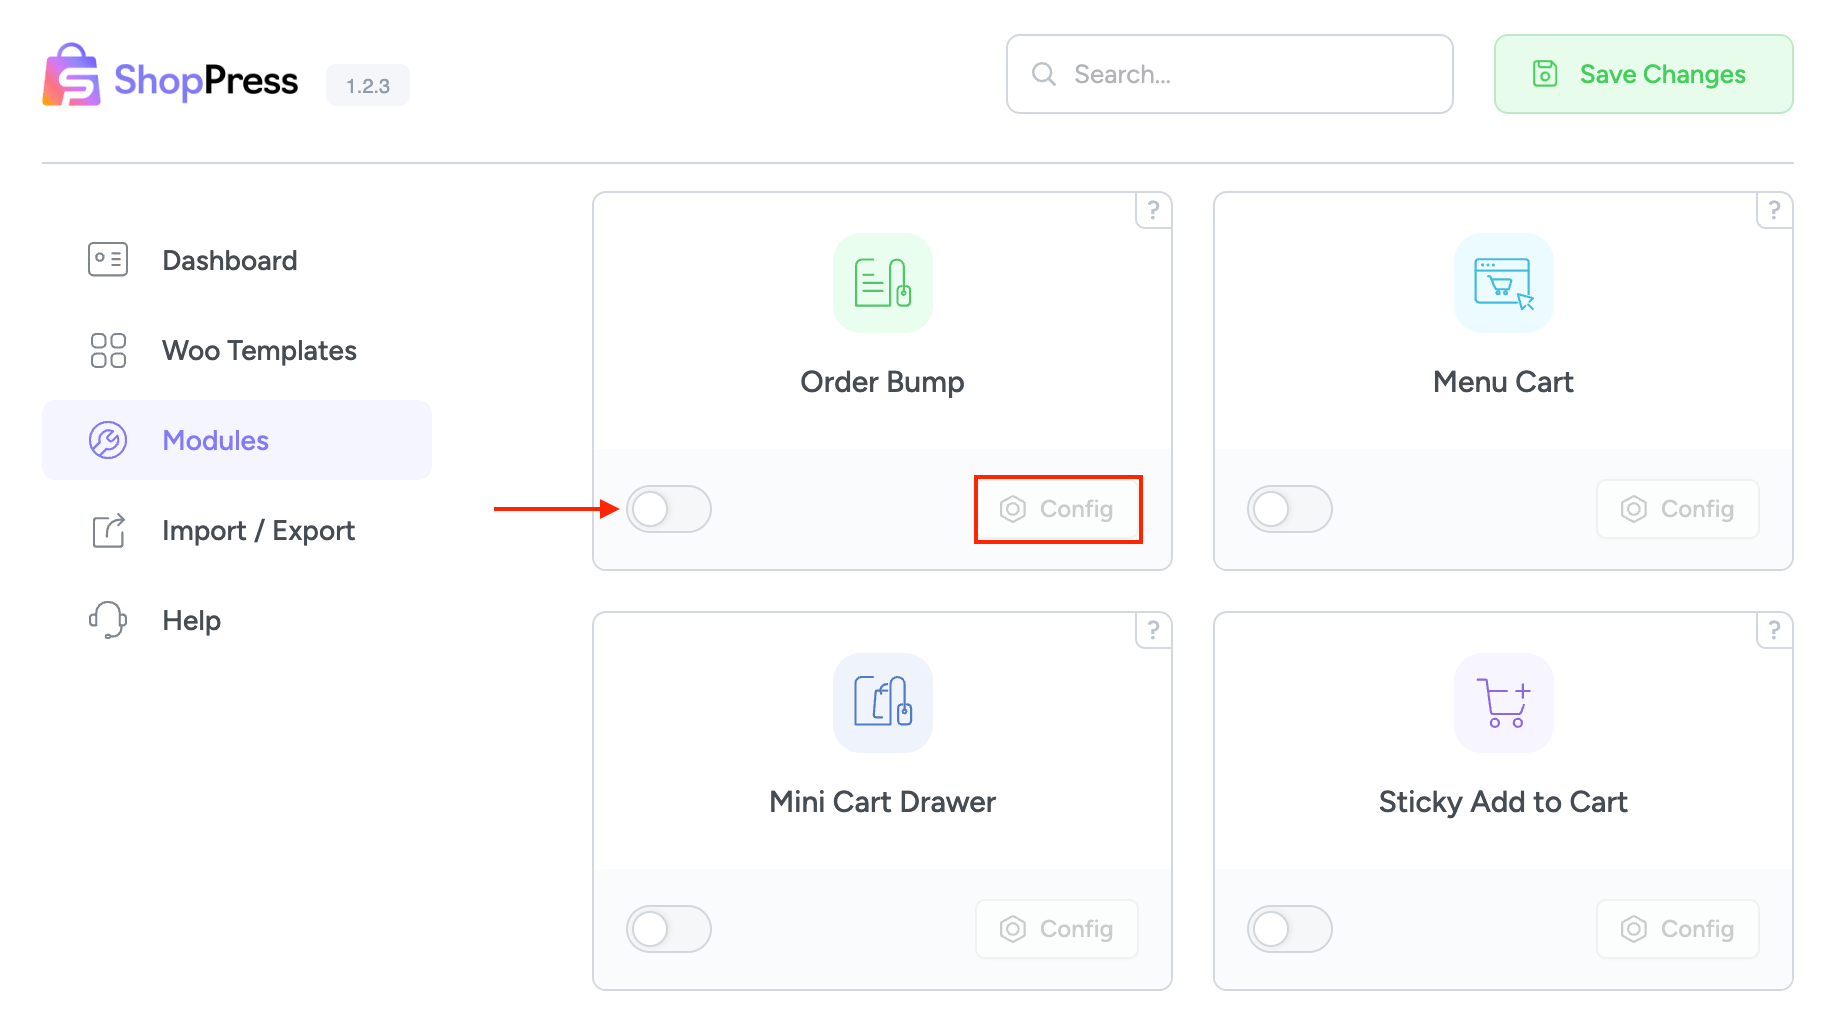
In order to create a WooCommerce Order Bump, please head over to ShopPress > Modules > Order Bump, and after enabling the module, click on the Config button.
This page provides you with the option to create Order Bumps for multiple duct products. Additionally, it allows you to specify the conditions under which the Order Bumps will be displayed to customers. You can customize the Order Bump display based on your preferences and the needs of your business.
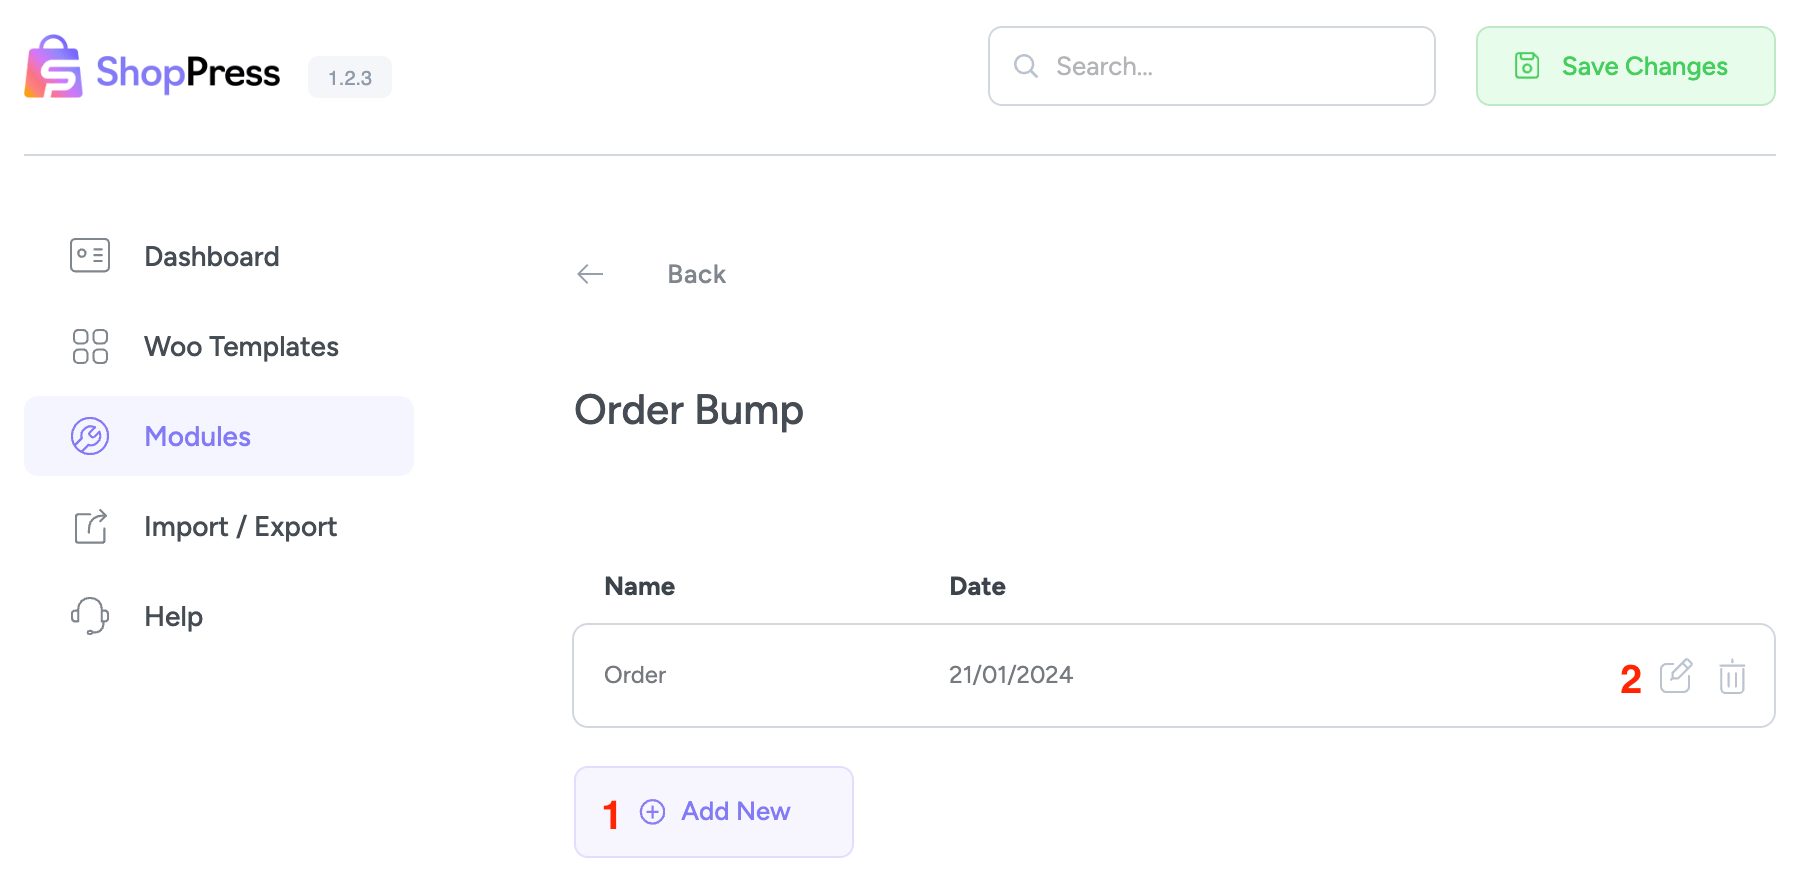
To create a new Order Bump, please navigate to the Add New Button and initiate the process. Once the creation process has begun, proceed to the edit icon to start creating your Order Bump.
WooCommerce Order Bump Settings
After clicking the edit icon, you will be redirected to the order bump creation page.
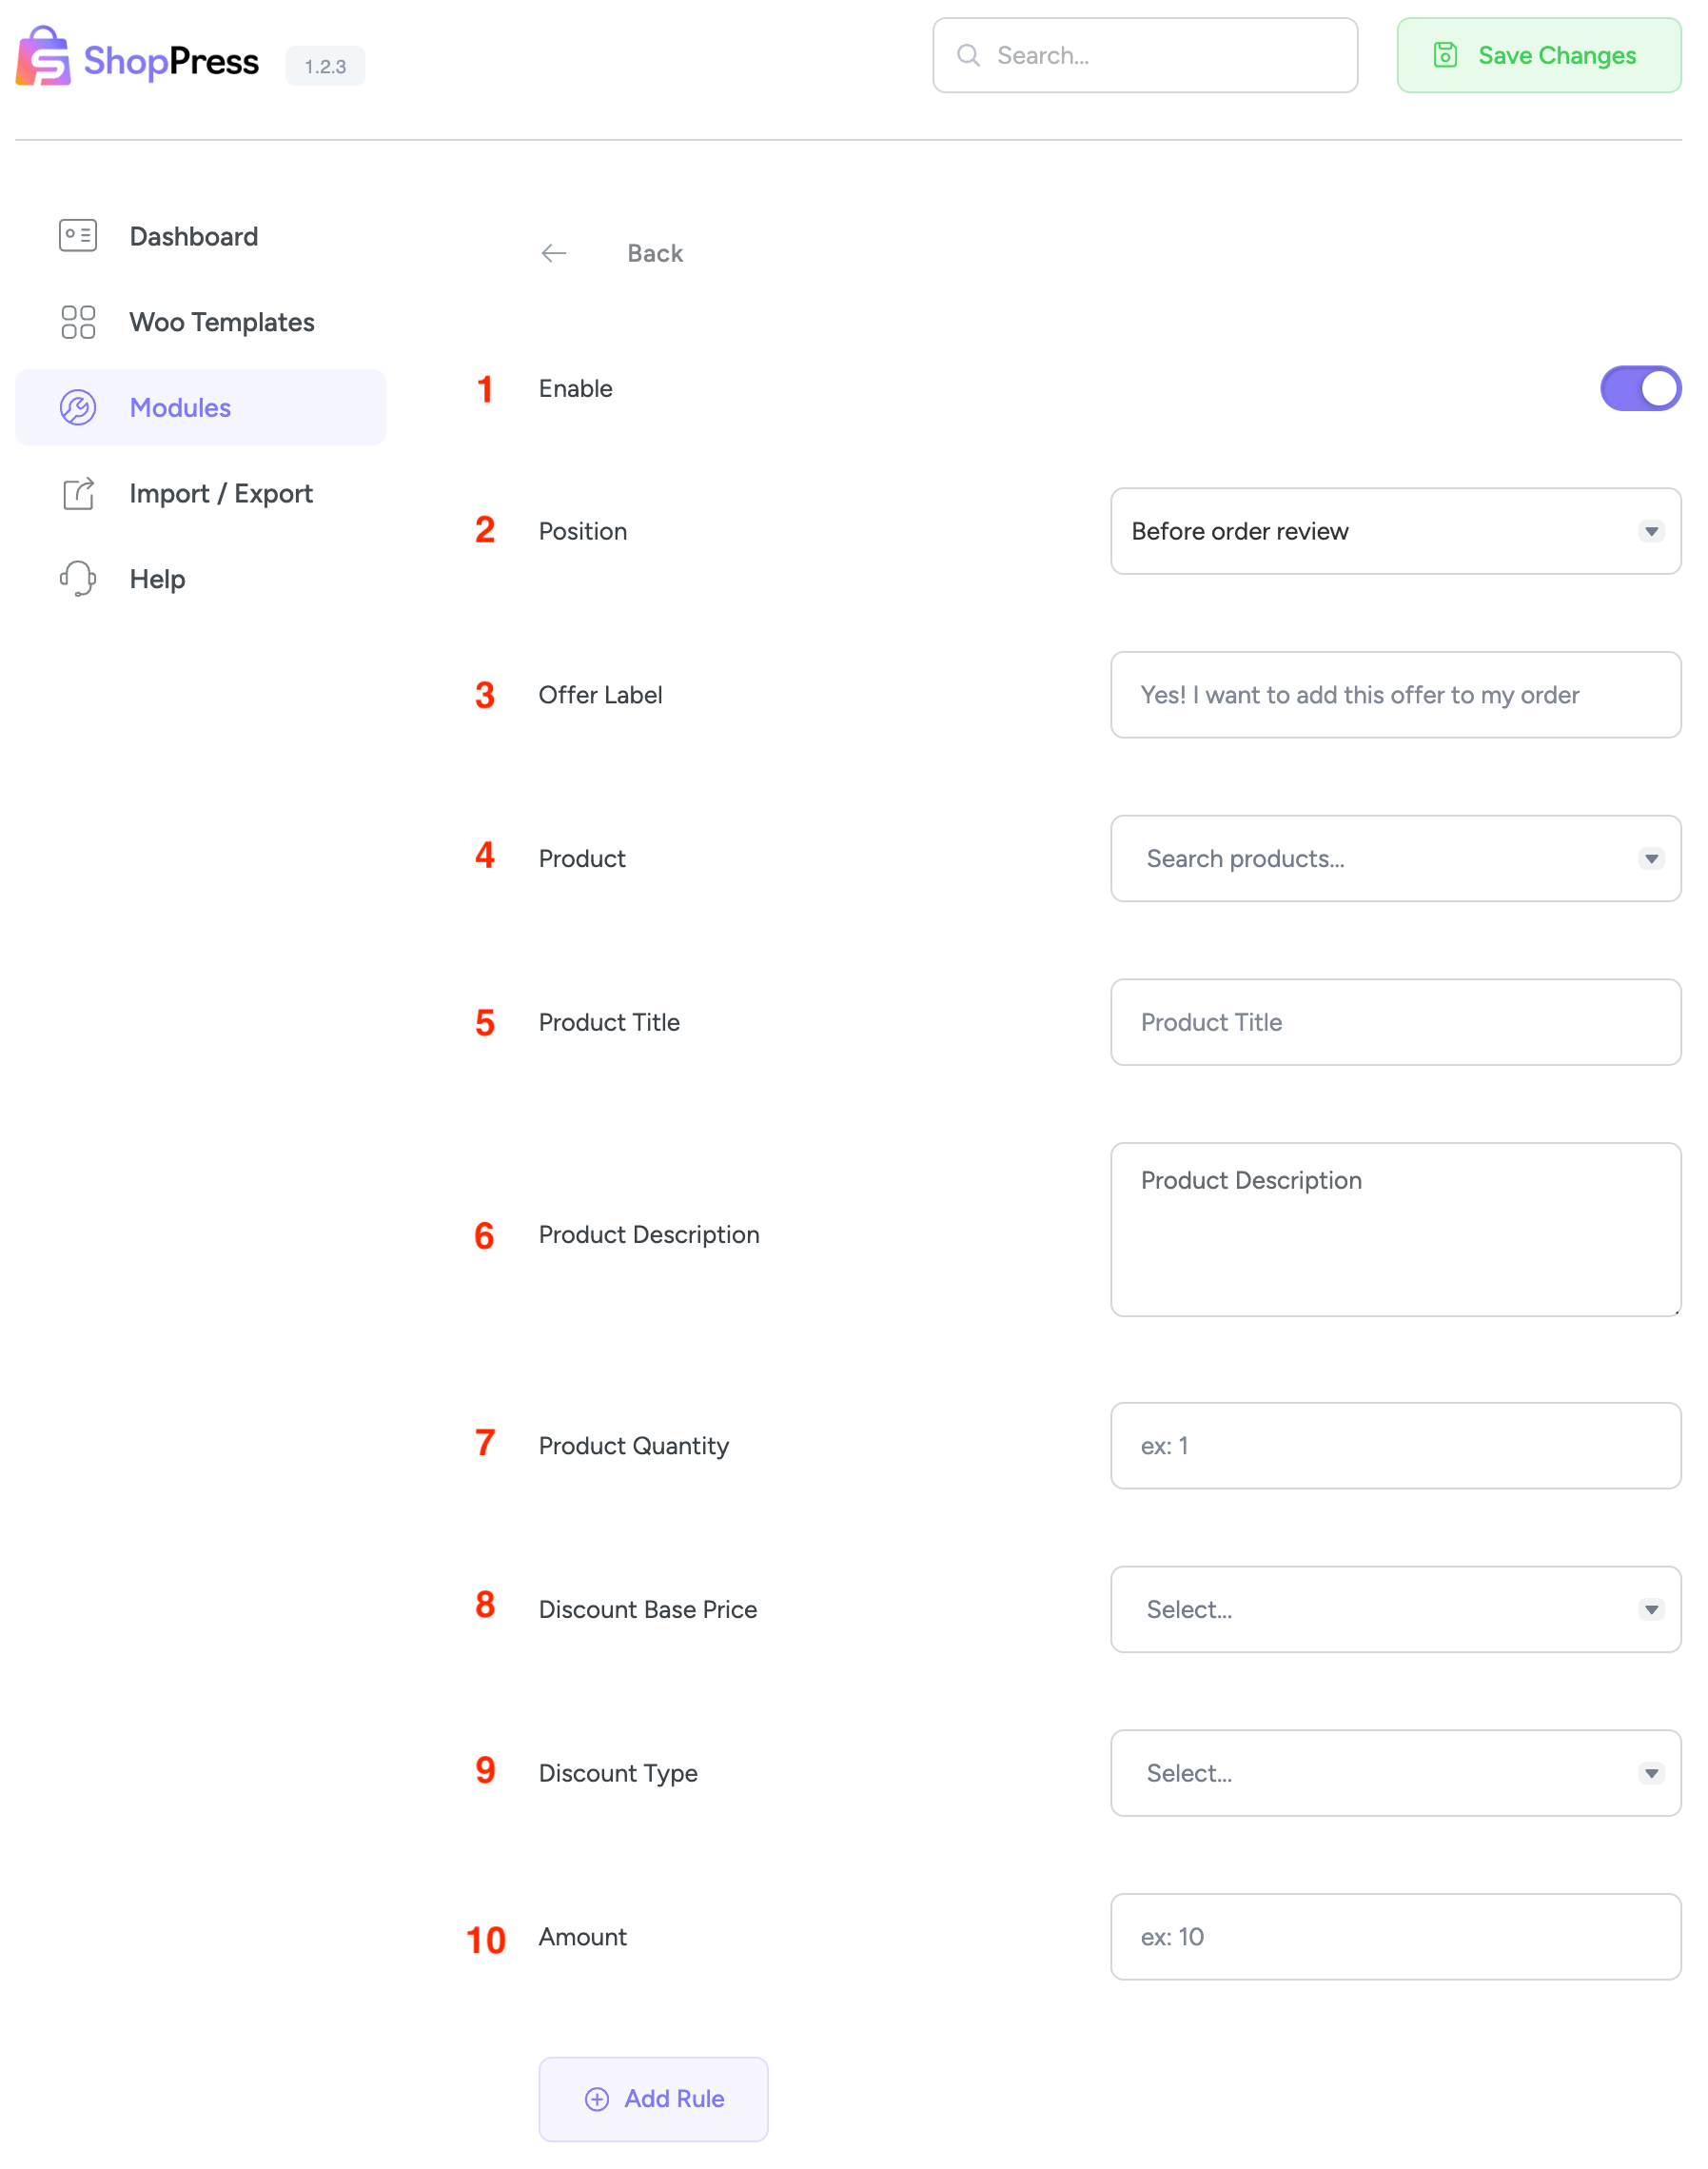
1- Enable: This will enable the created order bump.
2- Position: Indicates where to display the order bump.
3- Offer Label: Displays a label for your offer.
4- Product: Choose your product from the drop-down list.
5- Product Title: You can define a title for your order bump to override the main product title.
6- Product Description: You can write a description for your order bump here.
7- Product Quantity: It is possible to identify the quantity of products that you want to sell as an order bump.
8- Discount Base Price: This option sets the order bump price to Regular or Sale.
9- Duscount Type: Here you can choose the discount type that you want to apply to the order bump.
10- Amount: This option, indicates the amount of the discount type that you have chosen before.
Rules: This option allows you to apply an order bump to specific customer roles, cart totals, and more.
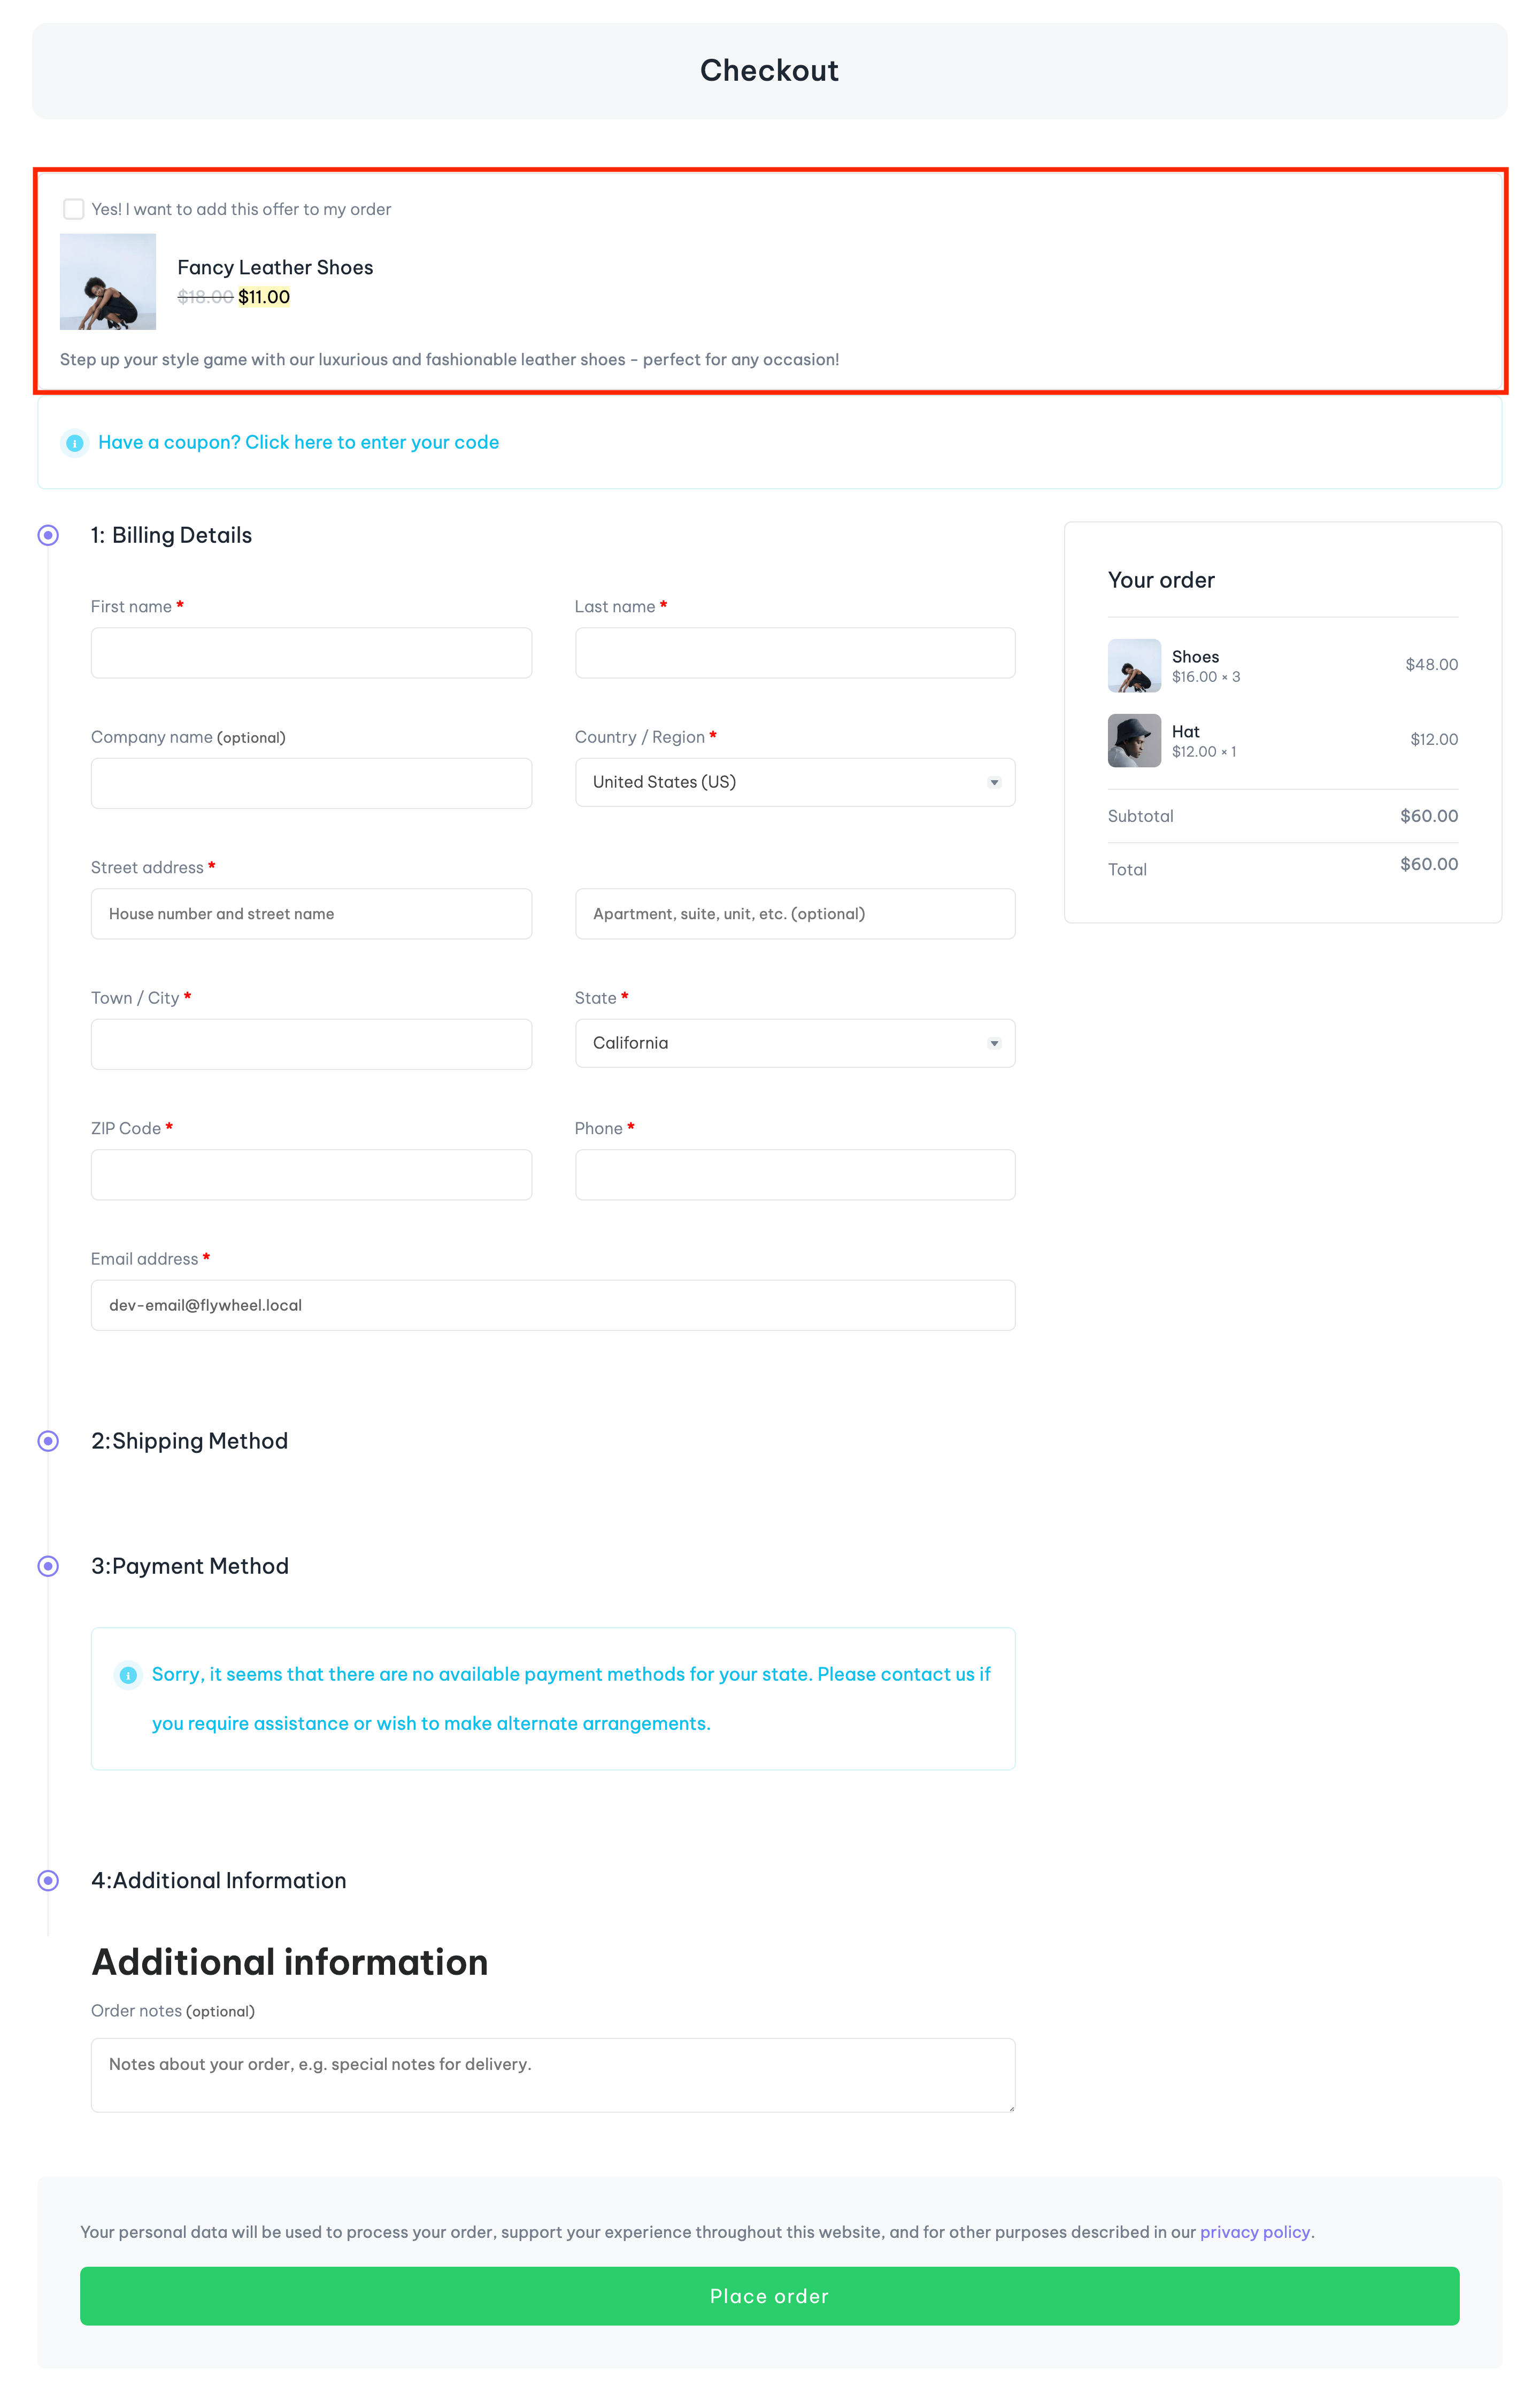
That’s it. Now if you visit your checkout page, you will see the order bump appear in the location that you have defined before.